How to enable XMP for GPU gaming is a common search that reveals a widespread misunderstanding: XMP is a memory profile for your system RAM, not a GPU setting, yet enabling it can genuinely improve GPU gaming performance by feeding the card faster data. When your DDR4 or DDR5 runs at its rated speed instead of the slower default, the CPU processes frames more quickly and the GPU spends less time waiting, which translates into higher minimum frame rates and smoother gameplay. This guide clears up the confusion, shows you exactly how to enable XMP in BIOS, and explains how faster RAM helps your graphics card deliver the performance you paid for.
What You Will Need to Enable XMP
XMP is a BIOS toggle, so there is nothing to buy if your RAM already supports it. Most DDR4 and DDR5 kits sold as gaming memory ship with an XMP profile built into the stick. What you need is a compatible motherboard and a quick BIOS visit. The items below cover how to check and what to expect.
XMP-Compatible RAM and Motherboard
Check your RAM kit’s specifications for an XMP or EXPO profile, which lists the rated speed the memory is designed to hit. DDR4-3200, DDR4-3600, DDR5-6000, and similar labels all indicate a speed that requires XMP to reach, since without the profile enabled the board defaults to a slower JEDEC speed.
Your motherboard must support XMP. Intel boards use XMP natively, while AMD boards support the equivalent feature under the names DOCP or EXPO depending on the generation. If your board lists any of these terms in its BIOS, you are good to go.
Understanding XMP vs GPU Overclocking
XMP does not touch the GPU directly. It overclocks the system RAM to its rated speed, which reduces the time the CPU spends shuttling data and preparing frames. The GPU benefits indirectly because it receives work faster, especially in CPU-limited scenarios where frame rates are held back by the data pipeline rather than the card itself.
This distinction matters because it sets correct expectations. XMP will not raise your GPU clock speed or lower its temperature; what it does is remove a bottleneck upstream so the card can do its job without waiting. The effect is most visible on minimum and 1% low frame rates, the dips that feel like stutter.
How Faster RAM Helps GPU Gaming Performance
Modern games are increasingly CPU-and-memory sensitive. The CPU builds draw calls and prepares frames that the GPU then renders, and when RAM is slow, that preparation takes longer. Enabling XMP can lift 1% low frame rates by several percent in CPU-bound titles, smoothing out the exact dips that break the feeling of fluid gameplay.
At higher resolutions like 4K, the GPU becomes the dominant bottleneck and the RAM speed effect shrinks. At 1080p and 1440p, where the CPU matters more, enabling XMP delivers a more noticeable improvement. Knowing your resolution helps set the right expectation for the gain.
This also explains the search confusion. People look for XMP for GPU because they see the frame-rate improvement and assume it is a GPU setting. It is not, but the fact that the gain is visible in gaming, a GPU-bound activity, makes the confusion understandable. What matters is the result: faster RAM feeds the pipeline and the GPU benefits downstream.
This also explains the original search confusion. People search for XMP for GPU because they see the frame-rate improvement and assume it is a GPU setting. It is not, but the fact that the performance change is visible in gaming, a GPU-bound activity, makes the confusion understandable. What matters is the result: faster RAM feeds the pipeline, and the GPU benefits downstream.
Step-by-Step Guide to Enabling XMP in BIOS
The process is a short BIOS visit and a single toggle. The exact menu varies by motherboard brand, but the principle is the same on every board: find the memory profile setting and select the one your RAM supports.
Step 1 to 3: Enter BIOS and Locate the Setting
Step 1: Reboot into BIOS. Restart your PC and press the key shown on the splash screen, typically Delete, F2, or F12.
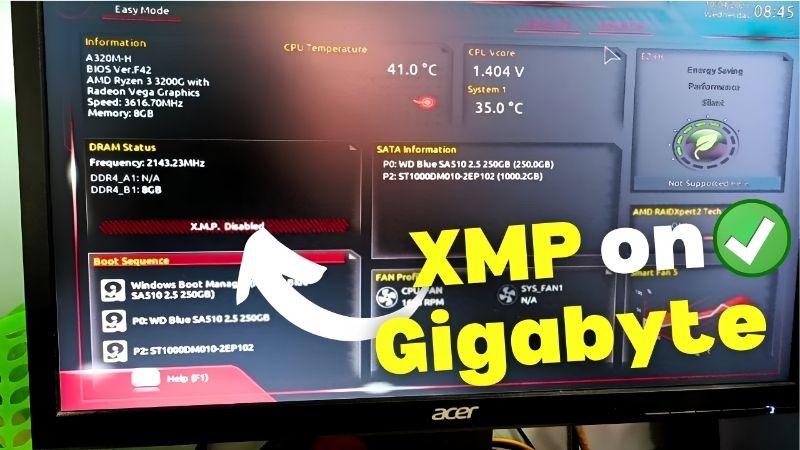
Step 2: Find the XMP, DOCP, or EXPO setting. On most boards this is on the first EZ Mode page or under the Overclocking or Memory menu. Intel boards label it XMP; AMD boards label it DOCP or EXPO. If you see a dropdown currently set to Disabled or Auto, that is the one.
Step 3: Select your profile. Most RAM kits include one or two profiles. Profile 1 is the standard rated speed. If two profiles exist, the second is often a slightly higher or lower alternative. Select Profile 1 unless you have a specific reason to choose differently.
The board will show the target speed and timings once you select a profile, confirming what the RAM will run at after you save.
Step 4 to 6: Save, Boot, and Verify
Step 4: Save and exit BIOS. Press the save-and-exit key, usually F10, and confirm. The system will restart with the new memory speed.
Step 5: Check stability. If the system boots normally, run a quick memory stress test or play a demanding game for a few minutes to confirm everything is stable. XMP profiles are validated by the RAM manufacturer, so instability is rare but not impossible.
If you see any crashes or blue screens during the test, reset to defaults by clearing CMOS and try again with the motherboard BIOS updated first. BIOS updates often improve memory compatibility, and a profile that failed on an older BIOS may work perfectly on the latest version. Ruling out a stale BIOS before blaming the RAM saves unnecessary returns.
Step 6: Verify the speed. Open Task Manager, go to the Performance tab, and click Memory. The speed shown should now match the XMP profile rather than the slower default. CPU-Z or HWiNFO also report the active memory speed.
If the system fails to boot, it will typically reset to default settings automatically after a few attempts. You can then try a different XMP profile or update the motherboard BIOS for better compatibility.
Troubleshooting Common Issues
If the system fails to POST after enabling XMP, clear CMOS by removing the motherboard battery for 30 seconds or using the clear-CMOS button. This resets BIOS to defaults, and you can try again with a different profile or a BIOS update.
If Task Manager shows a speed lower than expected, double-check that you selected the correct profile. Some boards also require manual confirmation of the voltage alongside the profile for full stability.
On AMD platforms, EXPO profiles may not appear until the BIOS is updated to a version that supports them. Check the motherboard manufacturer’s support page for the latest release.
Pro Tips, Mistakes, and Real-World Impact
XMP is a simple toggle, but a few details help you get the most from it and avoid the small mistakes that waste time or create false expectations. This section covers the habits that make the setup stick and the honest impact on GPU gaming performance.
Pro Tips for Maximizing the Benefit
For Intel platforms, DDR4-3200 or DDR4-3600 and DDR5-6000 or DDR5-6400 hit the sweet spot where the memory controller runs efficiently and the gaming gain is strongest. Going higher can deliver diminishing returns or require manual tuning.
Pair XMP with Resizable BAR and hardware accelerated GPU scheduling for the best combined data throughput to the GPU. Each setting removes a different bottleneck, and together they create a cleaner pipeline from RAM to the rendered frame.
Common Mistakes to Avoid
Do not assume XMP is already enabled. Most motherboards default to the slower JEDEC speed, so even if you bought fast RAM it may be running below its potential until you flip the toggle. Check Task Manager now to see what speed your memory is actually hitting.
Do not expect XMP to fix a GPU that is itself the bottleneck. At 4K with a heavily loaded card, RAM speed has almost no effect on frame rate. The benefit is strongest at 1080p and 1440p in CPU-sensitive games.
Pros and Cons of Enabling XMP for GPU Gaming
On the plus side, XMP is free, takes two minutes, and can improve minimum frame rates and frame pacing in CPU-bound scenarios, making gameplay smoother. It unlocks the performance your RAM was rated for from the factory.
On the downside, the gain is resolution and game dependent, rare instability can occur with aggressive profiles, and the feature does not touch the GPU directly. For any owner with XMP-capable RAM, the math strongly favors turning it on.
One final detail: if you upgrade your RAM in the future, remember to re-enable XMP for the new kit. Swapping sticks resets the BIOS memory profile to defaults, so the same quick BIOS visit is needed again. Building this into your post-upgrade checklist ensures you never leave free performance on the table after a hardware change.
Enabling XMP is one of the easiest free performance boosts for GPU gaming, and most owners are leaving it on the table. Flip the toggle, verify the speed, and pair it with other free optimizations.
See More:
- How to lower GPU temperature
- How to lower GPU hotspot temp
- How to increase GPU performance
- How to enable G-Sync
Conclusion
Understanding how to enable XMP for GPU gaming clears up a common confusion and unlocks performance your system already has. XMP speeds up your RAM, the CPU feeds the GPU faster, and minimum frame rates improve in CPU-sensitive titles. Enter BIOS, select your profile, save, and verify the speed in Task Manager. Pair it with Resizable BAR and hardware accelerated GPU scheduling for the best pipeline, and enjoy smoother gameplay from a setting that takes less than two minutes to enable.


Write Your Review
No reviews yet. Be the first to share your experience!