How to set a GPU fan curve is the easiest free way to control the balance between cooling and noise on your graphics card. The stock fan profile on most Nvidia cards prioritizes quiet operation, which means the fans ramp late and the card runs warmer than it needs to. A custom curve in MSI Afterburner lets you decide exactly when the fans spin and how fast, so you can keep temperatures lower, hold higher boost clocks, and still have a quiet card at idle. This guide gives you a sample curve to start from, walks through the setup step by step, and explains how to tune it for your own noise and temperature preferences.
What You Will Need to Set a Fan Curve
A fan curve is a pure software change, so there is nothing to buy. You need MSI Afterburner, a monitoring overlay, and a few minutes to tune. The setup below covers everything required to get a custom curve running and verified.
MSI Afterburner Setup
Download and install MSI Afterburner. It works with any Nvidia card regardless of manufacturer, and it includes both the fan curve editor and the on-screen monitoring overlay you will use to verify the result. Enable the on-screen display in the settings so you can watch temperatures and fan speed during gameplay.
In Afterburner’s settings, go to the Fan tab and check the box to enable manual fan control. This unlocks the curve editor where you will build your profile.
A Sample Fan Curve to Start From
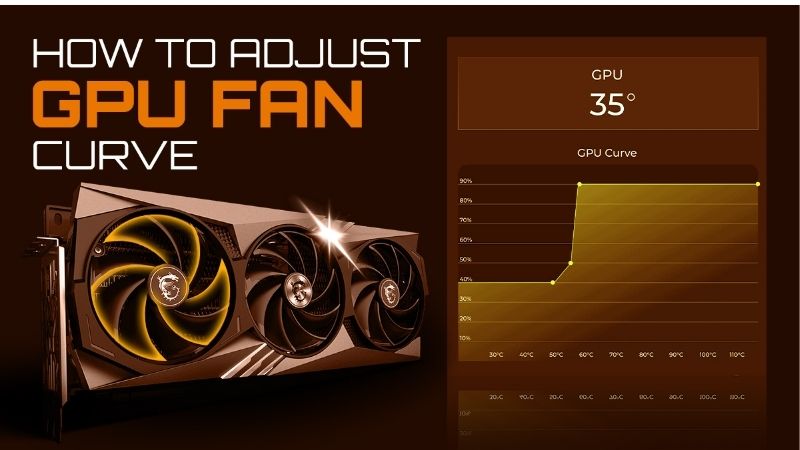
A good starting curve balances cooling and noise. Here is a sample that works well for most cards as a baseline to tune from: 0% fan speed below 40°C for silent idle, 30% at 50°C for gentle cooling as the card warms, 50% at 60°C for moderate load, 70% at 70°C for gaming, and 100% at 80°C as a safety ramp. Copy these points into the curve editor and adjust from there.
| GPU Temp | Fan Speed % | Purpose |
|---|---|---|
| ≤ 40°C | 0% | Silent idle (zero-RPM) |
| 50°C | 30% | Gentle start as card warms |
| 60°C | 50% | Moderate gaming load |
| 70°C | 70% | Heavy gaming load |
| 80°C | 100% | Safety ramp / max cooling |
The exact percentage at each temperature is a starting point, not a prescription. Your card’s fan minimum spin speed, noise level, and acoustic environment all affect what feels right. The sample above gives you a working curve on the first pass, and the tuning steps below show you how to personalize it in two or three rounds of play-and-adjust.
The key is starting the ramp early enough that the card never reaches its throttle point, while keeping the fans off or low at idle so the system stays quiet when you are not gaming.
Understanding Temperature and Noise Trade-Offs
Every fan curve is a trade between lower temperature and higher noise. Aggressive curves that spin fans hard at low temperatures keep the card very cool but make the system louder. Gentle curves stay quiet but let temperatures climb higher before responding.
There is no single best curve, because tolerance for noise and acceptable temperature are personal. The sample above is a middle ground, and the tuning steps below show you how to shift it toward your preference.
Step-by-Step Guide to Setting Your Fan Curve
Open MSI Afterburner and follow these steps to build, apply, and verify your custom curve. The process is quick and fully reversible, so there is no risk in experimenting.
Step 1 to 3: Build the Curve
Step 1: Open the fan curve editor. In Afterburner, click the gear icon to open Settings, then select the Fan tab. Check Enable user defined software automatic fan control to unlock the curve graph.
Step 2: Set your control points. Click on the curve to add or drag points. Enter the sample values as a starting point: 0% at 40°C, 30% at 50°C, 50% at 60°C, 70% at 70°C, 100% at 80°C. The graph updates visually as you move each point.
Step 3: Apply and close. Click Apply, then OK. The curve takes effect immediately and persists as long as Afterburner is running. Set Afterburner to start with Windows so the curve is always active.
The curve is now live. Your fans will follow these points instead of the stock profile.
Step 4 to 6: Test and Tune
Step 4: Run a game with the overlay. Play a demanding title while watching the temperature and fan speed in the on-screen display. Note where the temperature stabilizes and whether the noise level is acceptable to you.
Step 5: Adjust for noise preference. If the fans are too loud during gameplay, lower the fan percentage at the gaming temperature point by 5–10%. If the temperature is higher than you would like, raise it. Small changes make a noticeable difference.
Step 6: Adjust the idle threshold. If you want silent idle, make sure the curve stays at 0% up to at least 40°C. Some owners prefer a gentle 20% spin at idle for continuous airflow; try both and pick what suits your environment.
Repeat the play-test-and-adjust cycle until the curve matches your preferences. Two or three passes usually land it.
Pay attention to which temperatures you actually hit in your most-played games, not just the worst case. If your card never passes 72°C in the titles you play most, the points above 75°C are safety net rather than daily behavior, and you can focus your tuning on the 60–72°C band where your experience actually lives.
Saving Profiles and Reverting
Afterburner lets you save up to five profiles. Save your tuned curve to a profile slot so you can recall it instantly after a driver update or settings reset. A second profile with a more aggressive curve is handy for hot days or demanding titles.
To revert to stock behavior at any time, uncheck the manual fan control box in the Fan tab and click Apply. The card returns to its default fan profile immediately, so there is no risk in experimenting.
If you close Afterburner, the card also returns to stock. Setting it to start with Windows and minimize to the tray keeps the custom curve active without cluttering the taskbar.
One edge case worth noting: some driver updates override Afterburner’s fan control on the first boot after the update. If your fans suddenly behave differently after patching the driver, reopen Afterburner, recheck the Fan tab, and reapply your saved profile. This takes seconds but catches the most common way a custom curve silently stops working.
Pro Tips, Mistakes, and Best Practices
A fan curve is simple to set, but a few details help you get the best balance and avoid the small mistakes that create noise or heat problems. This section covers the habits that make your curve work well long-term.
Pro Tips for the Best Balance
Pair your fan curve with an undervolt for the best combined result. Undervolting lowers the heat the fans have to remove, which means the curve can stay gentler and quieter while keeping the same temperatures. The two settings complement each other perfectly.
Check your curve after driver updates, since some updates reset Afterburner’s settings. A saved profile restores it in one click.
Common Mistakes to Avoid
Do not set the maximum fan speed below 80–90% at high temperatures. Capping the fans too low removes the safety ramp that protects the card during the most demanding scenarios. Always let the curve reach full speed at or before the card’s throttle threshold.
Do not set the fan to spin at very low percentages like 10–15% and expect it to actually turn. Most GPU fans have a minimum RPM below which they stall. If the fans buzz or fail to spin at a low setting, raise the minimum active point to 25–30%.
Pros and Cons of a Custom Fan Curve
On the plus side, a custom curve is free, instant, fully reversible, and gives you exact control over the noise and temperature balance. It is the single easiest way to lower GPU temperatures without touching hardware.
On the downside, it requires Afterburner to be running, driver updates can reset it, and an overly gentle curve can leave the card hotter than stock if the ramp is too late. Saving profiles and checking after updates prevents these issues.
As a practical habit, listen to the card from your normal sitting position rather than with your ear next to the case. A fan speed that sounds loud up close may be inaudible at desk distance, and tuning for desk-level perception gives you a curve that is both cool and genuinely quiet where you actually sit.
A custom fan curve takes minutes to set and transforms how your card handles heat and noise. Build it, test it, and save a profile so it survives updates.
See More:
- How to lower GPU temperature
- How to lower GPU hotspot temp
- How to increase GPU performance
- How to enable G-Sync
Conclusion
Knowing how to set a GPU fan curve gives you free, precise control over your card’s cooling and noise. Build a curve in MSI Afterburner starting from the sample values above, test under load, and adjust until the balance fits your preferences. Pair it with an undervolt for the best result, save the profile, and set Afterburner to start with Windows. It is the simplest, zero-cost way to lower temperatures and keep your card quieter at the same time.
Once you have a curve you like, leave it running and forget about it. A well-tuned fan profile works invisibly in the background, keeping the card cool under load and silent at idle, and the only maintenance it needs is a quick check after a driver update to make sure the profile is still active. That is the appeal of a custom curve: a few minutes of setup for a permanent improvement in how your card sounds and feels.


Write Your Review
No reviews yet. Be the first to share your experience!