replace thermal paste on GPU comes down to two things that decide your results: choosing the right paste and applying it correctly. Get those right and you can shave several degrees, sometimes far more, off an old card’s temperatures; get them wrong and you can make things worse or even risk damage. This guide focuses on the paste itself, what it does, how to know it is time, which type to choose, and the proper technique for applying it and handling the often-forgotten thermal pads.
Understanding Thermal Paste on a GPU
Thermal paste is the thin layer of compound between your graphics chip and its heatsink, and its job is to fill the tiny imperfections between the two surfaces so heat flows efficiently. Over time it degrades, and replacing it restores proper cooling. Understanding what the paste does and why it matters is the foundation for doing the job well.
What Thermal Paste Does and Why It Degrades
No two solid surfaces are perfectly flat, so when a chip meets a heatsink there are microscopic air gaps between them, and air is a poor conductor of heat. Thermal paste fills those gaps, creating a continuous path for heat to travel from the chip into the cooler.
Over years of heating and cooling, the paste gradually dries out, hardens, and cracks, losing its ability to transfer heat. The result is a chip that runs progressively hotter despite nothing being mechanically broken, which is the slow temperature creep many owners of older cards notice.
Replacing the degraded paste with fresh compound restores that efficient heat path, which is why a repaste can produce such a satisfying drop in temperatures on a card that has been running hot for years.
How to Know It’s Time to Replace It
The main signal is temperatures that have risen well above the card’s normal range, particularly on an older card where cleaning the dust away has not solved the problem. If airflow is good and the heatsink is clean but the chip still runs hot, the paste is the prime suspect.
As a general guide, paste is worth replacing once a card is several years old and running noticeably hotter, or when reviving a used card whose history you do not know. A newer card under warranty rarely needs it, and opening such a card may affect the warranty, so timing matters as much as technique.
A useful sanity check is to clean the card thoroughly first and see whether temperatures improve, since dust is a far easier fix than paste. If a careful clean and good airflow still leave the chip running hot, you have effectively confirmed that the paste, not dust, is the remaining culprit and a replacement is justified.
Choosing the Right Thermal Paste
For a graphics card, the safest and most popular choice is a quality non-conductive paste, which cools excellently while posing no risk of causing a short if a little escapes; a well-regarded non-conductive compound is the sensible pick for almost everyone. These pastes are forgiving, easy to work with, and more than good enough for the vast majority of cards.
There are higher-performance options, including liquid metal, which conducts heat exceptionally well but is electrically conductive and risky, since any spill can short and destroy components. For that reason, liquid metal is best left to experienced users, while a standard non-conductive paste is the right recommendation for a confident beginner and most enthusiasts alike.
It is also worth noting that a small tube of quality paste lasts for many applications, so there is no need to buy the most exotic or expensive option for a single job. A reputable mid-range non-conductive paste offers almost all the performance of premium compounds at a fraction of the fuss, which is why it is the default recommendation.
How to Replace Thermal Paste on a GPU
With the right paste chosen, the job is about clean surfaces, the correct amount, and even pressure. This section focuses on the technique that actually determines your results, assuming you have safely opened the card to expose the chip.
Removing the Old Paste Properly
Once the cooler is off and the chip is exposed, the quality of your clean sets up everything that follows. Using a lint-free wipe lightly dampened with isopropyl alcohol, wipe the old paste off both the chip and the heatsink’s contact plate, repeating until both are spotless.
Polish the surfaces until they are completely clean and dry, with no streaks or residue remaining, because any leftover old paste compromises the new application. A genuinely clean surface is what lets the fresh paste make perfect contact, so it is worth taking the extra minute to get it right.
Applying the New Paste: How Much and Which Method
The amount and method matter more than people expect, so apply the paste with these steps:
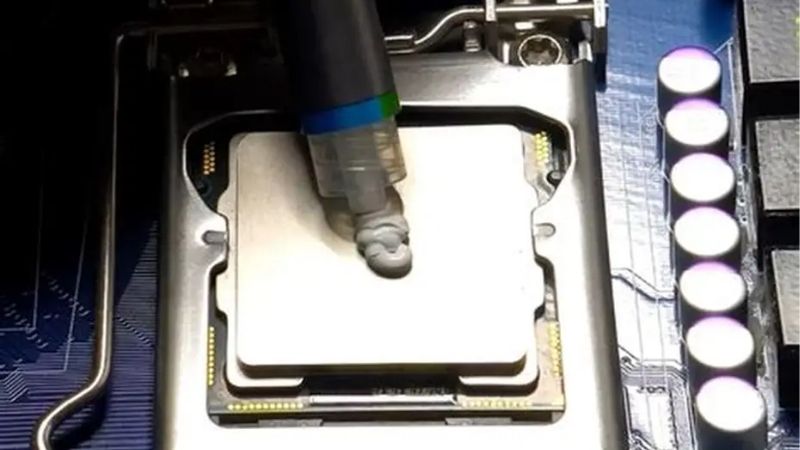
- Use a small, central blob roughly the size of a pea or a grain of rice for a typical chip, since the cooler’s pressure spreads it thin.
- Choose a simple method, with the central dot being the easiest and most reliable, letting pressure do the spreading when the cooler goes back on.
- Avoid spreading it manually unless you prefer to, and if you do, apply a thin, even layer covering the chip without excess.
- Resist the urge to add more, since too much paste oozes out and cools no better than the right amount.
The single most common mistake is using too much paste, which is messier and can squeeze out over the surrounding area. A modest central blob that spreads under pressure to a thin, even film is exactly what you want, and less really is more here.
Whichever method you choose, the cooler’s even pressure does most of the spreading for you, so trying to pre-spread the paste perfectly is rarely necessary. Trusting the mounting pressure to distribute a modest central amount is both the simplest approach and, for most chips, the one that produces the most consistent results.
Don’t Forget the Thermal Pads
Thermal paste cools the main chip, but the memory and power components are cooled by thermal pads, and these are easy to overlook. Before reassembling, check the condition of the existing pads, and if any are dried, torn, or stuck to the cooler, replace them with new pads of the same thickness.
Getting pad thickness right is important, since a pad that is too thin will not make contact and one that is too thick can prevent the cooler from seating properly on the chip. Matching the original thickness keeps both the chip and the surrounding components cooled correctly, which is why pads deserve as much attention as the paste itself.
If you are unsure of a pad’s exact thickness, measure the old one before removing it or check details for your specific card, since guessing can lead to poor contact. Taking a moment to get pad thickness right is what ensures the memory and power components stay as well cooled after the job as the main chip does.
Tips, Pitfalls, and Pros and Cons of Replacing Paste
Replacing paste is straightforward once you respect the technique, so knowing the pitfalls and what to expect keeps your results good and safe. A little knowledge turns a daunting-sounding job into a reliable temperature win.
Mistakes to Avoid
The biggest mistakes are using too much paste and choosing a risky conductive compound that can short components if it escapes. Sticking to a modest amount of non-conductive paste sidesteps both problems at once and is the right call for almost everyone.
Other errors include neglecting the thermal pads, reassembling before surfaces are fully dry, and tightening the cooler unevenly, which leads to a poor paste spread. Working cleanly, methodically, and patiently avoids every one of these and produces a much better result.
One more avoidable error is rushing the reassembly and pinching a fan cable or leaving a screw loose, which can cause new problems unrelated to the paste itself. A final check that every cable is routed cleanly and every screw is snug, before powering on, prevents these small oversights from undoing an otherwise good job.
Pro Tips and Expected Temperature Drop
Tightening the cooler’s screws gradually in a crosswise pattern, a little at a time, spreads the paste evenly and gives the best contact, so resist fully tightening any single screw first. Letting everything dry after cleaning, and double-checking the pads, rounds out a clean job.
As for results, a successful repaste on an old, hot card commonly drops temperatures by several degrees, and on a badly degraded card the improvement can be considerably larger. Running a stress test afterwards while watching the numbers confirms the gain and tells you the new paste is doing its job.
See More:
Pros and Cons of Replacing It Yourself
On the plus side, replacing the paste yourself is cheap, can meaningfully lower temperatures, revives an aging card, and teaches a genuinely useful skill. With the right non-conductive paste, the risk is low and the payoff in cooler, quieter operation is real.
On the downside, it requires opening the card, which can affect a warranty and demands care, and a sloppy job with too much or conductive paste can cause problems. For older cards running hot, though, the benefits clearly outweigh these manageable risks.
To wrap up, knowing how to replace thermal paste on GPU is mostly about choosing a good non-conductive paste, cleaning the surfaces properly, using a small central amount, and not forgetting the thermal pads. Apply less than you think, tighten the cooler evenly, and confirm the temperature drop with a stress test. To get reliable results, check the recommended thermal paste and application tools linked below.


Write Your Review
No reviews yet. Be the first to share your experience!