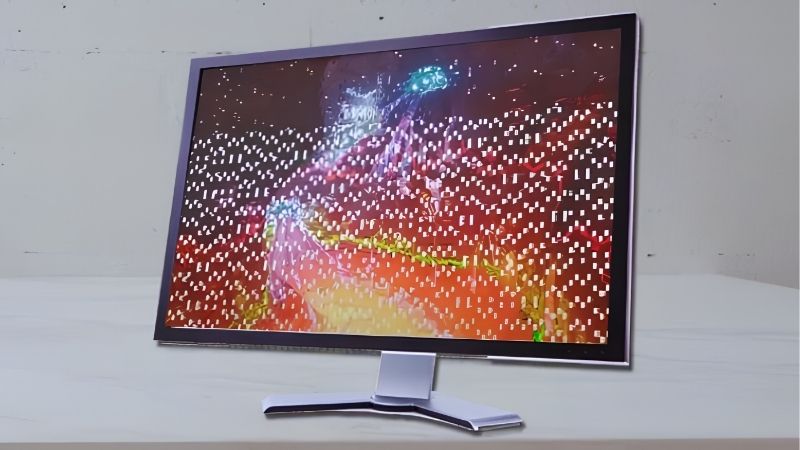
GPU artifacts fix searches usually come from a moment of panic: textures tearing, colored dots scattering across the screen, or flickering blocks mid-game. The good news is that many cases are recoverable with the right sequence of steps, and you do not always need a new card. This guide focuses on the practical fixes in the order that works best, from the zero-cost software resets to hardware maintenance, and it flags the point where replacement becomes the sensible call, based on patterns reported across many graphics cards.
Follow the steps below in order and your GPU artifacts fix will usually land somewhere short of buying new hardware.
First Steps for a GPU Artifacts Fix
The fastest and safest fixes are software, so always start there before touching the hardware. Resetting clocks and cleaning up drivers resolves a surprising share of artifact problems at no cost. Work through this group first and you may not need to go any further.
Reset Overclocks to Stock
The single most common cause of sudden artifacts is an unstable overclock, so the first move is to return every core and memory clock and voltage offset to stock. If you use a tuning utility, reset its profile or remove it entirely.
If the artifacts disappear at stock settings, you have your answer: the overclock was too aggressive. Dial it back to a more conservative margin and retest under sustained load rather than a short benchmark.
This step takes minutes and costs nothing, which is why it always comes first.
Remember that stock includes any factory overclock the card shipped with. A handful of heavily binned models run aggressive out-of-the-box clocks, so if resetting your own tuning does not help, try a small negative offset below the factory speed to see whether the card was simply pushed too far from the start.
Clean Reinstall Your Drivers
Corrupted or mismatched driver files are the next most common cause. The reliable fix is a clean reinstall: boot into safe mode, remove the existing driver completely with a dedicated uninstaller, then install the latest version fresh.
This eliminates the leftover files that a normal update often leaves behind, which are a frequent source of artifacts after a driver change. Users repeatedly report that a clean install resolved artifacting they had assumed was hardware failure.
If a clean install fixes it, you are done, and the whole problem cost nothing but time.
Timing matters too. If the artifacts began immediately after a specific driver version, rolling back to the previous stable release can be as effective as updating forward. Not every new driver suits every card, and occasionally a recent release introduces instability that a clean install of an older version resolves.
Test With a Different Game or Benchmark
Before assuming the worst, confirm whether the artifacts are universal or tied to one title. Running a couple of different games or a short stress test shows whether the fault follows the card everywhere or only appears in a single, possibly buggy, game.
If artifacts show only in one title, the problem may be that game rather than your GPU, and a game update or a settings change can resolve it. Consistent artifacts across everything point back to the hardware or drivers.
This quick test stops you from replacing a perfectly good card over a single broken game.
A built-in benchmark or a dedicated stress test is the most reliable way to reproduce the fault on demand. Looping one for several minutes puts sustained, consistent load on the card, which surfaces heat and memory issues far faster than waiting for artifacts to appear during normal play.
Hardware Fixes for Persistent Artifacts
If software steps do not clear the artifacts, the cause is more likely heat or aging components. These fixes take more effort but are still far cheaper than a new card, and they resolve many stubborn cases. Approach them in order, starting with the least invasive.
Lower Temperatures and Underclock
Heat-induced artifacts respond well to better cooling. Clean dust from the heatsink and fans, improve case airflow, and consider a mild underclock to reduce thermal and electrical stress on a struggling card.
A memory underclock in particular can stabilize a card whose VRAM is struggling, trading a small amount of performance for a clean image. Many users find a slight underclock buys months of extra life from an aging card.
If lower temperatures eliminate the artifacts, you have isolated heat as the cause and avoided a costly replacement.
When you underclock to test, change one thing at a time. Lower the memory clock first, since VRAM is the most common artifact source, and only touch the core afterward. Isolating which clock stabilizes the image tells you exactly which part of the card is struggling and whether a repaste or a replacement is the better call.
Repaste and Replace Thermal Pads
On cards more than a couple of years old, dried thermal paste and tired memory pads are a frequent culprit. Replacing the paste with a quality compound and fitting fresh pads can drop temperatures substantially and clear heat-related artifacts.
The materials are inexpensive, and a basic toolkit plus a good thermal paste are worth keeping for this kind of maintenance. Take care and follow a guide for your specific card, since cooler disassembly varies.
For an older card, this is often the most effective single fix available.
Pros and Cons of Each Fix Approach
Knowing the trade-offs helps you decide how far to push repairs before considering a new card. Here is the honest balance sheet for fixing artifacts.
Pros
- Driver and overclock fixes are free and resolve many cases.
- Cooling and repasting are cheap and effective on older cards.
- An underclock can stabilize a struggling card for months.
Cons
- None of these help if the VRAM itself is failing.
- Repasting carries a small risk if done carelessly.
- Repeated fixes on a dying card have diminishing returns.
When No Fix Works: Replacing the Card
If you have reset clocks, reinstalled drivers cleanly, lowered temperatures, and repasted, yet the artifacts persist, the card itself is likely failing. At that point the focus shifts from fixing to replacing. Here is how to confirm it and choose a sensible replacement.
Confirming Hardware Failure
The clearest sign that no fix will help is artifacting that appears at stock clocks, with a clean driver, at safe temperatures, and especially during boot or in the BIOS before any driver loads.
If artifacts show on the boot logo, the fault is hardware, full stop. Persistent artifacts accompanied by crashes or black screens reinforce that the card is on its way out.
Confirming this saves you from pouring more time into a card that cannot be saved by software or maintenance.
It is also worth ruling out the power supply at this stage. A failing or marginal supply can mimic memory faults under load, so if you have access to a known-good unit, swapping it briefly removes one more variable before you commit to replacing the graphics card.
Picking a Replacement That Fits
When replacement is unavoidable, choose a card matched to your resolution, power supply, and case clearance rather than simply the most powerful option. A balanced upgrade serves you better than an overspend that your system cannot fully use.
Bear in mind that GPU prices remain elevated because AI demand keeps consumer supply tight, and real relief is still years away, so waiting for a steep drop rarely pays. It is usually wiser to buy a sensible card at a fair price than to hold out for a discount that may not arrive.
Pick the right tier for your needs, then check the current price and replace the failing card.
Before you commit, double-check the new card’s physical fit and power requirements against your build. A surprising number of returns come from cards that are too long for the case or need a power connector the supply does not have, so a few minutes confirming clearance and cabling prevents a frustrating second trip.
Keeping the New Card Artifact-Free
Once installed, protect your new card with good habits. Maintain airflow, keep the case clean, and avoid pushing aggressive overclocks if stability matters more to you than a marginal performance gain.
A background monitoring tool and a sensible fan curve help catch rising temperatures before they cause problems. These simple measures keep artifacts from returning and extend the card’s useful life.
A little ongoing care is far cheaper than another replacement down the line.
It also pays to keep your driver installation tidy from the start. Performing a clean install when you first set up the new card, rather than layering it over old files, gives you a stable baseline and makes any future troubleshooting far simpler if a problem ever returns.
See More:
- GPU for Valorant 240fps
- GPU for Fortnite 240fps
- GPU for CS2 high fps
- GPU for Apex Legends
- RTX 4070 Cyberpunk FPS
Conclusion
The right GPU artifacts fix almost always starts with the free steps: reset your overclock, reinstall drivers cleanly, and test across multiple games before assuming hardware failure. If those do not work, lower temperatures and repaste an older card, since heat is a frequent and fixable cause. Only when artifacts persist at stock settings, clean drivers, and safe temperatures, or appear during boot, should you treat the card as failing and move to replacement. Even then, confirm the fault in a second system if you can, since a clean test prevents the costly mistake of replacing a card that was only suffering from a bad driver or a marginal power supply. Keep your hardware cool and stable to avoid a repeat, and if a new GPU is the answer, check the current price and choose one that fits your system.


Write Your Review
No reviews yet. Be the first to share your experience!