
- Top Pick: msi Crosshair 18 HX AI Gaming Laptop 18" QHD+ 240Hz (100% DCI-P3) Intel 24-core Ultra 9 275HX (>i9-14900HX) 32GB DDR5 4TB SSD GeForce RTX 5070 (Up to 798 AI TOPS) RGB Backlit Thunderbolt Win11 ICP Hub
- Best Value: msi Crosshair 18 HX AI Gaming Laptop 18" QHD+ 240Hz 100% DCI-P3 Intel 24-core Ultra 9 275HX (>i9-14900HX) 32GB DDR5 1TB SSD GeForce RTX 5070 (798 AI Tops) RGB Backlit Thunderbolt Win11Pro ICP Hub
- Premium Choice: Gawfolk 49 inch Ultra-Wide Curved 1500R Gaming Computer Monitor, DQHD(5120×1440), 165Hz, 1MS, FreeSync, 120% sRGB, Height Adjustable PC Screen, HDMI2.1 & DP1.4, Compatible Wall Mount 75 * 75mm- Black
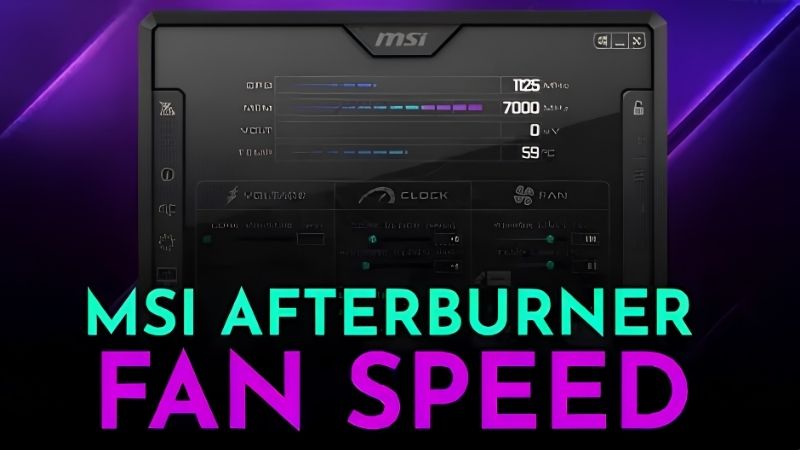
MSI Afterburner flatten curve guides mostly consist of someone talking over a screen recording while you try to catch which key they pressed. That is a bad format for this job, because flattening a curve is a precise sequence — Shift-click the wrong point and you get a card that crashes, or one that quietly runs slower than stock. This page gives you the exact sequence in text, real starting voltages and clocks by card, and the reason your curve snaps back to where it was. Read a step, do it, come back. That is how this actually gets done.
What Flattening the Curve Actually Does
Your GPU has a voltage/frequency curve — a lookup table mapping each voltage point to a clock speed. Stock, it climbs continuously: more voltage, more clock, more heat, more power. Flattening means capping that climb, so beyond a chosen voltage the clock stays constant instead of rising. You are telling the card: never go above this voltage, and hold this clock when you get there.
Voltage, Clock and Why the Curve Exists
Nvidia’s stock curve is conservative because it has to work on every chip from the best silicon to the worst. Your specific card is almost certainly better than the worst, which means it is being given more voltage than it needs for the clock it runs.
That surplus voltage does not make you faster. It makes heat. And heat makes the card throttle, which makes you slower. This is why a good undervolt frequently produces higher sustained performance than stock — you are not trading speed for temperature, you are removing the thing that was costing you speed.
The gain is real: typically 15-25% lower power draw, 8-15C lower temperatures, quieter fans, and performance within 2% of stock or slightly above it.
Flatten vs Offset: Two Different Things
The distinction that trips people, and getting it wrong is why some people’s undervolt does nothing.
Offset shifts the entire curve up or down. Type +100 into Core Clock and press Enter and every point moves up 100MHz. That is an overclock, not an undervolt — the card still climbs to maximum voltage, it just clocks higher there. More heat, not less.
Flatten takes everything to the right of a chosen point and drags it down to a fixed level. The card can no longer request voltage above that point, because there is no reward for it — the clock does not rise. That is the undervolt.
Most people who report “undervolting did nothing” applied an offset. If your power draw did not drop, you did not flatten.
What You Gain and What You Risk
Gains: lower temperatures, lower noise, lower power bills, and on a throttling card, more sustained performance. On a laptop, meaningfully longer battery and less throttling.
Risks, honestly: a driver crash if you go too aggressive, which is recoverable and costs you a reboot. Artifacts in games, which means back off. And nothing else. You cannot damage the card by undervolting — you are reducing voltage, not raising it. Worst case is instability, and instability is a settings problem rather than a hardware event.
This is why undervolting is safer than overclocking and why it is worth twenty minutes of your evening.
The Step-by-Step, With Real Numbers
Follow this in order. It takes about ten minutes plus testing.
Before You Start: Unlock Voltage Control
Afterburner hides the curve editor by default and this stops most people at step zero.
- Open Afterburner, click the gear icon
- On the General tab, tick Unlock voltage control
- Tick Unlock voltage monitoring
- Tick Force constant voltage only if you know you want it — leave it off otherwise
- Click OK. Afterburner restarts.
If the curve editor still will not open after this, the last section covers why. Also: save your stock settings to a profile slot first. Click the save icon, then a numbered slot. That is your undo button.
The Flatten Procedure, Step by Step
The exact sequence. Read it once before doing it.
- Press Ctrl+F. The voltage/frequency curve editor opens — voltage across the bottom in mV, clock up the side in MHz.
- Find your target voltage on the horizontal axis. Start at 900mV if you are unsure; it is a safe first attempt on nearly everything.
- Left-click the point at that voltage to select it. It highlights.
- Drag it up to your target clock. Everything to the right of it moves too — that is expected and fine.
- Now the key step: Shift+Left-click the last point on the far right of the curve. This selects every point from your target voltage rightward.
- Drag the selection down until all of those points sit level with your target point. The curve is now flat from 900mV to the right edge.
- Press Enter to commit, then click Apply (the tick icon) in the main window.
Look at the graph. You should see a normal rising curve up to 900mV, then a horizontal line all the way to the right. If it still slopes upward past your point, step 5 did not select everything — repeat it.
Starting Values by Card
Conservative starting points. These are first attempts, not final answers — silicon varies and yours may do better or worse.
| Card | Target voltage | Target clock | Expected power drop |
|---|---|---|---|
| RTX 3060 12GB | 900mV | ~1,850 MHz | ~170W → ~130W |
| RTX 3070 | 875mV | ~1,800 MHz | ~220W → ~170W |
| RTX 3080 | 875mV | ~1,800 MHz | ~320W → ~250W |
| RTX 4070 | 950mV | ~2,700 MHz | ~200W → ~150W |
| RTX 4080 | 950mV | ~2,700 MHz | ~320W → ~250W |
| RTX 5070 Ti | 950mV | ~2,600 MHz | ~300W → ~230W |
| RTX 5080 | 950mV | ~2,650 MHz | ~360W → ~280W |
Method: start here. If it is stable after testing, try 25MHz higher at the same voltage. Repeat until it crashes, then drop back 50MHz. That is your card’s limit.
If it crashes at the starting values, go the other way — drop the clock by 50MHz, or raise the voltage to 925mV and try again. A card that will not do 900mV at the listed clock is not broken, it is just an average sample.
Pros and Cons, and Testing It Properly
An untested undervolt is not a tune, it is a time bomb that goes off during something you care about.
How to Test Properly
Synthetic benchmarks are not enough. A 3DMark run is three minutes at a steady load; games are hours of varying load, and varying load is what exposes an unstable curve.
The reliable method: play the most demanding game you own for 30 minutes minimum, with the OSD showing GPU clock, voltage and temperature. Watch that the clock actually holds at your target rather than dropping — if it drops, you are power or thermal limited elsewhere.
Then leave it for a week of normal use. Instability frequently appears in the one title you did not test, or during a shader compilation, or on a cold boot. If a week passes clean, it is stable.
Reading the Failure Signs
Three symptoms, three meanings.
Driver crash and recovery — screen goes black, comes back, “display driver stopped responding”. Classic too-little-voltage. Drop the clock 50MHz or raise voltage 25mV.
Artifacts — flickering textures, coloured dots, geometry spikes. This is usually the memory rather than the core. If you also raised memory clock, undo that first.
Hard crash to desktop or a freeze — more aggressive instability. Drop the clock 100MHz and retest.
None of these damages anything. They are the card telling you the curve is a step too far, and the answer is always the same: less clock or more voltage.
Pros and Cons Summary
| Pros | Cons |
|---|---|
| 15-25% lower power for ~2% or no performance loss | Takes 20 minutes plus a week of validation |
| 8-15C cooler, so fans run slower and quieter | Curve editor is unintuitive and easy to misuse |
| Often more sustained performance on a throttling card | Silicon lottery — your card may not hit the table values |
| Cannot damage the card; worst case is a reboot | Afterburner must run at startup or it reverts |
| Free, reversible, and a huge win on laptops | Newest cards have patchy Afterburner support |
The honest summary: this is the highest return-per-minute tweak available in PC hardware, and the only real cost is an evening.
When It Does Not Work
Three situations where the guide above will not get you there.
The Curve Editor Will Not Open
Ctrl+F does nothing. Almost always the unlock settings from earlier were not applied, or Afterburner is not running as administrator.
Right-click Afterburner, Properties, Compatibility, tick Run this program as an administrator. Then recheck both Unlock voltage boxes — they occasionally do not persist through an update. If it still refuses, your card may have a locked voltage table, which some laptop and OEM models do.
And check the obvious: some Afterburner skins hide the curve button entirely. Ctrl+F works regardless of skin, which is why the shortcut is the reliable route.
The Curve Snaps Back After a Reboot
The most common complaint and it is not a bug. Afterburner does not apply settings unless it is running.
Open Settings, General tab, tick Start with Windows and Start minimized. Then save your curve to a profile slot and tick Apply overclocking at system startup. Without that last box, your careful curve is decoration.
Also note: a driver update resets the curve. After every driver install, reopen Afterburner and reapply your profile.
Blackwell, Newer Cards, and When Undervolting Is Not Your Answer
Afterburner’s release cadence has been slow for years and support for the newest hardware sensors sometimes lags months behind launch. On RTX 50-series cards, curve editing has been inconsistent depending on your Afterburner build — if the editor opens but the curve looks wrong or will not commit, check for a newer beta before assuming your card is locked.
And the honest limit: undervolting fixes heat, noise and power. It does not fix performance problems that are not thermal. If your card stutters while its average frame rate looks fine, that is VRAM exhaustion, and no curve changes it — add a memory usage readout to your OSD and check whether allocation is pinned at your ceiling during the stutters. If it is, no tune will help; compare what a 12GB or 16GB card costs before spending another evening in the curve editor.
See More:
- GTX 1650 vs RTX 3050
- Nvidia DIGITS
- Nvidia cuDNN
- Radeon RX 9070 XT vs RTX 5090
- PNY GeForce RTX 5080 review
Conclusion: Flattening the MSI Afterburner Curve Properly
The MSI Afterburner flatten curve technique is worth twenty minutes for 15-25% less power, 8-15C lower temperatures and, on a throttling card, genuinely more sustained performance. The whole job is six keystrokes: Ctrl+F, click your target voltage point, drag it to your target clock, Shift+click the far-right point, drag the selection level, Enter, Apply. Step five is the one everyone misses, and skipping it turns an undervolt into a pointless offset.
Two things to remember afterwards. Tick Apply overclocking at system startup or your curve is decoration that vanishes at the next reboot. And reapply after every driver update, because the install resets it. Start at 900mV, test for thirty minutes in a real game rather than a benchmark, then live with it for a week before calling it stable. Bookmark the values table — it is the starting point you will want again on your next card.
Frequently Asked Questions
What does flattening the voltage curve actually do?
Opening the curve editor with Ctrl+F lets you pick one voltage point, raise it to your target clock, then flatten every point to the right of it. The card is then locked to that clock at that voltage instead of boosting to 1.05V or higher, which cuts power draw and heat while keeping most of the stock performance.
Which voltage and clock should I start with?
A safe starting point on Ampere and Ada cards is around 900mV paired with a clock roughly 60 to 90MHz below the peak boost you logged at stock. On Turing and Pascal, 950mV is a friendlier first target. Test, then move in 15MHz steps until you find the highest stable clock at that voltage.
Can undervolting damage my GPU or void the warranty?
No. You are lowering voltage and power, not raising them, so thermal and electrical stress both drop. Every setting is software side and disappears on reboot unless you apply it at startup. The only real symptom of going too far is a driver timeout or a game crash, which is fixed by adding voltage or lowering the clock.
How much temperature and power can I realistically save?
Typical results on a 250W to 350W card are 40 to 80W less board power, 6 to 12 degrees Celsius lower core and hotspot temperatures, and noticeably slower fans. Performance usually lands within 1 to 4 percent of stock because these cards spend most of their time voltage limited rather than clock limited anyway.
Why does my flattened curve reset after a reboot?
Afterburner does not apply profiles automatically unless you enable Apply overclocking at system startup and start with Windows in the settings menu. Also press the Save button, choose a profile slot, and press L in the curve editor to lock the curve. Driver updates and some Nvidia app overlays can also reload the stock curve.
As an Amazon Associate we earn from qualifying purchases at no extra cost to you.






Write Your Review
No reviews yet. Be the first to share your experience!