
- Top Pick: MSI MPG EZ120R ARGB-3B Fan – 120mm ARGB Fan, Patented Magnetic Connector Block, Daisy-Chain Connection, Fluid Dynamic Bearing + Extra nut Fixing, Fan hub, Reverse Fan Blade, 3 Packs
- Best Value: MSI MPG EZ120 ARGB-3B Fan – 120mm ARGB Fan, Patented Magnetic Connector Block, Daisy-Chain Connection, Fluid Dynamic Bearing + Extra nut Fixing, Fan hub, Mystic Light & Cooling Wizard Support
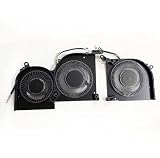
- Premium Choice: Fleshy Leaf CPU+GPU Cooling Fan for MSI Stealth GS66 WS66 MS-16V4 16V4-G-CW
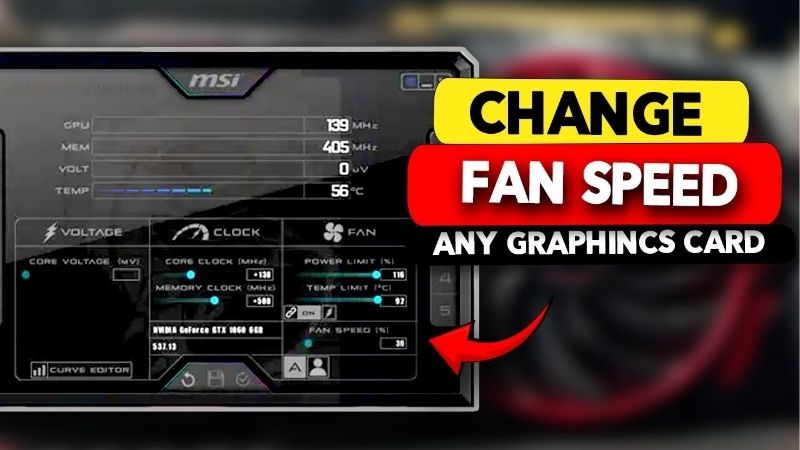
MSI Afterburner fan speed control is one of the easiest and most effective free upgrades you can give any graphics card, whether it wears an MSI badge or not. By taking manual control of how your GPU fans respond to temperature, you can cut noise dramatically, drop load temperatures by several degrees, and extend the comfortable life of your card, all without spending a cent on hardware. This review explains exactly what MSI Afterburner does for fan control, how to build a custom fan curve that actually works, what real-world results to expect, and when a software tweak is not enough and better cooling hardware is the smarter fix.
What MSI Afterburner Does for Fan Speed
Before adjusting anything, it helps to understand what MSI Afterburner is and how it approaches fan control, because a little context makes the settings far less intimidating. This section covers what the tool is, the difference between a fixed fan speed and a custom curve, and why temperature monitoring underpins the whole process.
What MSI Afterburner Is
MSI Afterburner is a free, widely trusted GPU utility that works with graphics cards from virtually any manufacturer, not just MSI, which is a common point of confusion. It has become the default tool enthusiasts reach for when they want to monitor, tune and control their card, and fan management is one of its most useful features.
The program reads your GPU’s temperature in real time and lets you decide how the fans respond, overriding the manufacturer’s default behavior. That default is usually a conservative, one-size-fits-all curve tuned for safety rather than for your specific card, case and noise tolerance.
Because it is free and does not require you to open your PC, it is the lowest-risk way to improve your card’s thermals and acoustics, which is exactly why it is so popular.
Manual Fan Speed vs a Custom Fan Curve
MSI Afterburner gives you two ways to control fans. The simple option is a fixed manual fan speed, where you set the fans to run at a constant percentage regardless of temperature. This is easy but blunt, since it either runs louder than necessary at idle or too slow under heavy load.
The better option is a custom fan curve, which maps fan speed to temperature so the fans stay quiet when the card is cool and ramp up smoothly as it heats. This is the setting that delivers the real benefit, giving you silence at the desktop and strong cooling when you game.
For almost everyone, the custom curve is the right approach, because it adapts automatically to whatever your card is doing at any moment.
Monitoring Temperatures and Why It Matters
Good fan control starts with good information, and MSI Afterburner’s monitoring is central to getting it right. The tool displays your GPU temperature, fan speed and load, ideally as an on-screen overlay while you game, so you can see how your card actually behaves under real conditions.
This data is what lets you build a sensible curve rather than guessing. By watching how hot your card gets in your most demanding games, you can set fan speeds that keep temperatures in a safe range without running the fans harder than necessary.
Without monitoring, fan tuning is guesswork; with it, you can make precise, informed adjustments and confirm they work.
MSI Afterburner Fan Speed Review: Setup and Results
The value of any tool is in the results it delivers, so this section walks through setting up a custom fan curve, the real-world improvements in temperature and noise you can expect, and an honest look at where MSI Afterburner shines and where it falls short.
How to Set a Custom Fan Curve
Setting a curve is straightforward. Open MSI Afterburner, go into settings, enable user-defined software automatic fan control, and you will see a graph plotting fan speed against temperature. You adjust the curve by dragging points to tell the fans how fast to spin at each temperature.
A sensible approach is to keep fans low and quiet at idle and moderate temperatures, then ramp them up more aggressively as the card climbs toward its hotter operating range. Apply the settings, then run a demanding game and watch the overlay to confirm the fans behave as you intended.
Once you are happy, enable the option to apply your settings at startup so the curve loads automatically every time, and your tuning becomes a permanent, hands-off improvement.
Real Results: Temperatures and Noise
The improvements from a good fan curve are genuinely noticeable. Many users find they can shave several degrees off their load temperatures by letting fans ramp sooner and higher under heavy gaming, which helps the card sustain its boost clocks and can improve performance stability.
Just as important is the noise benefit at the other end. By keeping fans slow or off during light use and desktop work, your PC becomes far quieter when you are not gaming, eliminating the constant fan hum that stock profiles sometimes produce. The result is a card that is both cooler under load and quieter at rest.
These gains compound over time. A card that consistently runs a few degrees cooler tends to hold its boost clocks more reliably and puts less thermal stress on components, which can contribute to a longer, more stable service life. In other words, a good fan curve is quietly protecting your investment as well as your ears.
Pros and Cons of MSI Afterburner Fan Control
The pros are compelling: it is free, works on almost any GPU, delivers real temperature and noise improvements, and carries very low risk since fan control alone does not stress your hardware. It also bundles useful monitoring that helps with much more than fans.
The cons are minor but worth noting: the interface can feel dated and slightly technical to newcomers, and the automatic curve only runs while the software is active, so it must launch with Windows to work continuously. Neither is a real obstacle, which is why the tool remains the community standard for fan control.
Getting the Best Cooling Results
A good curve is only part of the picture, and knowing how to tune it well, what mistakes to avoid, and when software cannot solve the problem will get you the best possible thermals. This section covers all three so your cooling is as effective as it can be.
Building a Safe, Effective Fan Curve
A good curve balances silence and cooling. Keep fans quiet up to moderate temperatures, then ramp them steadily so the card never reaches uncomfortable heat under sustained load. Avoid sudden jumps in the curve, which cause the fans to surge up and down audibly, a distraction known as fan pulsing.
Aim to keep load temperatures within a safe margin of your card’s limits rather than chasing the absolute lowest number, since extremely aggressive curves add noise for little real benefit. A smooth, gradual curve that tops out at a comfortably high fan speed under heavy load is the ideal for most people.
A practical starting point many users like is keeping fans low until the mid-range temperatures, then rising steadily so the card sits comfortably cool during long gaming sessions. From there, nudge the curve up or down a little based on what you see in your own games and how much fan noise you can tolerate.
Common Mistakes to Avoid
The most frequent mistake is an overly aggressive curve that runs fans loud all the time, defeating the point of tuning. The opposite error, keeping fans too low to stay silent, lets the card run hot and can hurt performance and longevity, so balance is key.
Another common slip is forgetting to enable the startup option, which leaves your carefully built curve inactive after every reboot. Finally, do not tune fans in isolation while ignoring your case airflow, since a hot case undermines even the best GPU fan curve.
One more subtle mistake is setting and forgetting after a single quick test. Games and seasons vary, so it is worth rechecking your temperatures across a few different titles and, if your room gets warm in summer, confirming the curve still holds the card in a safe range under those hotter conditions.
When Software Isn’t Enough
Sometimes a fan curve alone cannot fix high temperatures, and that points to a hardware limitation. Poor case airflow, aging thermal paste, or an undersized cooler can all cap what software tuning can achieve, no matter how well you set the curve.
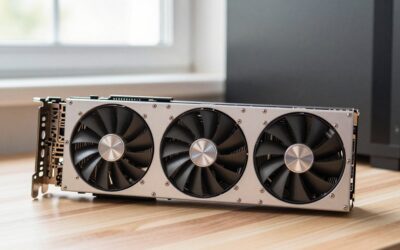
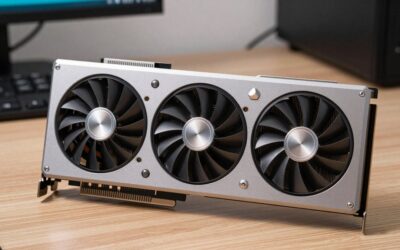
In those cases, the practical fixes are hardware. Adding quality case fans improves the airflow feeding your GPU, fresh thermal paste can rejuvenate an older card, and for a card that simply runs too hot for its cooler, an upgrade may be the real answer. If you reach that point, comparing quality case fans, thermal paste or a cooler-running card through the links here is the sensible next step.
See More:
Final Verdict: Is MSI Afterburner Fan Speed Control Worth It?
For anyone who wants a quieter, cooler graphics card at zero cost, MSI Afterburner fan speed control is absolutely worth it. A well-built custom fan curve delivers real, measurable improvements in both temperature and noise, works on almost any GPU, and carries minimal risk, making it one of the best free tweaks in PC gaming. The only honest caveats are a slightly technical interface and the need to run the software at startup.
Set up a smooth, balanced curve, enable it at boot, and use the monitoring overlay to confirm your results, and your card will run cooler under load and near-silent at rest. If MSI Afterburner fan speed tuning still cannot tame stubborn temperatures, the cause is likely hardware, so check the latest prices on quality case fans, thermal paste or a better-cooled GPU through the links in this guide to finish the job.
Frequently Asked Questions
What is a good starting fan curve?
A practical baseline is zero percent below fifty degrees, thirty percent at sixty, fifty percent at seventy, seventy percent at eighty, and one hundred percent at eighty-five. This keeps the card silent at idle while ensuring it never thermal throttles under sustained gaming load.
Does Afterburner work with all NVIDIA cards?
Yes, it is vendor agnostic despite the MSI branding and controls fan speed, power limit, and clocks on cards from any board partner. Some very new architectures need the latest beta build before full monitoring and voltage controls are exposed correctly.
How do I make my fan curve apply automatically at startup?
Enable both the Windows startup option and the apply overclock at system startup checkbox in Afterburner settings, then save your curve to a profile slot. Without the second option the software loads but leaves the card on its default BIOS curve.
Will running fans at one hundred percent damage the card?
It will not damage the GPU, but sustained maximum RPM shortens bearing life and is extremely loud for little thermal gain. Most coolers reach diminishing returns above roughly seventy-five percent, where a further twenty-five percent of noise buys only a few degrees.
Should I adjust the power limit along with the fan curve?
Raising the power limit lets the card boost higher and generates more heat, which is exactly when a stronger fan curve pays off. Conversely, lowering the power limit slightly is often the quietest tuning method, cutting temperature and noise while costing very little performance.
As an Amazon Associate we earn from qualifying purchases at no extra cost to you.











Write Your Review
No reviews yet. Be the first to share your experience!