


Prime
Editor's Pick
GeForce GT 610 2G DDR3 Low Profile Graphics Card, PCI Express 1.1 x16, HDMI/VGA, Entry Level GPU for PC, SFF and HTPC, Compatible with Win11

How to reinstall Nvidia drivers is the first thing to search when your games crash, your screen flickers, or a driver update goes wrong. The good news is that a clean reinstall fixes the vast majority of these problems, and you can do it yourself in about fifteen minutes. This guide walks you through the safe, professional method using DDU, so you remove every trace of the old driver and install a fresh one without the leftover files that cause most glitches. No technical background needed, just follow the steps in order. By the end you will not only have fixed the current problem but also know how to solve it yourself the next time it appears, which saves both money and the frustration of trial and error.
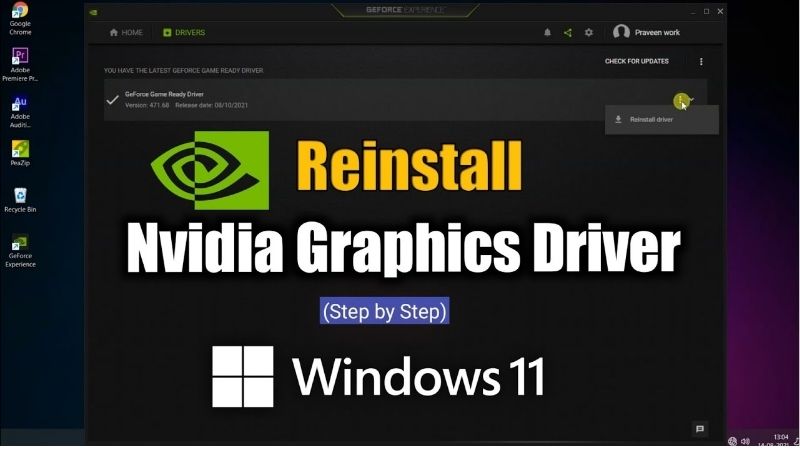
What You Need Before You Reinstall Nvidia Drivers
A little preparation makes the whole process smooth and safe. Before touching anything, it helps to understand why a clean reinstall works, gather the free tools you need, and get your PC ready so nothing catches you off guard mid-way. Skipping this prep is the single biggest reason a simple reinstall turns stressful, so it is worth spending a couple of minutes here first.
As an Amazon Associate we earn from qualifying purchases at no extra cost to you.





Why a Clean Reinstall Fixes Most Nvidia Driver Issues
Most GPU problems, including stutters, crashes, black screens and missing features, trace back to corrupted or conflicting driver files rather than faulty hardware. A simple update installs over the top and can leave that mess behind. Over months of updates, GPU swaps and Windows changes, those leftover files quietly pile up, which is why a system that once ran perfectly can start acting strangely for no obvious reason.
A clean reinstall removes every old file first, then installs a fresh copy, which eliminates the leftover registry entries and clashing versions that cause the majority of issues.
That is exactly why technicians reach for a full clean reinstall rather than a quick update whenever a system misbehaves after a Windows update, a GPU swap, or a failed driver install. In short, if an update alone has not fixed your problem, a clean reinstall almost always will, which is why it is the go-to method for stubborn graphics issues.
What You Will Need to Get Started
Everything software-related here is completely free, but a couple of small hardware items make the process safer and easier, especially if this is not your first driver headache.
Gather the following before you begin: the latest Nvidia driver for your exact GPU, downloaded from Nvidia’s site or the Nvidia app; Display Driver Uninstaller (DDU), the free tool that removes drivers completely; and your GPU model and current driver version noted down.
It also helps to keep a reliable USB flash drive with DDU and the driver saved offline, so you can reinstall even when network drivers are missing, and a dependable USB 3 stick is worth having on hand. If your area suffers frequent power cuts, a basic surge protector or small UPS helps prevent a corrupted install mid-process. These are small, inexpensive additions, but they turn a driver reinstall from a nervous gamble into a routine, repeatable task you can do any time.
Back Up and Prepare Your PC
Quick prep prevents surprises. Save your work and close all games and GPU apps first, because the process requires a restart into Safe Mode.
Note your current driver version in the Nvidia app or Device Manager so you can confirm the change afterward, and download the new driver before you start, since you may temporarily lose display drivers during removal.
Optionally, turn off automatic driver installation in Windows so it does not quietly reinstall an old driver behind your back before you finish the job. This one setting trips up a surprising number of people, because Windows can be quick to reinstall a generic driver the moment it detects a GPU without one.
How to Reinstall Nvidia Drivers Step by Step
With everything ready, the reinstall itself is straightforward. Follow the numbered steps below in order, and do not skip the Safe Mode stage, because that is what allows DDU to remove every last driver file cleanly. The whole process usually takes ten to fifteen minutes, most of which is simply waiting for downloads and restarts, so there is no need to rush any single step.
Steps 1 to 3: Download, Prepare and Disconnect
Start by getting everything in place before you remove anything, so you are never left without graphics support.
- Download the latest driver for your exact GPU from Nvidia and save it somewhere easy to find.
- Download and extract DDU (Display Driver Uninstaller) into its own folder.
- Disconnect from the internet so Windows cannot auto-install a generic driver while you work.
This simple preparation ensures nothing interferes once you begin removing the old driver. Having the new driver already saved locally is what lets you reinstall confidently even while offline, which is the whole reason we disconnect at this stage.
Steps 4 to 6: Boot to Safe Mode and Run DDU
Now remove the old driver cleanly. Safe Mode ensures no driver files are locked while DDU does its work.
- Boot into Safe Mode through Windows Recovery (Settings, System, Recovery, or hold Shift and click Restart).
- Open DDU, select GPU and then Nvidia, and choose “Clean and restart.”
- Let DDU finish and your PC reboot automatically, removing every trace of the old driver.
When Windows returns, your display may look basic and low-resolution, which is completely expected because no dedicated driver is installed yet. Do not worry that something has gone wrong; this bare, low-resolution look simply confirms that DDU did its job and fully removed the old driver.
Steps 7 to 9: Install the Fresh Driver and Verify
Finish by installing the new driver and confirming everything works as it should.
- Run the driver installer you downloaded and choose the Custom (Advanced) option.
- Tick “Perform a clean installation”, complete the setup, and restart if prompted.
- Verify the version in the Nvidia app or Device Manager and launch a game to confirm stability.
If the new version matches what you installed and your original issues are gone, the clean reinstall has worked exactly as intended. At this point you can reconnect to the internet and, if you like, re-enable automatic updates, since your system now has a fresh, correct driver in place.
Pro Tips, Mistakes and Final Checks
Getting the job done is one thing; doing it smoothly every time is another. These tips, a clear comparison of your options, and the mistakes to avoid will keep future reinstalls quick and trouble-free. Most people only learn these the hard way after a botched attempt, so reading them now saves you that trouble entirely.
Pro Tips for a Smooth Nvidia Driver Reinstall
A few simple habits make this painless. Always download the driver before removing the old one, so you are never stuck without working graphics.
Keep DDU and your driver on that USB stick for next time, because reinstalling is a recurring task and having the tools ready saves you the scramble later.
If you only had a minor glitch, try the Nvidia app’s clean-install checkbox first before the full DDU route, since it is quicker and often enough for smaller problems. Reserve the full Safe Mode and DDU routine for the stubborn cases where a quick clean install has not solved things, and you will save yourself time on the simpler fixes.
Clean Reinstall vs Quick Update: Pros and Cons
Both approaches have their place, and knowing when to use each saves time. Here is how they compare so you can pick the right method for your situation.
| Clean Reinstall (DDU) | Quick Update |
|---|---|
| Pros: Removes all corruption; fixes deep issues; best after a GPU swap or persistent crashes. | Pros: Fast; no Safe Mode needed; perfectly fine for routine version updates. |
| Cons: Takes longer; requires Safe Mode and a restart. | Cons: Leaves old files behind; may not fix persistent, deeper problems. |
Use a quick update for routine version bumps, and reach for a clean reinstall whenever problems keep coming back. Knowing which method fits the situation is what separates endless frustrating retries from a single fix that actually sticks.
Common Mistakes and When It’s Not the Drivers
The most common mistake is removing the old driver while still online, which lets Windows slip in a generic replacement. Disconnecting first avoids this entirely.
Another is skipping Safe Mode. DDU works best there, and running it in normal mode can leave fragments behind that undo the whole point of a clean install.
Finally, if a clean reinstall does not help, the real culprit may be hardware, such as an aging or failing GPU, a weak power supply, or overheating. In that case, checking temperatures or considering a GPU upgrade may be the actual fix rather than more driver tweaks. If you have already reinstalled cleanly more than once and problems persist, that is a strong sign the drivers are not the root cause and the hardware deserves a closer look.
See More:
Conclusion
Learning how to reinstall Nvidia drivers the clean way is one of the most useful PC skills you can pick up, because it fixes the crashes, black screens and glitches that a simple update so often leaves behind. With DDU, the latest driver and about fifteen minutes, you can restore a stable, high-performing system entirely on your own. Keep the tools handy for next time, and remember that if a clean reinstall still does not solve the problem, the hardware itself may be to blame. If your GPU is aging or struggling to keep up, it is worth checking current prices on a modern replacement through the links on this page, because sometimes the best cure for endless driver headaches is a fresh, more capable card.
Frequently Asked Questions
What is the correct order for a clean reinstall?
Download the driver package first so you are not stuck without network drivers, disconnect from the internet, boot into Safe Mode, run Display Driver Uninstaller and select clean and restart. Once Windows returns, install the downloaded package using the custom option with perform a clean installation ticked, then reboot and reconnect.
Do I really need Display Driver Uninstaller?
Not for routine updates, where the installer clean option is enough. DDU earns its place when you are switching brands, chasing a persistent crash, moving between major driver branches, or dealing with leftover files from a failed install. It removes registry entries and cached files that the standard uninstaller leaves behind.
How do I stop Windows reinstalling its own driver?
Set your network connection as metered, or use the Group Policy setting that excludes drivers from Windows Update, before you begin. Staying offline during the whole DDU and reinstall cycle is the simplest approach. After the manual driver is in place, reconnect and confirm the version number in the NVIDIA App matches what you installed.
What if I get code 43 or a black screen after reinstalling?
Code 43 usually points at a hardware or seating issue rather than software. Reseat the card and both power cables, try a different PCIe slot, and test the monitor cable on another port. If the display stays black, boot with integrated graphics, remove the driver again with DDU, and install an older branch to rule out a bad release.
Should I reinstall drivers after upgrading my GPU?
Yes, and do it properly. Uninstall the old driver with DDU while the previous card is still installed, shut down, swap hardware, then install fresh. Skipping this often works but can leave stale profiles and control panel settings that cause odd behaviour, particularly when moving between different generations or between AMD and NVIDIA.
Ready to decide? Our #1 pick for 2026 is the Clean Reinstall (DDU).
Live price & availability on Amazon.



Write Your Review
No reviews yet. Be the first to share your experience!