


Editor's Pick
msi Gaming GeForce GT 1030 4GB DDR4 64-bit HDCP Support DirectX 12 DP/HDMI Single Fan OC Graphics Card (GT 1030 4GD4 LP OC)
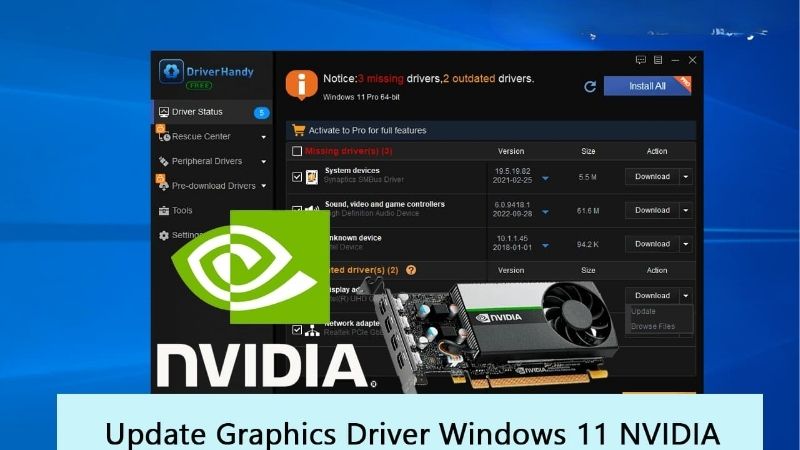
How to update nvidia graphics driver the right way is the fastest fix for stutter, crashes, black screens, and games that refuse to launch. An outdated driver can quietly cost you frames and stability, and a botched update can cause even bigger headaches. The good news: you can do this safely in a few minutes. This guide walks you through every method, from the one-click app to a full clean install, with clear steps, the exact tools you need, and the common mistakes to avoid so your GPU runs at its best.
What You Need Before You Update Your NVIDIA Graphics Driver
A little prep prevents almost every driver-update problem. Before you touch a single download button, confirm which GPU you own, make a quick backup, and pick the update method that fits you. Do these three things first and the actual update becomes a formality rather than a gamble.
As an Amazon Associate we earn from qualifying purchases at no extra cost to you.


Confirm Your GPU Model and Grab the Right Tools
You cannot install the correct driver until you know your exact card. Press Ctrl+Shift+Esc to open Task Manager, click the GPU entry under Performance, and read the model name in the top corner.
For a deeper readout, a lightweight tool like GPU-Z shows your exact chip, memory, and current driver version at a glance. It is free, and knowing your driver version tells you instantly whether an update is even needed.
If your card turns out to be several generations old and no driver can deliver the performance you want, that is a sign to consider a modern upgrade. A current-generation card such as a well-reviewed RTX GPU will do far more for your frame rate than any driver ever could. Either way, write down the driver version number you see now before you change anything. That single detail lets you confirm afterward that the update actually applied, and it gives you a reference point if you ever need to roll back to it.
Back Up Your System and Prepare a Stable Setup
Updates rarely go wrong, but when they do you will be glad you prepared. Create a Windows restore point first so you can roll back in one step if a new driver misbehaves.
If you plan a full clean install later in this guide, back up anything important beforehand. Copying critical files to an external SSD is a fast insurance policy that takes minutes and saves hours.
Finally, make sure your PC stays powered through the process. A brief power loss mid-install can corrupt a driver, so on a desktop a basic surge protector or a small UPS is a smart, cheap safeguard. Laptop users have this mostly covered by the battery, but should still keep the charger plugged in, since a driver install is not the moment you want the machine dropping into a low-power state.
Choose the Right Update Method for You
There are three main paths, and picking correctly saves time. The NVIDIA App, formerly GeForce Experience, is the easiest for most people and updates with a couple of clicks.
Manual download through NVIDIA’s official driver search gives you full control and is ideal when you want a specific version. Windows Update can also deliver drivers, but it often lags behind the newest releases, so it is a fallback rather than a first choice.
Analytically, the trade-off is simple: convenience versus control. Casual gamers should default to the app; anyone chasing a specific version or troubleshooting a problem should update manually. There is no single correct answer here, only the method that matches your comfort level and your goal: if you just want stable frames with zero fuss, the app wins, and if you are hunting a specific bug or want to pin a known-good release, the manual route pays off. The steps for all three methods follow next.
How to Update Your NVIDIA Graphics Driver Step by Step
Now for the main event. Below are three reliable methods, ordered from easiest to most thorough. Follow the numbered steps for whichever path you chose, and you will be on a fresh, stable driver within minutes.
Method A: Update Through the NVIDIA App
This is the recommended route for most users because it is quick and hard to get wrong.
Follow these steps:
- Download and install the NVIDIA App from Nvidia’s official site. This replaces the older GeForce Experience.
- Open the app and go to the Drivers tab. It automatically detects your card and available updates.
- Click Check for Updates, then Download. Choose the Game Ready or Studio driver depending on your use.
- Select Express Installation. This handles everything with default, safe settings.
- Restart your PC when prompted. A reboot ensures the new driver loads cleanly.
That is the entire process for most people. If the app updates without errors, you are done and can skip the more advanced methods below.
Method B: Manual Update via NVIDIA Driver Search
Choose this method when you want a specific driver version or the app is not cooperating.
Follow these steps:
- Go to Nvidia’s official driver search page. This is the safest source; avoid third-party driver sites entirely.
- Enter your product details. Select your GPU series, exact model, and operating system.
- Pick Game Ready or Studio and download. Match the driver type to whether you mainly play or create.
- Run the installer and choose Custom. This lets you see exactly what is being installed.
- Tick Perform a clean installation, then finish and reboot. A clean tick removes leftover settings that cause conflicts.
Manual updating takes a couple of extra clicks but gives you precise control, which is exactly what you want when troubleshooting a stubborn issue.
Method C: Full Clean Install With DDU
Use this thorough method when you have persistent crashes, artifacts, or a messy driver history.
Follow these steps:
- Download the new driver and Display Driver Uninstaller (DDU) first. Have both ready before you remove anything.
- Boot into Windows Safe Mode. DDU works most reliably here with fewer processes running.
- Run DDU and choose Clean and restart. This wipes every trace of the old driver.
- Install the fresh driver you downloaded. Windows will boot with basic display until you do.
- Reboot once more and confirm the version in GPU-Z. This verifies the clean install succeeded.
DDU is the nuclear option, but it resolves problems that simple updates cannot. Reserve it for real trouble rather than routine maintenance.
Pro Tips, Mistakes to Avoid, and Keeping Drivers Updated
You now know how to update. This final section keeps the process smooth long term, warns you about the errors first-timers make, and helps you decide which driver type actually suits you so every future update is painless.
Pro Tips for a Smooth Driver Update
Close every game and background overlay before you start. Recording tools and launchers can lock driver files and cause an install to fail halfway.
Update after a major game launches rather than the moment a driver drops. Waiting a few days lets Nvidia catch early bugs, and a slightly older stable driver often beats a brand-new one with teething problems.
Keep a note of the last driver version that worked well for you. If a new one causes issues, you can roll straight back to a known-good release without guesswork. It also helps to update one component at a time. If you change your driver, Windows, and a game on the same day and something breaks, you will not know which change caused it, so spacing them out makes troubleshooting far easier.
Game Ready vs Studio Driver: Pros and Cons
Choosing the wrong driver type is a quiet mistake, so weigh the trade-offs. The Game Ready driver’s pros are day-one optimization for new titles and the freshest performance tweaks; its con is a slightly faster release cadence that can occasionally introduce bugs.
The Studio driver’s pros are extra stability and validation for creative apps like Premiere, Blender, and DaVinci Resolve; its con is that it updates less frequently, so it may trail on the very newest game optimizations.
The practical rule: pick Game Ready if you mostly play, and Studio if you mostly create. Either way, you can switch between them at any future update, so the choice is never permanent.
Common Mistakes and Staying Up to Date
Avoid the classic errors. Never download drivers from unofficial third-party sites, never skip the reboot, and never run an update over an unstable connection that could interrupt the file.
To stay current effortlessly, let the NVIDIA App notify you of updates and check roughly once a month or whenever a game you play gets a big patch. New drivers frequently unlock features too, such as improved DLSS behavior and AI enhancements that can boost performance in supported titles. Do not fall into the opposite trap of updating obsessively either. If your current driver is stable and your games run well, there is no urgent reason to chase every release the moment it appears, because stability is usually worth more than a higher version number.
If updating still leaves your games struggling, the honest answer is that your hardware, not your driver, may be the limit. When that happens, a modern GPU paired with a quality power supply is the upgrade that truly moves the needle, and the link below makes it easy to compare current options.
See more:
- amd driver auto-detect tool
- nvidia geforce rtx 5080 best buy
- TechPowerUp GPU-Z
- nvidia china
- nvidia etf price
Conclusion
Knowing how to update nvidia graphics driver software confidently turns a source of frustration into a two-minute routine that keeps your games smooth and stable. Confirm your card, back up first, pick the method that fits, and reboot to finish. Do that regularly and you will squeeze every frame your hardware can offer. And if the drivers are current but the performance still falls short, use the link above to compare a modern graphics card and the gear to run it, so your next upgrade delivers the boost no driver alone can.
Frequently Asked Questions
What is the fastest way to update an NVIDIA driver?
Install the NVIDIA App from nvidia.com, open the Drivers tab, and select Download then Express Install. It detects your GPU automatically, no account is required since it replaced GeForce Experience, and it keeps your existing settings. The whole process usually takes under five minutes including the brief screen flicker while the display driver reloads.
Should I choose Express or Custom installation?
Express is fine for routine updates. Choose Custom when you want to enable the clean installation checkbox, which wipes existing driver settings and profiles, or when you want to skip optional components like the PhysX system software or the audio driver. Clean installation is the first thing to try when a previous driver left problems behind.
Do I need to uninstall the old driver first?
Not normally. NVIDIA installers handle in-place upgrades reliably. Use Display Driver Uninstaller in Windows safe mode only if you are switching from an AMD card, troubleshooting persistent crashes or black screens, or moving between very different driver branches. Unnecessary DDU runs add risk without benefit.
How often should I update?
Update when a game you play gets a Game Ready driver, when a security bulletin is published, or every couple of months as routine maintenance. Chasing every release is unnecessary and occasionally introduces regressions. If your system is stable and you are not playing new releases, staying one or two versions behind is perfectly reasonable.
What do I do if the update fails or breaks something?
Reboot and retry with the clean installation option first. If it still fails, run Display Driver Uninstaller in safe mode, then install a known-good version from the NVIDIA driver archive. Temporarily disable antivirus during installation, since some suites block driver services, and make sure Windows Update is not fighting you by pushing its own package.



Write Your Review
No reviews yet. Be the first to share your experience!