GPU clearance calculator searches usually come from one place: you have found a card you want, and you need to know for certain it will fit your case before you spend the money. While a dedicated tool can crunch the numbers for you, the calculation behind it is simple enough to do yourself in under a minute. This review explains exactly how a clearance calculator works, walks through the formula with a worked example, and shows you how to confirm fit with complete confidence.
How a GPU Clearance Calculator Works
The quick answer: a GPU clearance calculator simply compares three of your case’s measurements, maximum length, slot count, and width clearance, against the same three dimensions of the card, then subtracts the depth of any front cooling. If every card dimension is smaller than the matching case figure with a little margin, it fits. Understanding that logic means you never have to rely on a tool you do not have.
The Three Dimensions It Checks
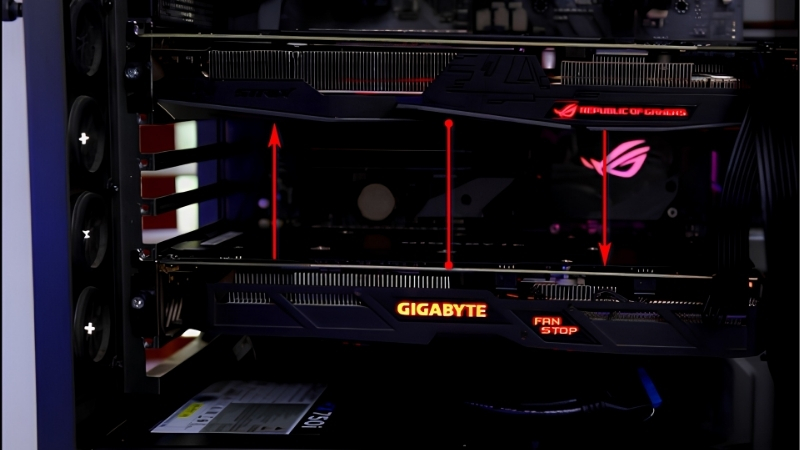
Any clearance check, whether by tool or by hand, comes down to three comparisons. The first is length, the card’s measurement from bracket to cooler tip against the case’s maximum GPU length.
The second is thickness, expressed in expansion slots, where the card’s slot count must not exceed the space your case and motherboard leave below the top PCIe slot. The third is height or width, from the slot to the top edge of the card, which must clear the side panel and leave room for the power cable.
Get all three under the case’s limits and the card fits; fail any one and it does not, which is the entire logic a calculator automates.
Understanding that this is all a calculator does is liberating. There is no secret formula or hidden data; it is simply three comparisons, which means you can trust your own check just as much as any tool.
This is reassuring when you are looking at a brand-new card that no online calculator has added to its database yet. As long as you have the card’s dimensions, your manual comparison works the instant a card is announced.
The Simple Clearance Formula
The core formula for length is straightforward: your case’s maximum GPU length, minus the depth of any front radiator or fans, must be greater than the card’s length plus a small buffer. Written simply, available length equals case maximum minus front cooling.
For thickness and height, the comparison is direct: the card’s slot count must be less than or equal to the case’s, and the card’s height must be less than the case’s width clearance. There is no complex math, just three side-by-side comparisons.
If you prefer a single rule of thumb, it is this: every one of the card’s three dimensions must be smaller than the matching case figure, after subtracting front cooling from the length. Pass all three and the card fits.
A Worked Example
Imagine a case rated for 360 millimeters of GPU length, with a 30-millimeter front fan and a 30-millimeter radiator fitted. Subtracting the 60 millimeters of cooling leaves 300 millimeters of real clearance.
If your chosen card is 290 millimeters long, it fits with 10 millimeters to spare, which is a healthy margin. If it were 305 millimeters, it would not fit despite the case’s headline 360-millimeter rating, showing exactly why subtracting front cooling matters so much.
You can repeat this example with your own numbers in under a minute. Swap in your case’s rated length, your actual cooling depth, and your chosen card’s length, and the same simple subtraction gives you a clear yes or no.
Keeping a note of your case’s three limits somewhere handy makes future upgrades effortless. Once you know your maximum length, slots, and width clearance, checking any new card takes only a glance.
How to Calculate GPU Clearance Yourself
Running the numbers by hand takes only a couple of minutes once you know where to find each figure. This section walks through gathering your case and card measurements and applying the subtractions that catch most people out, so your manual check is as reliable as any tool.
Gathering Your Case Numbers
Start with your case manufacturer’s specifications, which list the maximum GPU length, the number of expansion slots, and often a width or GPU thickness clearance. These three figures are the ceilings your card must fit under.
Where the case lists both an empty-front and a with-cooling length, note both. The with-cooling figure, or the empty figure minus your own cooling depth, is the one that reflects your actual build.
It also helps to note the case’s expansion slot count, since that doubles as your thickness limit. A seven-slot case, for instance, leaves plenty of room below the top slot for even a chunky 3-slot or 4-slot card.
Gathering Your Card Numbers
From the graphics card’s specification, record its length in millimeters, its thickness in slots, and its height or width. Card makers publish all three, though you may need to check the detailed specs rather than the headline page.
If a card lists both a PCB length and a total length, use the total, since the cooler and any protruding connector are what actually occupy space. As with the case, a few millimeters of caution here prevents a near-miss.
If a manufacturer lists the card’s thickness in millimeters as well as slots, record that too. The millimeter figure is more precise, because many cards labelled as one slot count are actually a half-slot wider than the name suggests.
Subtracting Front Cooling and Cables
The step that catches most people is subtracting front-mounted cooling from the case’s length. Measure or look up the depth of your front fans and any radiator, then take that total off the case’s maximum length before comparing.
Do not forget the power cable either. The connector adds a little height, and the cable needs room to curve, so leave clearance above the card rather than assuming the height figure alone is enough.
A useful rule is to add roughly 10 to 15 millimeters of headroom above the card’s height for the connector and cable. In a tight case this small allowance is often what decides whether the side panel closes cleanly.
Getting the Most from a Clearance Check
A clearance check is only as good as the numbers you feed it, so a few habits make the difference between a confident purchase and an unwelcome surprise. This section weighs tools against manual checks, flags the common mistakes, and shows how to confirm fit beyond doubt.
Pros and Cons of Calculators Versus Manual Checks
Both approaches reach the same answer, with different trade-offs:
- Calculator tools – Pros: fast, hard to make an arithmetic slip, and convenient when comparing several cards. Cons: only as accurate as their database, which may miss the latest cards or your exact cooling setup.
- Manual check – Pros: works for any card or case, forces you to account for your real cooling, and builds understanding. Cons: takes a couple of minutes and relies on you finding the right figures.
For most people the best approach is a quick manual check, using a calculator as a second opinion when one is available.
Treating the two as complementary is the smartest approach. The manual check forces you to account for your exact build, while a calculator offers a quick sanity check that you have not slipped up on the arithmetic.
Whichever method you favour, the goal is the same: confidence before you spend. A two-minute check, by hand or by tool, is always cheaper than discovering the problem after the card has already arrived.
Build that quick check into your buying routine and you will never be caught out by a card that looks perfect online but will not physically fit. It is the simplest habit a PC builder can adopt, and it pays off every single upgrade.
Common Mistakes That Break the Math
The biggest error is using the empty-case length while running front cooling, which over-states your clearance by 50 millimeters or more. Always subtract your actual cooling depth first.
Other frequent slips include using the PCB length instead of the full length, ignoring the power-connector height, and forgetting slot thickness entirely on a chunky modern card. Checking all three dimensions, not just length, avoids each of these traps.
Confirming Fit With Confidence
Once your numbers say a card fits, a physical sanity check seals it. Cut a strip of paper or card to the GPU’s length and lay it inside your case along the slot, with any front cooling in place.
Seeing the space occupied with your own eyes turns a calculation into certainty. It takes seconds, costs nothing, and is the surest way to avoid the disappointment of a card that will not seat.
A clearance check is the cheapest insurance you can buy before purchasing a graphics card, and the math is simple enough that you never truly need a separate tool. Whether you are comparing cards or choosing a roomier case, take a look at the recommended well-sized cards and spacious cases linked throughout this review and pick the pairing that fits with margin to spare.
See More:
- How to clean a GPU heatsink
- GPU vertical mount thermals
- GPU thermal throttle temp
- What PSU for RTX 4090
- What PSU for RTX 5080
Conclusion
A GPU clearance calculator does one simple job: it compares your case’s length, slot, and width limits against the card’s three dimensions, minus any front cooling, and tells you whether everything fits. Because the formula is so simple, you can run it yourself in a minute by gathering both sets of numbers and subtracting your cooling depth. Avoid the common mistakes, leave a small buffer, and confirm with the paper trick. Check the recommended cards and cases above to build a system that fits perfectly the first time.


Write Your Review
No reviews yet. Be the first to share your experience!