
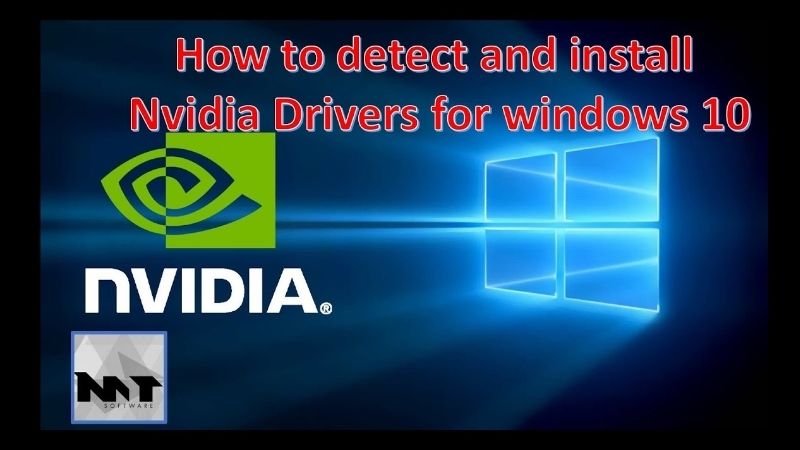
Nvidia drivers auto detect is the fastest way to get the exact right driver without knowing your GPU’s model number by heart. Instead of guessing, you let Nvidia scan your hardware and hand you the precise package it needs. This guide explains how auto-detect works, walks through the two main methods in 2026, and shows what to do on the rare occasion detection fails to find your card.


How Nvidia Driver Auto-Detect Works
Auto-detect removes the guesswork from driver hunting, which is exactly why it exists. Understanding what it does behind the scenes makes it easier to trust and to troubleshoot.
As an Amazon Associate we earn from qualifying purchases at no extra cost to you.


What Auto-Detect Actually Does
The value becomes obvious the moment you consider the alternative. Manually matching a GPU to its driver means correctly identifying the exact model, the operating system, and the right branch, and a single wrong choice can leave you with missing features or instability. Auto-detect removes all three chances to slip up.
Auto-detect scans your system to identify your specific GPU model and operating system, then matches that against Nvidia’s driver database to find the correct, most recent driver for your exact hardware.
This matters because installing the wrong driver, or a generic one, can cause missing features, poor performance, or instability. Auto-detect eliminates that risk by pinpointing the package built for your card.
The result is that even users who have no idea whether they own a particular GeForce model can get the right driver in a couple of clicks, which is the whole point of the feature.
Auto-Detection in the NVIDIA App
Because the app re-checks your hardware every time it opens, it also stays accurate if you change GPUs. Swap in a new card and the app simply detects it and offers the correct driver, with no need to clear old settings or tell it what you installed.
The NVIDIA App, which replaced GeForce Experience in 2026, detects your GPU automatically the moment you open it. Its Drivers tab shows the exact driver available for your card, with no need to enter any model details.
Because the app already knows your hardware, updating is a single Download click followed by an Express or Custom install. It also no longer requires an account login for this, making the whole process quicker than before.
For most people this is the easiest form of auto-detect, since the app handles identification, download, and installation in one place and can even notify you when a new driver appears.
The Website Auto-Detect Tool
Keep this option in mind as your rescue path when a machine has no graphics software at all. On a brand-new build or a freshly wiped drive, the browser tool bridges the gap between a bare system running a basic display and a fully accelerated one running the correct driver.
Nvidia’s website also offers an auto-detect utility that scans your system through the browser and recommends the right driver without you selecting a model. It is handy when you have not installed the NVIDIA App yet.
This browser-based tool is especially useful right after a fresh Windows install, when you need a driver before anything else is set up. It gets you from a bare system to the correct package quickly.
Once it identifies your card, it links you straight to the matching driver page, from which you download and install as normal. It is a reliable fallback whenever the app is unavailable.
Using Auto-Detect Step by Step
Both methods are quick, but knowing the exact steps removes any hesitation. Here is how to run each one and how to choose the right driver type once your card is identified.
Via the NVIDIA App
If you plan to game regularly, it is worth letting the app manage detection permanently rather than checking manually. Set it to notify you of new drivers and it quietly keeps your card matched to the latest release, turning a recurring chore into something you rarely have to think about.
Open the NVIDIA App and select the Drivers tab on the left. It will already display your detected GPU and any available driver, so you simply click the green Download button to begin.
When the download finishes, choose Express for a hands-off install or Custom for a clean install that clears old settings. A restart afterward ensures the new driver loads properly.
If the app is not on your system, a quick search for “NVIDIA App” in Windows, or a download from Nvidia’s site, gets it installed so it can detect your card automatically.
Via the Nvidia Website
This browser route is also useful on a work computer where you would rather not install extra software. You can detect and download the correct driver directly, install it, and be done, without committing to a resident application running in the background.
On Nvidia’s driver page, choose the auto-detect option, and the browser tool scans your hardware and returns the recommended driver. You then download it directly, no model lookup required.
This route works even on a machine with only a basic display driver, which is why it is the classic first step on a fresh Windows install before the NVIDIA App is present.
After downloading, run the installer and follow the prompts, choosing a clean install if you want to clear any previous driver remnants for a fresh start.
Choosing Game Ready or Studio
If you are unsure which branch to pick, default to Game Ready, since it suits the majority of users and still runs creative applications perfectly well. You can always switch to Studio later if you find your work benefits from its extra validation, with no downside to changing your mind.
Once your card is detected, you may be offered both Game Ready and Studio drivers. Game Ready is optimized for the latest games and is the right pick for gamers who want day-one performance.
Studio drivers emphasize validated stability for creative applications, updating less often, and suit video editors, 3D artists, and anyone who prioritizes reliability over launch-day speed.
Auto-detect finds the correct hardware match either way; you simply pick the branch that matches how you use your PC. You can switch between them later without any trouble.
When Auto-Detect Fails
Detection works the vast majority of the time, but a few situations can trip it up. Knowing the causes and the manual fallback keeps you from being stuck.
Common Causes of Detection Failure
Recognizing these causes saves time, because the symptoms look alike whether the culprit is a browser setting or an ancient GPU. If the website tool returns nothing, quickly trying the NVIDIA App or disabling a VPN usually reveals which of the common causes is at play before you resort to manual selection.
The browser tool can fail if your browser blocks the required plugin or script, if a VPN or strict privacy settings interfere, or if your GPU is a very old legacy model no longer in active support.
Occasionally a fresh system missing basic chipset drivers can also confuse detection. In these cases the tool either returns nothing or misidentifies the hardware, which is your cue to switch methods.
If the website tool struggles, the NVIDIA App often succeeds because it reads the hardware directly rather than through the browser, so trying the app is a sensible next step.
The Manual Fallback
Finding your model is easier than many people expect. Device Manager lists it plainly under display adapters, and once you have that name, the drop-down menus on Nvidia’s site lead you to the exact driver in seconds, making manual selection a dependable path rather than a daunting one.
When auto-detect will not cooperate, manual selection always works. On Nvidia’s driver page you choose your product series, model, and operating system from drop-down menus to find the exact driver yourself.
To do this you need to know your GPU model, which you can find in Windows Device Manager under Display adapters, or in the Task Manager performance tab. It takes a moment but is completely reliable.
Manual selection is also the way to grab a specific older driver version if the newest one causes issues, giving you full control that auto-detect does not offer.
Pros and Cons of Auto vs Manual
In practice, the two methods complement each other rather than compete. Start with auto-detect for its speed and simplicity, and keep manual selection in your back pocket for the occasions when detection stalls or you deliberately need a particular version. Together they cover every situation you are likely to meet.
Auto-detect and manual selection each have their place, and the table below makes the trade-off clear so you know which to reach for in a given moment.
| Auto-detect | Manual selection |
|---|---|
| Fast, no model knowledge needed | Works even when detection fails |
| Ideal for casual users and fresh installs | Lets you pick a specific older version |
| Always finds the current matching driver | Full control for troubleshooting |
| Can be blocked by VPNs or legacy GPUs | Requires knowing your exact GPU model |
For most people, auto-detect via the NVIDIA App is the best default, with manual selection as the dependable backup whenever detection hits a snag.
See More:
- TechPowerUp GPU
- Nvidia H200 GPU price
- RTX 5050 Mobile
- Nvidia competitors
- Nvidia Reflex low latency on or off
The Bottom Line on Nvidia Drivers Auto Detect
Nvidia drivers auto detect, whether through the NVIDIA App or the website tool, is the quickest and safest way to land on the exact driver your GPU needs, with manual selection always available as a reliable fallback. If auto-detect flags your card as a legacy model that no longer receives current drivers, that is a strong sign it is time to upgrade — tap the link on our site to check today’s best GPU deals before you buy.
Frequently Asked Questions
How does NVIDIA’s auto-detect actually identify my GPU?
The web-based auto-detect on NVIDIA’s download page inspects your system through a small helper component and returns the matching driver for your GPU model, operating system version and architecture. The NVIDIA App does the same thing locally and more reliably, because it reads the device ID directly from the installed hardware rather than depending on browser permissions that modern browsers increasingly restrict.
Why does auto-detect suggest the wrong driver on my laptop?
Laptops with switchable graphics report both the integrated Intel or AMD GPU and the discrete GeForce chip, and detection sometimes latches onto the wrong one. Some OEM designs also require a vendor-specific driver with custom power management. If the suggested package refuses to install, select the notebook branch manually from the product dropdown or use the laptop maker’s support page.
Is manual selection safer than auto-detect?
Manual selection is more predictable because you control every variable: product series, model, operating system, download type and language. Auto-detect is faster and adequate for a standard desktop with one GeForce card. If you ever end up with a mismatch, nothing is permanently damaged; the installer simply refuses to proceed and reports that no compatible hardware was found.
Does auto-detect work on Linux?
Not usefully. On Linux you should use your distribution’s packaged drivers instead, for example the ubuntu-drivers tool on Ubuntu, the akmod packages on Fedora, or the official run file only as a last resort. Distribution packages handle kernel module rebuilds after kernel upgrades automatically, which the manual run file installer does not do reliably.
What is the difference between the DCH and standard driver types?
DCH is the modern Windows driver model where the core driver installs through Windows and the control panel arrives separately from the Microsoft Store or the NVIDIA App. Standard was the older monolithic packaging. All current Windows 10 and Windows 11 systems use DCH, and mixing types requires a clean uninstall first, which is a common cause of failed installs.
Ready to decide? Our #1 pick for 2026 is the Fast, no model knowledge needed.
Live price & availability on Amazon.

Write Your Review
No reviews yet. Be the first to share your experience!