How to undervolt with MSI Afterburner is the specific, tool-focused search that means you already know you want to undervolt and just need the exact button presses. Good: this guide skips the theory and gets you straight into the curve editor with sample voltage and clock values, a clear screenshot-friendly walkthrough, and the stress-testing routine that locks in a stable, cooler, quieter card. MSI Afterburner’s voltage-frequency curve is the industry-standard way to undervolt an Nvidia GPU, and once you understand the three actions, drag a point, flatten the rest, and apply, the entire process takes fifteen minutes. Follow along with Afterburner open and you can have a tuned undervolt by the time you finish reading.
What You Will Need
Everything is free software. MSI Afterburner, a stress-testing tool, and your existing monitoring overlay are the only requirements. No hardware, no risk, and fully reversible.
MSI Afterburner Installed and Updated
Download the latest version from the official site. Older versions lack curve editor improvements that make the process smoother on newer Nvidia cards. Once installed, open it and confirm your GPU is detected on the main dashboard.
Enable the on-screen display in the Monitoring tab so you can watch temperature, clock speed, and voltage while you game. This overlay is your real-time feedback during the stress test.
A Stress Test Tool
Download Unigine Heaven, 3DMark Time Spy, or FurMark. Any GPU-heavy benchmark that runs continuously will do. The goal is to push the card hard enough to expose an unstable undervolt within minutes, so pick a tool that maxes out utilization and sustains it.
If you do not want to install a separate benchmark, a demanding game you already own works as a substitute. The key is consistent, sustained GPU load for at least 15 minutes, so choose whatever produces the heaviest workload on your card and let it run long enough to expose any instability.
A demanding game also works as a follow-up test, but a synthetic benchmark is better for the initial tuning because it produces consistent, repeatable load.
Baseline Numbers
Before touching the curve, run a stress test for five minutes and note the GPU’s load voltage, boost clock, and peak temperature from the overlay. These are your stock reference numbers, and every comparison after the undervolt measures against them.
| Metric | Stock Baseline | After Undervolt |
|---|---|---|
| Load Voltage | ___ mV | ___ mV |
| Boost Clock | ___ MHz | ___ MHz (same target) |
| Peak Temp | ___°C | ___°C |
| Fan Speed | ___ RPM | ___ RPM |
Fill in your own numbers before and after to measure the gain.
Write these down or screenshot them. Without a baseline, you cannot tell how much temperature and noise you actually gained, and the before-and-after comparison is what confirms the undervolt is worth keeping.
A useful format is a simple table: stock voltage, stock clock, stock temp, stock fan speed on one row; undervolted values on the next. This makes the improvement concrete and gives you the exact numbers to rebuild the curve if a driver update resets it.
Step-by-Step: Undervolting in MSI Afterburner
Open Afterburner and follow these steps with the tool in front of you. Each step matches an action in the interface, so you can work through them in real time.
Step 1 to 3: Open the Curve and Set Your Target
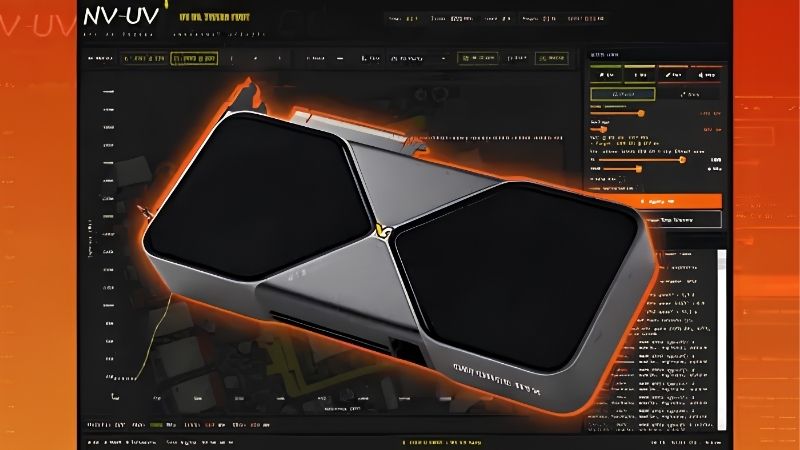
Step 1: Open the curve editor. Press Ctrl+F in Afterburner. A graph appears with voltage on the x-axis and frequency on the y-axis. Each green dot is a voltage-frequency pair the card can use.
Step 2: Identify your stock load point. Look at the voltage and clock you noted from the baseline. Find that voltage on the graph and note the dot at that position. This is where the card currently operates under load.
Step 3: Set a lower voltage target. Move 50–100 mV to the left of your stock load voltage. Click the dot at that lower voltage and drag it up to match your stock boost frequency. For example, if stock is 2100 MHz at 1000 mV, drag the 900 mV dot up to 2100 MHz.
This tells the card to hit the same clock at less voltage, which is the essence of an undervolt.
Visually, your curve should now have a flat ceiling at your target frequency from the target voltage leftward, and everything to the right should be at or below that ceiling. If the shape looks like a plateau ending at your chosen voltage rather than the usual upward slope, you have set it correctly.
Step 4 to 6: Flatten, Apply, and Test
Step 4: Flatten the curve to the right. Select every dot to the right of your target point and drag them all below your target frequency, or press Delete to flatten them. This prevents the card from ignoring your undervolt by jumping to a higher voltage point.
Step 5: Apply the curve. Click the checkmark button in Afterburner. The curve locks in and the card begins using the new voltage-frequency map immediately.
Step 6: Run a stress test. Launch your benchmark and let it run for 15–20 minutes. Watch for crashes, driver resets, or artifacts. If the test passes, your undervolt is stable at this voltage. If it crashes, return to the curve, raise the target voltage by 25 mV, flatten again, apply, and re-test.
Each crash-and-raise cycle narrows the window until you find the lowest stable voltage. Most cards land 50–100 mV below stock, but every chip is different.
If a crash happens, do not worry. The card resets to stock on a driver restart, and you simply raise the voltage by one step and try again. Crashes during tuning are expected and harmless; they are the card telling you where its limit is, which is exactly the information you are looking for.
Step 7 to 9: Confirm, Save, and Automate
Step 7: Test in a real game. Play your most demanding title for a full session. Synthetic benchmarks and games stress different parts of the GPU, so a real-world pass is the final confirmation.
Step 8: Save to a profile slot. In Afterburner, click a profile number and save. This lets you restore the curve with one click after a driver update or settings reset.
Step 9: Set Afterburner to start with Windows. In Settings, enable Start with Windows and Start minimized. The undervolt loads automatically every boot without manual action.
You now have a permanent, automatic undervolt that lowers temperature and noise while holding the same performance.
Pro Tips, Mistakes, and What to Expect
The curve editor is powerful but a few details make the process faster and prevent the small errors that waste time. This section covers the habits that experienced undervolters use and the honest results you should expect.
Pro Tips for the Best Result
Pair the undervolt with a custom fan curve in Afterburner’s Fan tab. Lower heat lets the fans spin slower, so the card is both cooler and quieter. The two settings together deliver a noticeably better experience than either alone.
After finding your stable point, note the exact voltage and frequency somewhere safe. If a driver update resets the curve, you can rebuild it in seconds rather than re-testing from scratch.
Common Mistakes to Avoid
Do not forget to flatten the curve to the right. If higher-voltage dots remain above your target frequency, the card will boost past your undervolt and use more voltage than you intended, defeating the purpose.
Do not jump to a very aggressive voltage drop on the first try. Start conservative at 50 mV below stock and work down in 25 mV steps. A crash from a 200 mV drop feels alarming even though it is harmless, and methodical steps are faster in total.
Pros and Cons of Undervolting With MSI Afterburner
On the plus side, the process is free, fully reversible, lowers temperature and fan noise with no performance loss, and Afterburner is the most widely used and trusted tool for the job. Profiles make the curve persistent and easy to restore.
On the downside, the curve editor takes a moment to learn, the optimal voltage varies per card, and driver updates can reset the curve. Saving a profile and noting your numbers prevent the update inconvenience.
For any Nvidia owner, undervolting in Afterburner is one of the highest-value free optimizations available. The small time investment pays off every session.
One last practical note: if you share the PC or switch between users, saving the profile to a slot keeps it persistent regardless of who is logged in, as long as Afterburner starts with Windows. This ensures the undervolt is always active and the card always runs at its optimized point, no matter the session.
Your undervolt is set, saved, and automatic. Enjoy a cooler, quieter card at the same performance.
Every Nvidia card ships with voltage headroom designed for the weakest chips of that model. Your specific card almost certainly needs less voltage than the factory default, and the curve editor finds the actual requirement rather than the conservative safety margin. That built-in headroom is what makes undervolting so consistently effective across nearly every Nvidia GPU, and it is the reason the process works on cards from every generation and price point.
See More:
- How to lower GPU temperature
- How to lower GPU hotspot temp
- How to increase GPU performance
- How to enable G-Sync
Conclusion
Knowing how to undervolt with MSI Afterburner gives you a free, reversible way to lower GPU temperature and noise while keeping the same clocks. Open the curve editor, drag your target voltage point to the stock frequency, flatten everything to the right, apply, stress test, and save. Pair it with a custom fan curve for the best combined result, and set Afterburner to start with Windows so the undervolt is always active. It is fifteen minutes of work for a permanently cooler, quieter card.
Every Nvidia card ships with voltage headroom designed for the weakest chips of that model. Your specific card almost certainly needs less voltage than the factory default, and the curve editor simply finds the actual requirement rather than the conservative safety margin. That built-in headroom is what makes undervolting so consistently effective across nearly every Nvidia GPU.


Write Your Review
No reviews yet. Be the first to share your experience!