
- Top Pick: 87mm PLA09215B12H 4Pin Fan Replace for EVGA GTX 1080 1070 1060 GTX1060 GTX1070 GTX1080 VGA Cooler Graphics Video Card Fan
- Best Value: 87MM PLD09220S12H RTX3080 RTX3070 Graphics Card Fan Replacement for EVGA GeForce RTX 3070 3080 TI 3090 FTW3 Cooler Fan (Black B-Fan)
- Premium Choice: GPU Cooling Replacement Fan for ZO-TAC GTX 1070 1070TI 1080 AMP Extreme Series 4 Pin 87mm GA92S2U (fan1)
GPU fans are the first part of a graphics card to die and the cheapest part to replace, which is a fortunate combination almost nobody takes advantage of. A card grinding at 3,000 RPM or throttling because one fan has stopped is not a dead card — it is a $20 part and forty minutes. The hard bit is identifying the right replacement, because manufacturers do not publish fan part numbers and the connectors are not standardised. This page covers the identification properly: what to read off the label, what to measure, and the connector trap that catches most people.
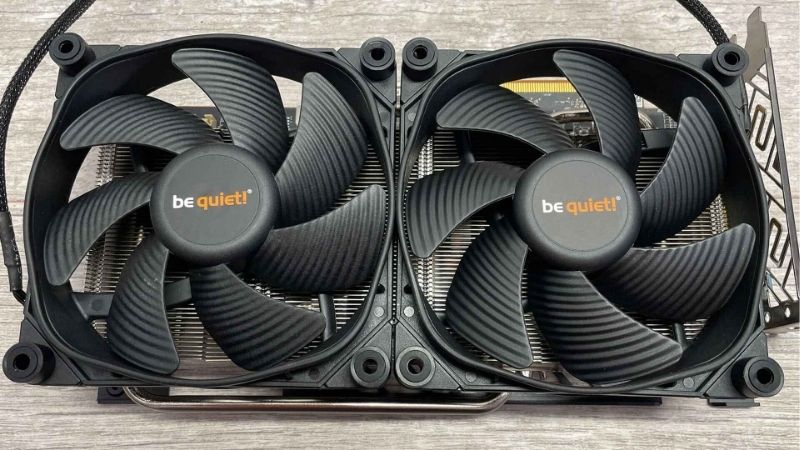
Why GPU Fans Fail and How to Tell
Fans are the only moving parts on a graphics card, which means they are where the wear goes. Everything else on the board is solid state and will outlive you. The fans will not.
The Three Failure Modes
Bearing wear. The most common by a wide margin. Symptoms: grinding, rattling, or a rhythmic clicking that changes pitch with RPM. It develops gradually and people habituate to it, which is why so many cards run loud for a year before the owner notices something is wrong.
Seized fan. One fan stops spinning entirely while the others continue. Symptoms: rapid thermal throttling under load, temperatures 15-25C above normal, and the other fans screaming to compensate. Look at the card while a game runs — if one of three fans is still, that is your answer.
Intermittent spin-up. The subtle one. A fan that starts late, stops randomly, or only spins when the card is horizontal. Bearings are failing but not gone. This is the stage to replace at, because the next stage is a seized fan and a throttled card.
Ex-mining cards concentrate all three. Fans that ran continuously for two years have done roughly ten years of gaming duty.
Bearing Types and Why They Matter
Not all fans are equal and the label frequently tells you which you have.
| Bearing type | Typical life | Noise as it ages | Found on |
|---|---|---|---|
| Sleeve | ~30,000 hrs | Degrades noticeably | Budget cards |
| Ball | ~50,000 hrs | Louder new, stable over time | Mid-range |
| Fluid dynamic (FDB) | ~60,000+ hrs | Quiet, degrades slowly | Premium cards |
| Dual ball | ~60,000 hrs | Stable, vertical-friendly | Higher-end partner cards |
The practical use of this table: if you are replacing a sleeve-bearing fan, spend the extra few dollars on a dual-ball or FDB replacement. It is a $5 difference for roughly double the life, and you are already doing the work.
One detail that catches people: sleeve bearings do not like running vertically. If your case mounts the GPU upright, sleeve fans wear substantially faster, and a vertical mount is a good reason to upgrade the bearing type when you replace.
Diagnosing Noise vs Actual Failure
Before buying anything, rule out the two causes that are not the fan.
Dust. A card that has never been cleaned can run 15C hotter, which makes the fans spin faster, which sounds like fan failure. Blow it out first. Free, ten minutes, and it resolves a surprising share of “my fans are dying” complaints.
Dried thermal paste. On a card over four years old this is near-certain. The card runs 15-20C hot, the fans compensate at high RPM, and you hear it as a fan problem. It is not — the fans are working correctly on a card that is too hot. Repasting drops temperatures and the fans go quiet on their own.
So: if the noise is a smooth rush that rises under load, that is thermal, not mechanical. Clean and repaste. If it is grinding, clicking or rattling, that is the bearing, and no amount of paste helps.
Identifying the Right Replacement
The genuinely hard part, and the reason this page exists. Card manufacturers do not publish fan part numbers, so you have to identify it yourself from the fan.
Reading the Label
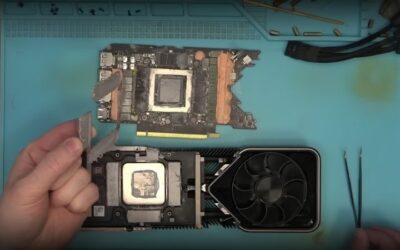
Every GPU fan has a sticker on the hub, on the side facing the heatsink. You have to remove the shroud to see it — four to six screws on the back of the card.
The label carries the model number, and that string is what you search for. Common manufacturers are Power Logic, Apistek, Everflow, Firstd and Delta, with model numbers looking like PLD09210S12HH or FDC10U12S9-C. That exact string, pasted into a search, will find the part.
Decode what you can: in PLD09210S12HH, the 09 indicates roughly 90mm frame, 12 is 12V, and the trailing letters indicate speed grade. You do not need to decode it perfectly — you need to match it.
Photograph the label before removing anything. You will want it later and the shroud will be reassembled by then.
Measuring Correctly
If the label is unreadable, measure. Three numbers matter and people usually only take one.
| Measurement | How | Common values |
|---|---|---|
| Frame width | Outer edge to outer edge | 75, 85, 90, 92, 95mm |
| Screw hole spacing | Centre to centre, diagonally | ~40-45mm typical |
| Hub diameter | Across the centre boss | Varies by model |
| Thickness | Blade face to mounting face | 10-15mm |
The one everyone misses is screw hole spacing. Two 90mm fans can have different mounting patterns and the wrong one simply will not bolt on. Measure diagonally between hole centres, not along the edge.
Thickness matters too. A fan 3mm thicker than the original will not sit inside the shroud, and you will discover this after the old one is out.
The Connector Trap
The single most common ordering mistake, and it is worth its own section.
GPU fans use small connectors — typically 2-pin, 3-pin or 4-pin, at a much finer pitch than case fans. They are not interchangeable with case fan connectors despite looking similar in photos, and a 4-pin case fan will not plug into a 4-pin GPU header.
Count the pins on your existing connector before ordering. A 4-pin GPU fan is PWM-controlled; a 2-pin is voltage-controlled only. Fitting a 2-pin where a 4-pin was means the card cannot regulate speed and the fan runs at full RPM permanently — technically working, permanently loud.
Also check the wire length. Replacements sold as generic frequently ship with cables too short to route through the shroud. And note that many cards use a single connector for two or three fans on a shared harness — in which case you either replace the whole set or splice, and replacing the set is the sane choice.
Pros and Cons of Replacing Them Yourself
The job is easy. Whether it is the right job is the question worth answering first.
The Replacement Process
Forty minutes, four steps, one screwdriver. Remove the shroud screws from the back of the card. Lift the shroud carefully — the fan cable is attached and short, so do not yank. Unplug the fan connector, unscrew the fan from the shroud, fit the new one, reconnect, reassemble.
Two cautions. Do not touch the heatsink or the die while the shroud is off unless you are also repasting — and if you have gone this far, you probably should be. And note that opening the card voids warranty on most models. If yours is in warranty, RMA it instead; do not open a card you could have replaced for free.
Test before final assembly. Reconnect the fan, power the card, confirm all fans spin, then screw the shroud back on.
When to Just Repaste Instead
If your symptom is heat rather than noise — temperatures 15-20C above normal, fans working hard but sounding smooth — the fans are fine and the paste is the problem. Replacing healthy fans will not lower your temperatures at all.
Since you are opening the card either way, the sensible move on anything over four years old is to do both: $20 of fans and $15 of paste and pads, one afternoon, and the card runs like it did when new. That is genuinely the best money-per-degree available in PC hardware.
Pros and Cons Summary
| Pros of replacing yourself | Cons and risks |
|---|---|
| $15-30 in parts against $50-90 at a shop | Voids warranty on most cards |
| 40 minutes and one screwdriver | Identifying the right fan is the hard part |
| Upgrade sleeve to dual-ball for a few dollars more | Wrong screw spacing or thickness means it will not fit |
| Fixes throttling caused by a seized fan outright | Connector pin count mismatches are easy to order wrong |
| Combine with a repaste for a near-new card | Will not help if the real problem is dried paste |
The pattern: the work is easy, the ordering is where people go wrong, and half the people who need fans actually need paste.
Why Keeping a Card Alive Matters More in 2026
A $20 fan replacement used to be a marginal decision — cards got cheaper every year and throwing hardware away was rational. That calculation has changed.
Replacement Stopped Getting Cheaper
Component and laptop prices have kept trending upward rather than settling back, and entry-level cards absorbed the sharpest share because memory is a large fraction of what they cost to build. The traditional pattern of a card drifting well below launch price by its third year has stopped operating entirely.
The consequence for a noisy fan: when the replacement card is not going to be cheaper next year, and used prices are anchored by a new market that will not fall, spending $20 to keep a working card running for another two years is a much better decision than it was in 2022. The card you have is worth more than it used to be, purely because the alternative stopped improving.
This is not a good outcome for anyone. It is the market you are in, and it argues strongly for the screwdriver over the shopping cart.
Prices Flattened, But Relief Is Distant
The good news is real and deserves precision rather than optimism. The steep climb of late 2025 has eased. Framework, which publishes unusually candid component pricing updates, has described a stretch of relative stability while continuing to warn that volatility persists. Prices stopped accelerating; they did not reverse.
New capacity is genuinely coming. OEMs can now source DDR5 from Chinese manufacturers such as CXMT, and Micron is building two fabs in Idaho. Both add real supply to a constrained market. Neither begins production before 2027-2028.
So the plan of “live with the noise until GPUs get cheap” has no arrival date attached. Two more years of grinding is not a strategy. Fix the fan.
When Fans Are Not the Problem
Worth saying plainly. If your card is loud because it is working hard, that is not a fault — a 360W card under load makes noise, and no fan swap changes physics. If your card is loud because it is at 88C, clean and repaste before touching the fans.
And if you came here because performance is bad rather than because of noise, fans are not your issue. A card that stutters while its average frame rate looks fine has run out of VRAM, and that is a hardware ceiling no maintenance addresses. If replacement fans and paste will not solve what is actually wrong, compare current pricing on 12GB and 16GB cards before spending an afternoon with a screwdriver.
See More:
- GTX 1650 vs RTX 3050
- Nvidia DIGITS
- Nvidia cuDNN
- Radeon RX 9070 XT vs RTX 5090
- PNY GeForce RTX 5080 review
Conclusion: Getting GPU Fans Right
GPU fans are the cheapest fix in PC hardware and the one most people skip, usually because identifying the replacement looks harder than it is. It is not hard — remove the shroud, photograph the label on the fan hub, search the model number, and order the match. If the label is gone, measure the frame width, the diagonal screw spacing and the thickness, and count the connector pins. That last one is where most wrong orders happen.
Two things to carry away. Grinding and clicking mean bearings and a fan swap; a smooth rush that rises under load means heat and a repaste — and on any card over four years old, do both while you have it open. And with replacement cards no longer getting cheaper and no correction expected before 2027, $20 and forty minutes to keep a working card running is a better decision now than it has been in years.
Frequently Asked Questions
What fan sizes do graphics cards use?
Most modern cards use 85mm, 92mm or 100mm frames measured across the blade tips, though the hub-to-hub screw spacing matters more when ordering a replacement. Two-fan mid-range cards typically use 90mm units, while triple-fan flagship coolers often mix a larger centre fan with two smaller outer fans that spin in opposite directions.
How do I know a GPU fan is failing rather than just loud?
Warning signs are a ticking or grinding noise that changes with fan speed, a fan that only starts after you nudge it, one fan reading 0 RPM in HWiNFO while its siblings spin, or rising hotspot temperatures at the same load. Rattle that vanishes when you lay the case on its side usually means worn sleeve bearings.
Why do my fans stay at zero RPM when the PC is idle?
Almost every card since the GTX 900 series uses a zero RPM or fan-stop mode that keeps the fans still below roughly 50 to 60 degrees Celsius. That is normal behaviour, not a fault. If it bothers you, MSI Afterburner lets you build a custom curve with a minimum speed of about 30 percent to keep them always spinning.
Can I replace GPU fans myself and what does it cost?
Yes. Replacement fans for common models cost roughly 10 to 30 dollars a pair on eBay or AliExpress, and the job is a shroud removal plus a few screws and a small 2-pin or 4-pin connector. You usually do not need to remove the heatsink, so the thermal paste and any warranty seal stay untouched.
Do I need to match the connector and voltage exactly?
You do. GPU fans use 2-pin, 3-pin or 4-pin PWM headers with proprietary pinouts, and a 4-pin PWM fan on a 2-pin voltage header will run at full speed constantly. Photograph the plug and the fan label, then match the model number, blade count, pin count and rated voltage, which is typically 12V.
As an Amazon Associate we earn from qualifying purchases at no extra cost to you.


Ready to decide? Our #1 pick for 2026 is the Sleeve.
Live price & availability on Amazon.





Write Your Review
No reviews yet. Be the first to share your experience!