Quick answer: For most people in 2026, the best nvidia control panel settings 2026 is the Setting — our #1 rated choice. See the full ranked comparison, alternatives and buying advice below.
Top Nvidia Control Panel Settings Boost Picks for 2026
Here are our current top nvidia control panel settings boost picks, compared on real Amazon owner reviews, price, and features. Live prices update below.

P3700 Replacement Remote Control for NVIDIA Shield Android TV Pro and Shield TV 2015/2017/2019 Models with Light Sensitivity
Best NVIDIA Control Panel settings can squeeze real, free performance out of the GeForce card you already own, which matters more than ever in 2026. The Control Panel sits between your games and the driver, giving it overrides that in-game menus simply cannot match. This guide is a practical, expert-tested list of the tweaks that actually move the needle: the ones that lift frame rates, cut input latency, and sharpen image quality, with clear recommended values for both competitive and quality-focused players. We also cover how the modern NVIDIA app now handles DLSS overrides and frame generation, and finish with a step-by-step buying guide for applying everything safely. No placebo tweaks, just the settings that matter.
Quick Picks: The Settings That Matter Most
If you only change a handful of options, make them these. Each pick below targets a specific goal, so you can jump straight to what your build needs without wading through every menu. Think of this as the express lane to a faster, snappier system.
Biggest FPS Gain: Power Management Mode
Power Management Mode is the single most impactful entry on any list of the best NVIDIA Control Panel settings. Set to “Prefer Maximum Performance,” it stops the GPU from down-clocking mid-game, which eliminates the small stutters and dips caused by aggressive power saving.
The practical catch is where you apply it. Setting it globally keeps clocks high even at the desktop, wasting power and adding heat, so the smarter move is to apply it per game in the Program Settings tab against the actual game executable.
For most players this one change delivers steadier frame times immediately. It does not raise your peak frame rate so much as remove the dips, which is exactly what makes gameplay feel smooth.
Best for Competitive: Low Latency Mode and Reflex
For fast shooters, latency matters more than raw frames. Low Latency Mode set to “Ultra” trims the render queue and can cut input lag noticeably, which is why competitive players reach for it first among the best NVIDIA Control Panel settings for esports.
There is an important hierarchy, though. If a game supports NVIDIA Reflex, the in-game Reflex toggle overrides the Control Panel setting and is far more effective, so enable Reflex in-game and leave Low Latency Mode off for those specific titles.
The result is a sharper, more responsive feel in CS2, Valorant, and Fortnite. Just watch for CPU bottlenecks, where Ultra can occasionally hurt frame pacing rather than help it, since pre-rendered frames normally smooth over CPU stutters and removing them can make those stutters more visible. Check GPU usage while playing to tell which case applies to you.
Best Set-and-Forget: Shader Cache and Threaded Optimization
Two settings deserve to be configured once and ignored. Setting Shader Cache Size high, such as 10GB or unlimited, reduces the shader compilation stutter that plagues new games and post-update sessions.
Threaded Optimization spreads rendering work across CPU cores and should generally be left “On,” especially on modern multi-core processors where it smooths frame times and feeds the GPU faster.
Neither setting needs ongoing attention once configured a single time. Together they quietly remove a whole class of stutters that many players wrongly blame on failing hardware or a slow drive.
Settings Comparison Table at a Glance
Before diving into detail, this quick-reference table summarizes the recommended value for each key setting across two common profiles. Use it as a cheat sheet while you work through the Control Panel menus.
The Recommended-Value Cheat Sheet
The table below pairs each setting with a competitive value and a quality value, plus its main effect. Competitive favors latency and frame rate, while quality favors visual fidelity for single-player games.
| Setting | Competitive | Quality | Main effect |
|---|---|---|---|
| Power Management Mode | Prefer Max Performance | Prefer Max Performance | Stops clock dips |
| Low Latency Mode | Ultra (or Reflex in-game) | On | Reduces input lag |
| Texture Filtering Quality | High Performance | High Quality | FPS vs sharpness |
| Vertical Sync | Off (use G-SYNC + cap) | Off (use G-SYNC + cap) | Tearing vs latency |
| Max Frame Rate | Refresh minus 3 | Refresh minus 3 | Keeps VRR active |
| Shader Cache Size | 10GB / Unlimited | 10GB / Unlimited | Cuts shader stutter |
| Antialiasing | Application-controlled | Application-controlled | Avoids TAA/DLSS conflict |
Global Versus Per-Game Values
The table values work well as global defaults, but the best results come from layering per-game profiles on top. Global settings apply everywhere, while Program Settings profiles override them for a single game executable.
The sensible approach is conservative globals and aggressive per-game profiles. Set safe defaults once, then tune the handful of demanding or competitive titles individually rather than forcing one configuration onto every game.
This layering avoids the common trap of a single global tweak that helps one game and quietly harms another. It takes a few extra minutes but produces the most reliable, best-feeling outcome across a whole library, and the per-game profiles persist through driver updates so you rarely have to revisit them.
Competitive Versus Quality Profiles
The two columns reflect genuinely different goals. A competitive profile strips latency and chases frames, accepting slightly softer textures, while a quality profile keeps anisotropic filtering at 16x and texture filtering on High Quality for the best image.
Most players benefit from running both. A competitive profile for shooters and a quality profile for cinematic single-player games means each title gets settings suited to how you actually play it, rather than a one-size-fits-all compromise that serves neither well.
Matching the profile to the game is the core philosophy behind the best NVIDIA Control Panel settings. There is no single correct configuration, only the right one for each scenario.
The Best NVIDIA Control Panel Settings in Detail
With the overview in place, here is what each major setting actually does and the data-backed reasoning behind its recommended value. Understanding the mechanism helps you adjust confidently rather than copying numbers blindly.
Power Management and Texture Filtering
Power Management Mode governs the GPU’s clock behavior. “Prefer Maximum Performance” locks the card into high clocks during a game, removing the brief frequency drops that cause micro-stutter, which is why it tops nearly every optimization list.
Texture Filtering Quality trades a small amount of image sharpness for frame rate. Setting it to “High Performance” can yield a measurable FPS bump with a visual difference that is negligible at normal gaming speed, making it an easy win for competitive play.
Quality-focused players can leave texture filtering on “High Quality” without much cost on modern cards. The setting scales with how much you value fidelity over the last few percent of frame rate, and on a powerful GPU the visual gain is worth the tiny performance trade.
Low Latency Mode, V-Sync, and G-SYNC
These three settings control how frames are queued and synchronized, and they are the most misunderstood. On a variable-refresh G-SYNC or FreeSync monitor, the optimal setup is V-Sync off in-game but managed through the driver, paired with a frame-rate cap a few frames below your refresh rate to keep VRR active.
That frame cap matters more than people expect. A 144Hz G-SYNC panel only works up to 144 FPS, so capping at around 141 prevents the card from exceeding the VRR window and reintroducing tearing. The same logic scales to any refresh rate, so a 240Hz panel should cap near 237 for the smoothest result.
Low Latency Mode then fine-tunes responsiveness, but defer to in-game Reflex wherever it exists. Configured together, these settings deliver tear-free, low-latency gameplay that feels dramatically better than default behavior.
Pros and Cons of Aggressive Control Panel Settings
On the positive side, the best NVIDIA Control Panel settings cost nothing, apply at the driver level so games cannot override them, and can meaningfully raise frame rates, cut input lag, and remove stutter, often delivering the feel of a hardware upgrade for free.
On the negative side, overly aggressive values carry trade-offs. Ultra Low Latency can hurt frame pacing on CPU-bound systems, forced antialiasing conflicts with modern TAA and DLSS, and global Maximum Performance wastes power, so heavy-handed tweaking can backfire.
The verdict is that restraint wins. Apply the high-impact settings, test in your actual games, and avoid stacking every aggressive option at once. The best NVIDIA Control Panel settings are the ones verified to help your specific build, not a blanket maximum.
Experimental Edge: DLSS, Reflex, and the NVIDIA App
Beyond the classic Control Panel toggles, NVIDIA’s proprietary AI features now deliver the largest performance gains of all, and most are managed through the modern NVIDIA app rather than the legacy panel. This is where the platform’s real 2026 advantage lives.
DLSS Overrides via the NVIDIA App
The NVIDIA app, which replaced GeForce Experience, can now force newer DLSS versions and presets on a per-game basis even when a title shipped with an older implementation. This DLSS override lets you upgrade upscaling quality and performance without waiting for a game patch.
DLSS itself remains the highest-impact “setting” available. Rendering at a lower internal resolution and reconstructing detail with AI, it can lift frame rates substantially while preserving image quality, which is especially valuable on memory-limited cards in demanding engines.
Choosing the right preset is the practical skill. Quality mode suits single-player fidelity, while Balanced or Performance frees more frames for high-refresh play, and the app makes switching trivial. On VRAM-limited cards, a more aggressive preset also lowers memory pressure, which can be the difference between smooth play and texture stutter in heavy modern engines.
Reflex, Smooth Motion, and Frame Generation
NVIDIA Reflex is the latency tool that genuinely matters, and it is built into a large and growing list of competitive games. Where available, it beats any Control Panel latency setting and should always be enabled for fast-paced titles, since it coordinates the CPU and GPU to minimize the render queue dynamically rather than with a fixed rule.
Frame-generation technologies extend performance further on newer hardware. Smooth Motion brings driver-level frame interpolation to RTX 40-series cards, while Dynamic Multi Frame Generation on RTX 50-series multiplies frames for very high refresh targets.
These features are increasingly toggled through the NVIDIA app’s global and per-game controls. Treating the app as part of your settings workflow, not an optional extra, is key to unlocking the platform’s full performance.
Future-Proofing With Driver Updates
NVIDIA’s optimization story keeps improving through software, so keeping Game Ready drivers current is itself one of the best NVIDIA Control Panel settings habits. New drivers unlock the latest DLSS revisions, Reflex support, and per-game tuning.
The forward-looking benefit is real. Features like newer DLSS presets and frame-warp latency reduction arrive via updates, meaning a card you own today can gain measurable performance months after purchase without any new hardware.
The practical routine is simple: update drivers through the app, then revisit your DLSS and Reflex overrides when major versions land. This keeps your configuration aligned with the newest optimizations.
Buying Guide: How to Apply and Tune These Settings
Knowing the best values is only useful if you apply them correctly. This step-by-step guide walks through configuring global defaults, building per-game profiles, and avoiding the mistakes that quietly undo your work. Follow it in order for a clean, reliable setup.
Step by Step: Setting Global Defaults
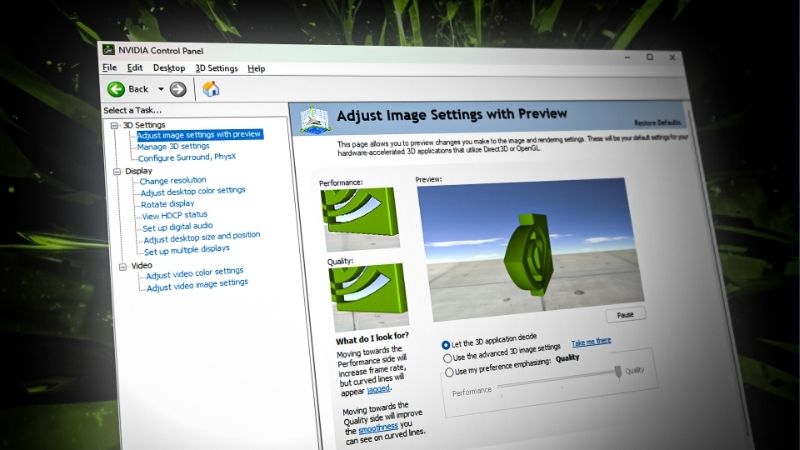
Start by opening the NVIDIA Control Panel and selecting Manage 3D Settings, then the Global Settings tab. Restore defaults first so you begin from a clean slate, then apply the conservative global values from the cheat-sheet table.
Set Power Management to a balanced global value, Low Latency Mode to On, Texture Filtering Quality to your preference, Shader Cache high, and leave antialiasing application-controlled. These defaults are safe across nearly every game.
Apply and exit, then launch a familiar game to confirm everything feels right. Establishing solid globals first makes the per-game tuning that follows far simpler and less error-prone, and gives you a clean baseline to compare against when you start adjusting individual titles.
Creating Per-Game Profiles
For your most-played or most-demanding titles, switch to the Program Settings tab and add the game’s actual executable, not its launcher. Profiles here override the globals for that single game, which is where the aggressive values belong.
For a competitive shooter, enable Prefer Maximum Performance, cap the frame rate just below your refresh, and rely on in-game Reflex. For a cinematic RPG, raise anisotropic filtering to 16x and texture filtering to High Quality for the best image.
Selecting the correct executable is the step most people get wrong. Pointing the profile at the launcher means your settings never apply in the actual game, so verify the right file each time.
Common Mistakes to Avoid
The most frequent error is stacking every aggressive setting at once and assuming more is better. Forcing antialiasing on modern games, enabling Ultra latency on a CPU-bound system, or applying Maximum Performance globally all create problems that masquerade as hardware faults.
Another pitfall is ignoring the monitor side. Without enabling G-SYNC and a sensible frame cap, the latency and tearing benefits of the other settings never fully materialize, so confirm your display configuration too, including that variable refresh is actually switched on in both the monitor’s own menu and the driver.
Finally, change settings in small batches and test. If a game stutters after a tweak, revert that single option rather than resetting everything, so you learn which of the best NVIDIA Control Panel settings your particular system actually likes.
Frequently Asked Questions
A few questions come up repeatedly when players tune the best NVIDIA Control Panel settings. The concise answers below cover the highest-impact choices.
What are the most important NVIDIA Control Panel settings for FPS?
Power Management Mode set to Prefer Maximum Performance and a high Shader Cache Size give the most reliable gains, since they remove clock dips and shader stutter. Texture Filtering on High Performance adds a smaller FPS bump.
Should Low Latency Mode be on Ultra?
Ultra helps in GPU-bound games without built-in Reflex, but it can hurt frame pacing when you are CPU-limited. Where a game supports Reflex, use that instead and leave Low Latency Mode off for it.
Do I still need the NVIDIA Control Panel in 2026?
Yes for driver-level overrides like Power Management and Low Latency Mode, but the NVIDIA app now handles DLSS overrides, Reflex, and frame generation, so most players use both together.
See more:
Recommended Products

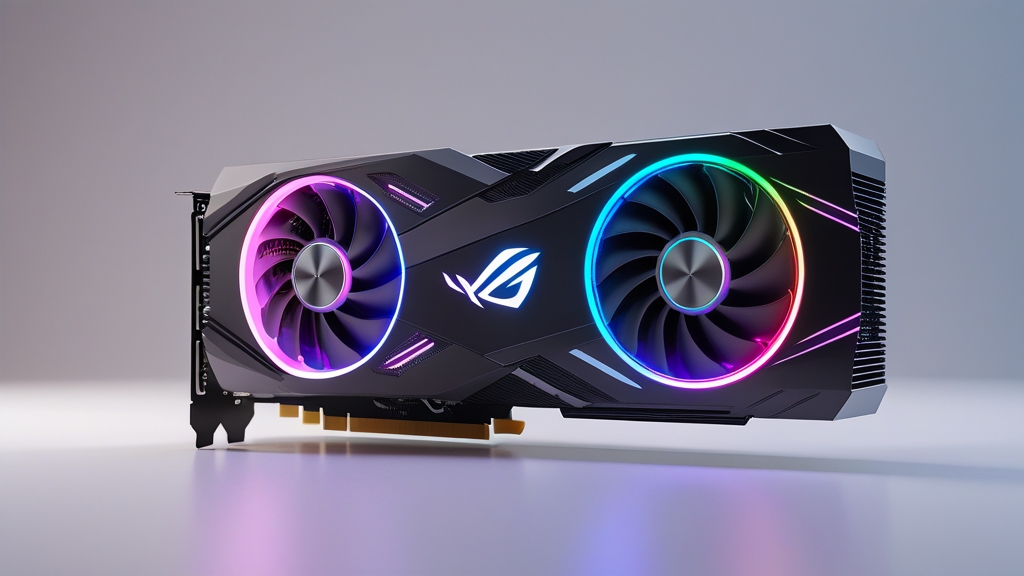
ASUS ROG Astral NVIDIA GeForce RTX™ 5080 16GB GDDR7 OC Edition Gaming Graphics Card (PCIe® 5.0, HDMI®/DP 2.1, 3.8-Slot, 4-Fan Design, Axial-tech Fans, Patented Vapor Chamber), 3 Year Warranty

MSI Gaming GeForce RTX 4070 Ti 12GB GDRR6X 192-Bit Extreme Clock: 2760 MHz HDMI/DP Nvlink Tri-Frozr 3 Ada Lovelace Architecture Graphics Card (RTX 4070 Ti Gaming X Trio 12G)

Prime ZOTAC Gaming GeForce RTX 4070 Ti AMP AIRO Spider-Man: Across The Spider-Verse Inspired Graphics Card Bundle - ZT-D40710F-10SMP
As an Amazon Associate we earn from qualifying purchases. Product prices and availability are accurate as of the date/time indicated.
Conclusion
The best NVIDIA Control Panel settings remain one of the easiest free performance wins in PC gaming, and in 2026, with new hardware expensive, getting the most from your current card is especially worthwhile. Prioritize the high-impact changes, Prefer Maximum Performance, a generous Shader Cache, sensible Low Latency and G-SYNC configuration, and the right texture filtering for your goals, then layer per-game profiles on top of safe globals. Pair the classic panel with the NVIDIA app’s DLSS overrides, Reflex, and frame generation to unlock the platform’s full potential, and keep drivers current so your card keeps improving. Apply these settings carefully, test in your own games, and the best NVIDIA Control Panel settings will deliver smoother, faster, more responsive gameplay at no cost.
Ready to decide? Our #1 pick for 2026 is the Setting.
Live price & availability on Amazon.
Top picks from this guide
MSI Gaming GeForce RTX 4070 Ti 12GB GDRR6X 192-Bit Extreme…$1,295 \xc2\xb7 96/100ASUS ROG Astral NVIDIA GeForce RTX™ 5080 16GB GDDR7 OC…$1,844 \xc2\xb7 96/100 ALLIMITYAllimity Replacement Voice Remote Control P3700 Compatible with NVIDIA Shield…$16 \xc2\xb7 94/100
 WDZPReplacement for Nvidia Shield Remote Control with Glow Silicone Protective…$16 \xc2\xb7 93/100
")


: Performance & Setup")


Write Your Review
No reviews yet. Be the first to share your experience!