
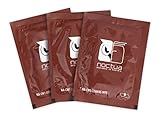
- Top Pick: Noctua NA-SCW1, Multipack Cleaning Wipes for Thermal Paste Removal 20 pcs
- Best Value: Thermal Grizzly Kryonaut – 1 Gram – Extremely High Performance Thermal Paste + 12 Cleaning Wipes 6 Wet & 6 Dry – for Demanding Applications and Overclocking CPU/GPU/PS4/PS5/Xbox
- Premium Choice: Thermal Paste kit, Roller Applicator for Thick Paste or Sticky, Easy-Use
Best way to remove thermal paste comes down to dissolving the old compound with a safe solvent and wiping it off with a lint-free material, whether you clean a CPU, a GPU, or a cooler base. This guide covers the products that remove paste cleanly, the technique that protects your hardware, and how to prep every surface for a fresh application.
As an Amazon Associate we earn from qualifying purchases at no extra cost to you. Product prices and availability are accurate as of the date shown and are subject to change.


As an Amazon Associate we earn from qualifying purchases at no extra cost to you. Product prices and availability are accurate as of the date shown and are subject to change.
By Ryan Cole
How to Find the Best Way to Remove Thermal Paste
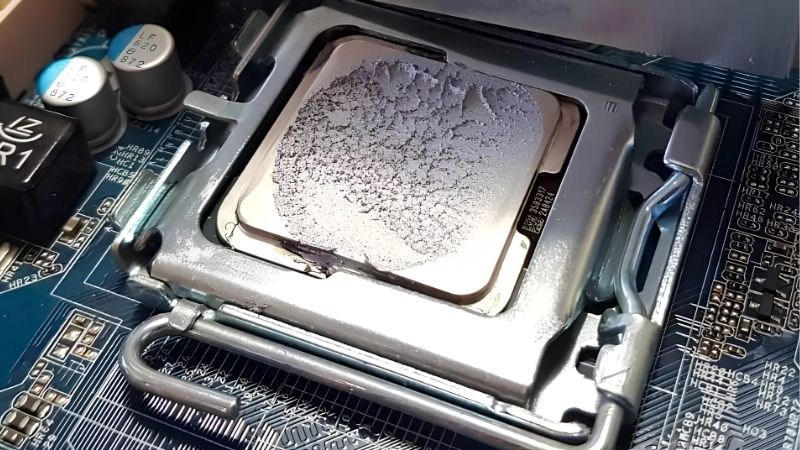
The best way to remove thermal paste is simple in principle: soften the old compound with a safe solvent, then wipe it away with a lint-free cloth without shedding fibers. Getting the details right, from solvent purity to protecting the pins, keeps the job clean across a CPU, GPU, or heatsink. A dust cleanout at the same time improves the temperature drop further. Let the surface dry completely before reassembling.
Choose a High-Purity Solvent
Isopropyl alcohol at 90 percent or higher is the standard choice because it dissolves paste fast and evaporates without residue. Lower-purity bottles hold more water, which dries slowly and can leave streaks on the metal surface.
Dedicated two-step removers exist for stubborn or hardened paste on an old cooler or chip. They break down the compound first, then a purifier preps the surface, which helps when plain alcohol struggles with a baked-on layer.
A quick note on value: a fresh repaste is one of the cheapest ways to cut temperatures on aging hardware, and a proper cleanup is the first step. With solvents and wipes costing very little, doing the removal well the first time saves you repeating it and improves the final result. Take your time during the teardown to avoid damaging plastic clips. Keep a lint-free wipe handy to finish the surface cleanly.
Use Lint-Free Materials
Lint-free wipes or coffee filters are ideal because they leave no fibers on the surface or in the socket. Ordinary paper towels shed tiny fibers that can interfere with clean cooler contact later on.
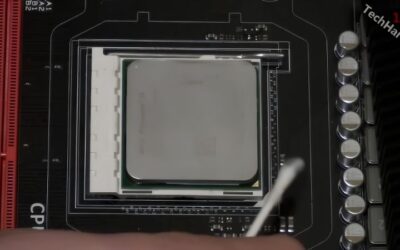
Cotton swabs reach the edges of a heat spreader, around capacitors, and into cooler fins a flat wipe cannot. Pair swabs for detail with a wipe for the main surface and you cover the whole area evenly. Note the screw layout as you go to make reassembly easier. Check current price and stock, since availability shifts over time.
Protect the Hardware and Socket
Apply solvent to the cloth rather than pouring it onto the chip, which keeps liquid away from the pins and socket. A lightly dampened wipe is all you need to lift the old compound safely.
If a CPU is still seated, work gently to avoid flexing the board, and never let alcohol pool around the socket. For a removed chip or a GPU die, hold by the edges and keep pressure light to protect delicate parts. A modest, even layer beats a thick blob for heat transfer. A dust cleanout at the same time improves the temperature drop further.
Prep Every Surface for Fresh Paste
Clean both the chip and the cooler base, since old paste on either side hurts heat transfer. Let each surface dry fully so no solvent remains before you apply new paste.
A completely dry, residue-free surface gives the fresh compound the best possible contact. Inspect under good light to confirm no streaks or fibers remain before reassembling. A modest, even layer beats a thick blob for heat transfer. A dust cleanout at the same time improves the temperature drop further.
Top Products for the Best Way to Remove Thermal Paste
These supplies cover everything from a quick wipe-down to removing stubborn, hardened paste. The best way to remove thermal paste usually combines a high-purity solvent with lint-free wipes, so check price and availability at the time of reading.
| Product | Type | Best For |
|---|---|---|
| 99% Isopropyl Alcohol | Solvent | Everyday removal |
| ArctiClean Kit | Two-step remover | Hardened paste |
| Arctic Thermal Material Remover | Solvent gel | Quick dissolve |
| Kimtech Kimwipes | Lint-free wipes | Streak-free wiping |
| Microfiber Cloth Pack | Reusable cloth | Main surface |
| Cotton Swabs | Precision tool | Edges and fins |
99% Isopropyl Alcohol
The workhorse for removing paste from a CPU, GPU, or cooler, since high-purity alcohol dissolves most compounds quickly and dries clean. A single bottle lasts many cleanups and doubles for general electronics work.
Very old, hardened paste can resist a single pass and need a second wipe. For routine removal, though, it is the most cost-effective and reliable option to keep on hand. Work on a clean, static-safe surface to protect the components. Take your time during the teardown to avoid damaging plastic clips.
ArctiClean Kit
A two-step system for stubborn paste, using a remover to break it down followed by a surface purifier. It is the pick when plain alcohol is not cutting through a baked-on layer on an old cooler.
It costs more than a bottle of alcohol and is overkill for simple jobs. When restoring neglected hardware, however, the extra step pays off. Store the tube sealed so it stays usable for future jobs. Note the screw layout as you go to make reassembly easier.
Arctic Thermal Material Remover
A gel-style solvent designed to cling to the surface and dissolve paste without running everywhere. It is convenient for a controlled removal around a seated chip or a vertical GPU.
You still need lint-free wipes to finish the job, so it is not a complete kit alone. As a targeted remover, it does its part well. Clean the old paste off fully with high-purity alcohol first. A modest, even layer beats a thick blob for heat transfer.
Kimtech Kimwipes
Lint-free wipes that leave no fibers behind, exactly what you want on a sealing surface. They pair perfectly with alcohol for a clean, streak-free finish on any component.
They are thinner than a cloth, so you may use a few per job. For guaranteed lint-free results, that is a small price to pay. Let the surface dry completely before reassembling. Work on a clean, static-safe surface to protect the components.
Microfiber Cloth Pack
Reusable microfiber handles the bulk of the wiping and can be washed and reused many times. It is a practical, low-waste choice for the main heat spreader or cooler base.
Cheaper cloths can occasionally shed, so buy a quality pack meant for electronics. Used with alcohol, a good microfiber cloth makes quick work of most paste. Keep a lint-free wipe handy to finish the surface cleanly. Store the tube sealed so it stays usable for future jobs.
Cotton Swabs
Simple swabs reach the edges of a heat spreader, cooler fins, and around delicate components a wipe cannot. They are essential for detail work on a bare die or a GPU.
On their own they cannot clean a whole surface efficiently. As a companion to wipes and alcohol, though, they finish the corners neatly. Work on a clean, static-safe surface to protect the components. Take your time during the teardown to avoid damaging plastic clips.
Frequently Asked Questions
Quick answers about the best way to remove thermal paste safely. Check current price and stock, since availability shifts over time. Clean the old paste off fully with high-purity alcohol first.
What is the best way to remove thermal paste from a CPU?
Dampen a lint-free wipe with high-purity isopropyl alcohol and gently wipe the surface, applying solvent to the cloth rather than the chip. Let it dry fully before applying fresh paste for clean contact. A dust cleanout at the same time improves the temperature drop further. Let the surface dry completely before reassembling.
Can I use rubbing alcohol to remove paste?
Only if it is 90 percent purity or higher, since lower grades hold more water and dry slowly. Higher purity evaporates cleanly and leaves no streaks on the metal. Take your time during the teardown to avoid damaging plastic clips. Keep a lint-free wipe handy to finish the surface cleanly.
Do I need to clean the cooler too?
Yes, remove old paste from both the chip and the cooler base, since either side reduces heat transfer. A clean pair of surfaces gives the best temperatures. Note the screw layout as you go to make reassembly easier. Check current price and stock, since availability shifts over time.
What should I never use to remove thermal paste?
Avoid water, abrasive materials, and lint-heavy paper towels that shed fibers. Stick to high-purity alcohol or a dedicated remover with lint-free wipes for a safe result. Store the tube sealed so it stays usable for future jobs. Note the screw layout as you go to make reassembly easier.
See More:
- Best micro ATX motherboard AM4
- Best CPU for B550 motherboard
- Best motherboard for Ryzen 7 5800X
- Best mATX AM5 motherboard
- What is the best capture card
Final Thoughts
The best way to remove thermal paste is a high-purity solvent plus lint-free wipes, applied gently with the liquid on the cloth rather than the hardware. Clean both the chip and the cooler base, let each dry completely, then reapply fresh paste. Keep alcohol and wipes on hand, and check current pricing before you restock. Clean the old paste off fully with high-purity alcohol first. A modest, even layer beats a thick blob for heat transfer.


Write Your Review
No reviews yet. Be the first to share your experience!