
The best way to apply thermal paste AM5 is the same basic method used on any desktop socket, with two details worth knowing: the heat spreader has an unusual octagonal shape with cutouts, and these processors are designed to run close to their thermal ceiling by default. Both details change the advice slightly.
As an Amazon Associate we earn from qualifying purchases at no extra cost to you. Product prices and availability are accurate as of the date shown and are subject to change.


As an Amazon Associate we earn from qualifying purchases at no extra cost to you. Product prices and availability are accurate as of the date shown and are subject to change.
By Ryan Cole
Quick answer: Clean both surfaces with isopropyl alcohol, place a single pea-sized dot of non-conductive compound in the centre of the heat spreader, then lower the cooler flat and tighten the screws a few turns at a time in a diagonal sequence. That is the best way to apply thermal paste AM5 in four steps.
What Makes the Best Way to Apply Thermal Paste AM5 Slightly Different
The method is familiar, but three characteristics of this platform are worth understanding before you start, because they explain why some advice written for older sockets does not translate directly. Older guides were written for flat spreaders.
The octagonal heat spreader
AM5 processors use a heat spreader with cut corners and slots that expose part of the substrate. Those cutouts are there for the surface-mounted components underneath, and compound that ends up in them serves no purpose at all. Compound in the cutouts does nothing at all.
The usable contact area is the raised central section. Aim your compound there rather than trying to cover the full outline of the part, since the recessed areas never touch the cold plate regardless of how much you apply. Aim for the raised central section only.
These chips run hot by design
AMD allows this generation to boost until it reaches 95C and then hold there while maintaining clock speed. Seeing that figure under a heavy workload is expected behaviour rather than evidence that your application went wrong. The reading alone will mislead you here.
Judge the result by clock speed rather than by the temperature reading. If the processor holds its boost clocks through a long workload, the mount is working, even though the number on screen looks alarming to anyone used to older chips. Held clocks are the signal that matters.
Retention and cooler brackets
The socket uses a retention frame that stays in place, and most coolers either clip to it or replace it with a backplate and screw-down mounting. The screw-down route generally seats the cold plate more evenly across the spreader. Screw-down mounting seats the plate evenly.
Check which hardware your cooler includes before starting. Some older boxed stock ships with AM4 brackets only, and discovering that with the processor already cleaned and exposed is a frustrating way to spend an evening. Check the bracket list before you start.
The Best Way to Apply Thermal Paste AM5, Step by Step
Work through these in sequence with the machine unplugged and the case laid flat. The table summarises what each stage needs before the sections below explain the detail. That order is the best way to apply thermal paste AM5 without surprises.
| Step | What you need | Key point |
|---|---|---|
| Remove the cooler | Long screwdriver | Warm the system first to soften old paste |
| Clean both surfaces | Isopropyl alcohol, lint-free cloth | Keep liquid out of the socket cutouts |
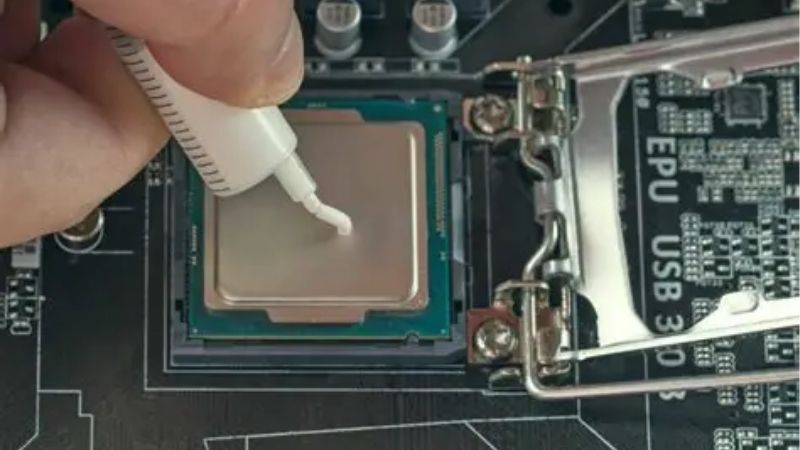
| Apply the compound | Non-conductive paste | One pea-sized dot in the centre |
| Mount the cooler | Backplate and screws | Tighten diagonally, a few turns at a time |
Removing and cleaning
Run the system for a few minutes first so the old compound softens, then power down and unplug before removing the cooler. Twisting the cold plate gently rather than pulling it straight up avoids lifting the processor in its socket. Softened compound releases far more easily.
Clean both the heat spreader and the cold plate with isopropyl alcohol on a lint-free cloth. Keep liquid away from the exposed substrate around the edges of the spreader, and let both surfaces dry fully before applying anything new. Let both surfaces dry completely first.
Applying the compound
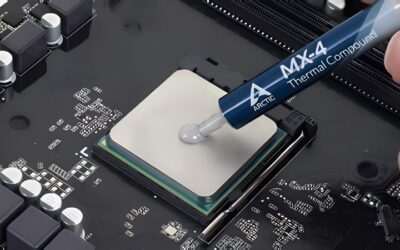
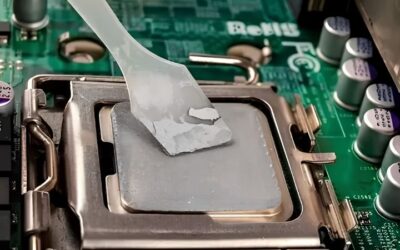
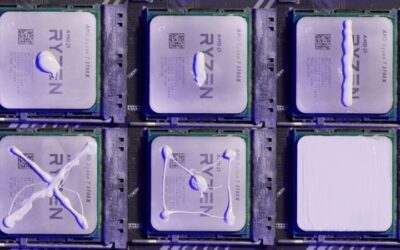
Place a single dot roughly the size of a pea in the centre of the raised section. Mounting pressure spreads it outward from there, which covers the contact area evenly without trapping air the way multiple separate blobs can. Pressure spreads it from the centre outward.
Use a non-conductive compound unless you have specific reason not to. The cutouts in the AM5 spreader sit close to surface-mounted components, which makes a conductive product a meaningfully worse idea here than on a flat older heat spreader. Conductive compound is a poor fit here.
Mounting and checking
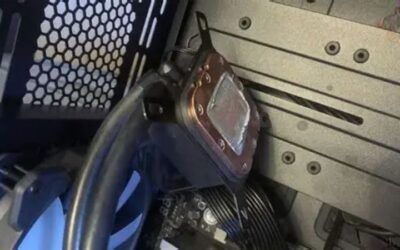
Lower the cooler flat rather than at an angle, then tighten the screws a few turns at a time in a diagonal pattern until they stop. Even pressure matters far more to the final result than the compound you chose. Even pressure beats any compound choice.
Boot the machine and run a sustained workload rather than a short benchmark. Watch whether the clock speed holds through the run, and check that idle temperatures look sensible once the system has been sitting quietly for a while. A short benchmark tells you very little.
Common Mistakes to Avoid
Most poor results on this platform trace back to the same handful of errors, and none of them involve the brand of compound sitting on the desk. None of them are about the best way to apply thermal paste AM5 being complicated.
Filling the spreader cutouts
Compound pushed into the recessed sections of the heat spreader does nothing useful and makes the next removal messier. Keep the application on the raised central area where the cold plate actually makes contact. Removal becomes messier for no benefit.
Tightening one screw fully first
Seating one corner completely before the others tilts the cold plate and pushes compound to one side, leaving a thin area under the opposite corner. A diagonal sequence in small increments avoids the problem entirely. Small increments keep the plate level.
Panicking at 95C
Reapplying compound repeatedly because the processor reaches its designed ceiling wastes an evening and risks damaging something. Check whether clocks are holding first, since a chip sitting at 95C at full boost is behaving normally. Repeated remounting risks real damage.
Frequently Asked Questions
Questions readers ask most about the best way to apply thermal paste AM5, covering quantity, cleaning products, timing and expected results. They assume a current BIOS and stock settings.
How much paste should I use?
A pea-sized dot is right for these processors. Excess simply squeezes past the edge of the spreader without improving contact, and with a non-conductive compound that overspread is untidy rather than dangerous. Overspread is untidy rather than harmful.
Can I use anything other than isopropyl alcohol?
Isopropyl at 90% or higher is the standard choice because it evaporates cleanly and leaves no residue. Avoid household cleaners and anything oil-based, since residue between the surfaces costs more than the old compound did. Residue costs more than old compound did.
How often should I repaste an AM5 system?
Every two to three years for a daily-use machine, or sooner if idle temperatures drift upward over months. Systems that heat and cool frequently see compound migrate faster than those left running at a steady load. Drift in idle temperature is the trigger.
Will a repaste lower my temperatures much?
If the previous application was old, uneven or badly mounted, several degrees is realistic. If the mount was already good, expect very little, since these processors are designed to reach their ceiling regardless of the cooler fitted. The ceiling is reached by design here.
Read next: Which thermal paste is best | Best CPU cooler for Ryzen 5 7600X
Final Thoughts
The best way to apply thermal paste AM5 comes down to clean surfaces, one pea-sized dot of non-conductive compound and an even diagonal tightening sequence. Judge the result by whether clock speeds hold rather than by the temperature reading alone. Clean surfaces and even pressure do the rest.




Write Your Review
No reviews yet. Be the first to share your experience!