
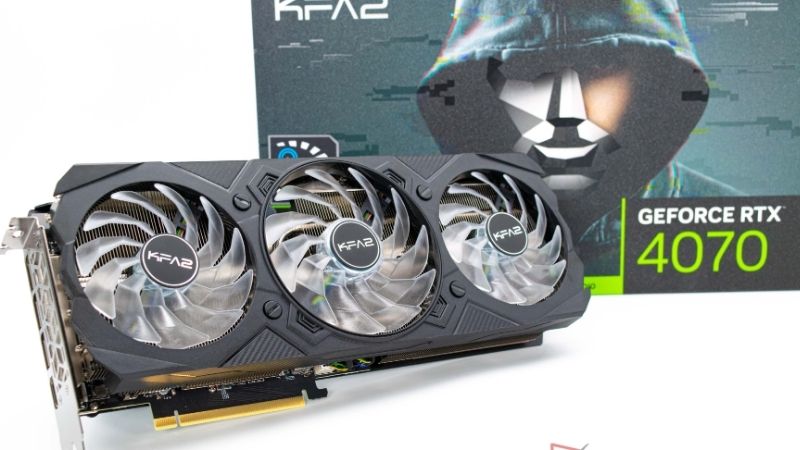
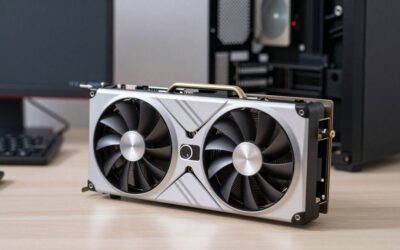
Modern graphics cards have grown into long, heavy slabs of metal and fans. A flagship card can stretch past 300 mm, occupy three or four slots, and hang almost all of that weight off one corner of the motherboard. The result is GPU sag: the far end of the card droops downward, sometimes by several millimeters. Sag looks untidy, but the bigger concern is mechanical. The card’s weight pulls against the PCIe slot at an angle, and over months of heat cycles that leverage can stress the slot and the card’s PCB near the connector. An anti sag bracket solves the problem simply, by propping up the unsupported end of the card so the slot only has to hold it in place, not carry it.
This guide compares five anti sag brackets covering the main mounting styles: floor-standing pillars, magnetic stands, screw-mounted braces, and motherboard-mounted supports. One adds ARGB lighting for showcase builds, while others disappear inside the case. Each section includes a specs table so you can match the bracket to your case.
As an Amazon Associate, we earn from qualifying purchases.
How to Choose an Anti Sag Bracket
Start by measuring. With the card installed, measure the vertical distance from the surface below the card, usually the PSU shroud or case floor, up to the underside of the card’s cooler shroud at the far end. That gap is the working height your bracket must cover, and every stand lists a height range for exactly this reason. Measure near the front corner of the card, since that is where support does the most good. If your case has bottom intake fans, measure from the fan frame instead, or choose a bracket that mounts somewhere else.
Next, pick a mounting style. Vertical stands and pillars sit on the PSU shroud and push up from below. They are the easiest to install and remove, but they need a flat, solid surface under the card. Magnetic base models grip a steel shroud for extra stability, though magnets do nothing on aluminum, plastic, or glass. Screw-mounted L braces attach to the case’s expansion slot screws and reach across under the card, which suits cases with fans on the floor. Motherboard-mounted brackets bolt to the motherboard standoffs and hide behind the card, the cleanest option when your board and case allow it.
Check the contact point. A good bracket touches the card on a padded surface, ideally against the metal frame or a reinforced corner of the cooler shroud rather than a fan blade or exposed PCB. Raise the support until it just meets the card and takes the droop out. Cranking it higher lifts the card above level and moves the stress in the opposite direction. A bracket should make the card sit level, not jack it upward.
Finally, think about clearance and looks. A stand occupies space that might block a bottom fan or a radiator hose, and ARGB models need a free 5V 3-pin header plus one more cable to route. In a windowless workstation, the plainest pillar is the sensible pick; in a desk display piece, a lit bracket can join the lighting design.
ASUS ROG Herculx Graphics Card Holder

| Spec | Detail |
|---|---|
| ASIN | B0B173F6RM |
| Type | Vertical stand |
| Material | Zinc alloy |
| Height range | 72 to 128 mm |
| Lighting | Aura Sync RGB |
| Installation | Toolless, with spirit level |
The ROG Herculx is the premium take on the simple support pillar. Its zinc alloy body feels closer to machined hardware than a plastic prop, and that density helps it stay planted under genuinely heavy cards. The 72 to 128 mm height range covers the gap in most mid-tower and full-tower cases with a standard PSU shroud, and adjustment is handled by a wheel rather than a threaded rod, so fine-tuning the last millimeter is quick.
Installation is completely toolless. You slide the unit under the card, lift the extending platform, and turn the wheel until the padded contact meets the shroud. A release button lowers the platform again for removal. The included spirit level is magnetic and detachable, which sounds like a gimmick until you use it: it gives an objective answer to whether the card is level instead of eyeballing it through tempered glass. Its addressable RGB syncs with ASUS Aura software, so it can match an ROG-themed build. Choose it if you run a heavy flagship card and want an install you can redo in seconds after swapping hardware. Skip it if your gap falls outside its range or you want support that hides out of sight.
Cooler Master Atlas ARGB GPU Support Bracket

| Spec | Detail |
|---|---|
| ASIN | B0CN3Y5DN2 |
| Type | Stand, vertical or horizontal |
| Material | Aluminum, tempered glass |
| Model | MCA-U000R-AGSBTG-00 |
| Lighting | Edge-lit ARGB, infinity mirror |
| Mounting | Magnetic base, tool-free |
The Atlas treats the GPU support as a showcase piece. Its tempered glass column carries edge-lit ARGB and an infinity mirror effect, so the bracket looks like a light installation that happens to hold your card up. Under the styling, the stand is aluminum, and the support mechanism slides and locks so you can position the contact point along the card rather than accepting a fixed spot.
The Atlas’s party trick is its dual-axis design. It works as a conventional vertical stand under a horizontally mounted card, and it can also reconfigure to support a vertically mounted GPU, a rarer need most pillars cannot address at all. Magnets in the base keep it steady on a steel shroud, and installation is tool-free. Cooler Master rates it for the largest current cards, up to RTX 4090 class hardware. Because it is a visual centerpiece, measure your shroud space carefully: the glass column is wider than a plain pillar, and bottom fans or radiator hoses can crowd it out.
upHere 5V 3Pin ARGB GPU Brace Support G276ARGB

| Spec | Detail |
|---|---|
| ASIN | B08YYB3WM2 |
| Type | Screw-mounted horizontal brace |
| Length | 276 mm |
| Lighting | Built-in 5V ARGB strip |
| Connection | 5V 3-pin ARGB header |
| Adjustment | Sliding support pad |
The upHere G276ARGB takes the opposite approach to a floor stand. Instead of propping the card from below, it is a long horizontal brace that screws into the case at the expansion slot screws and runs underneath the card, with a sliding pad you position under the card’s far end. Because nothing stands on the PSU shroud, this design works where the floor is covered by intake fans or the shroud sits too far below the card for a pillar to reach.
The brace is 276 mm long, which suits full-length cards, and the support pad adjusts along the bar so it can meet the card at a strong point on the shroud. A built-in ARGB strip connects to a standard 5V 3-pin addressable header and syncs with motherboard lighting software. That detail matters: this is a 5V addressable connection, not a 12V RGB one, and the two are not interchangeable.
Pick the upHere brace if your case floor is busy, your card is long, and you want a line of synced light under the GPU as a bonus. Installation takes a little more work, since you will be handling slot screws and routing one lighting cable, but in exchange the support is fixed firmly to the chassis and cannot be knocked over when you move the PC.
Lian Li GB-002 Graphics Card Anti-Sag Bracket

| Spec | Detail |
|---|---|
| ASIN | B099ZBFHKM |
| Type | Motherboard-mounted support |
| Mounting | Bolts to motherboard standoffs |
| Visibility | Hidden behind the card |
| Lighting | None |
| Best for | Clean, minimalist interiors |
The GB-002 is the bracket you buy when you do not want to see a bracket at all. Rather than standing on the shroud or screwing into the slot covers, it mounts to the motherboard’s standoff points and supports the card from behind, so from the side window the card simply appears to float level on its own. For builders chasing a clean interior, that invisibility is the entire point.
Because it anchors to the motherboard tray area, the GB-002 is unaffected by PSU shroud height, bottom fans, or floor material. There is no pillar to knock loose when you carry the PC to another room, and nothing competes for space with radiator tubing.
The trade-offs are compatibility and effort. Your motherboard and case need the right standoff positions, and installation means working around an installed board, easiest during a fresh build rather than as an afterthought. It also offers no lighting and no quick removal. If you are building a tidy system from scratch and the fit checks out, the GB-002 delivers the most elegant support here. If you swap cards often, a toolless stand will serve you better.
nkomax GPU Brace Support, Large (74-120mm)

| Spec | Detail |
|---|---|
| ASIN | B09FPJL1KY |
| Type | Vertical pillar stand |
| Material | Aluminum |
| Height range | 74 to 120 mm |
| Base | Hidden magnet, anti-scratch pad |
| Adjustment | Sliding, tool-less screw |
The nkomax brace is the straightforward classic of this category: a slim aluminum pillar with a magnetic base, a padded top, and a sliding mechanism that locks with a tool-less screw. There is no lighting, no software, and nothing to configure. You set the height, stand it under the far end of the card, and the sag is gone.
The Large size adjusts from 74 to 120 mm, matching the shroud gap in most standard towers, and nkomax sells smaller sizes for compact cases, so measure first and order the size that brackets your measurement with room to spare. The hidden magnet adds grip on steel shrouds, and the anti-scratch pad protects the card where the pillar touches it.
This is the right choice for a workstation, a windowless case, or any build where the bracket’s job is purely mechanical. What you give up versus the premium stands is fine adjustment feel and presence: the nkomax is a simple prop, and it looks like one. For many builders, that is exactly the point.
Frequently Asked Questions
Does GPU sag actually damage a graphics card or motherboard?
It can over time. The card’s weight hangs off the PCIe slot at an angle, so the slot, the solder joints near it, and the edge of the card’s PCB carry a constant bending load. Plenty of systems run for years with mild sag and no failure, but heavy cards in cases that get moved are the risky combination. A bracket removes that load cheaply, which is why so many case and card makers now include one.
How do I measure my case before ordering a bracket?
Install the card, then measure from the surface directly below its far end, usually the PSU shroud, up to the underside of the cooler shroud. That distance must fall inside the bracket’s stated height range, ideally near the middle so you have adjustment in both directions. Also check that no bottom fan, cable, or radiator hose occupies the spot where a stand would sit.
Where exactly should the bracket touch the card?
Place the contact near the far front corner of the card, on a solid part of the cooler shroud or metal frame. Never rest it against a fan blade, fan hub, or bare PCB. Raise it only until the card sits level; pushing the card above level just reverses the stress on the slot instead of removing it.
Will a magnetic base work in every case?
No. Magnets only grip steel. Many PSU shrouds are steel, but some are aluminum or plastic, and some cases have open floors with fans below the card. On a non-steel surface a magnetic stand still works as a plain prop, it just loses the extra grip. If your floor is unsuitable, choose a screw-mounted brace or a motherboard-mounted bracket instead.
Product and ASIN Reference
| Product | ASIN |
|---|---|
| ASUS ROG Herculx Graphics Card Holder | B0B173F6RM |
| Cooler Master Atlas ARGB GPU Support Bracket | B0CN3Y5DN2 |
| upHere 5V 3Pin ARGB GPU Brace Support G276ARGB | B08YYB3WM2 |
| Lian Li GB-002 Graphics Card Anti-Sag Bracket | B099ZBFHKM |
| nkomax GPU Brace Support, Large (74-120mm) | B09FPJL1KY |

Write Your Review
No reviews yet. Be the first to share your experience!