
- Top Pick: NVIDIA Tesla L4 24GB PCIe Graphics ACELLERATOR HH/HL 75W GPU 900-2G193-0000-000
- Best Value: NVIDIA Quadro RTX 6000
- Premium Choice: NVIDIA GEFORCE GTX 1080 Ti – FE Founders Edition (Renewed)
Ubuntu 24.04 install nvidia drivers is a task that used to intimidate Linux newcomers, but in 2026 it is genuinely straightforward if you use the right method. Ubuntu now packages Nvidia drivers cleanly, and the tooling handles the tricky parts for you. This guide walks through the reliable way to install, the exact commands, how to deal with Secure Boot, and how to confirm everything works.

Editor's Pick
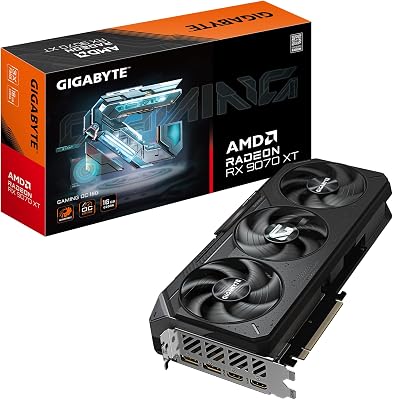
GIGABYTE Radeon RX 9070 XT Gaming OC 16G Graphics Card, PCIe 5.0, 16GB GDDR6, GV-R9070XTGAMING OC-16GD Video Card

The Right Way to Install Nvidia Drivers on Ubuntu 24.04
Before touching the terminal, it helps to know which approach to trust. Ubuntu offers several routes, but one stands out for stability and hassle-free updates, and understanding why prevents most headaches.
As an Amazon Associate we earn from qualifying purchases at no extra cost to you.



Why Use the ubuntu-drivers Tool
The contrast becomes obvious the first time a kernel update lands. Systems using the packaged driver rebuild their module automatically and keep working, while machines running a manual runfile install can boot to a black screen until the driver is reinstalled by hand. That difference alone is why seasoned Linux users steer newcomers toward the packaged route.
The recommended method is Ubuntu’s own ubuntu-drivers tool, which installs the driver through APT so kernel-module rebuilds, Secure Boot prompts, and future updates all stay tied to the package manager. This is the safest, most maintainable path.
Installing this way means that when your kernel updates, the driver module rebuilds automatically through DKMS, avoiding the classic Linux problem of a kernel update breaking graphics. Everything stays managed by the system.
By contrast, manual runfile installers from Nvidia’s website sit outside the package manager and are far more likely to break on kernel updates, which is why the packaged route is preferred for almost everyone.
Choosing the Recommended Branch
The recommended label exists precisely so you do not have to track Nvidia’s release numbers yourself. Canonical tests these branches against your hardware and marks the one that balances stability and features, so trusting it is not laziness but the sensible default that avoids the pitfalls of chasing the absolute newest version.
Ubuntu marks one driver branch as recommended for your specific GPU, and that is almost always the one to install. It balances stability and features for your hardware without you needing to research version numbers.
You can see the options by running sudo ubuntu-drivers devices, which lists the available branches and flags the recommended one. For most users, accepting that recommendation is the correct choice.
Advanced users who need a newer branch for the latest hardware can select a specific version instead, but the recommended branch is the reliable default that keeps a desktop stable day to day.
The Available Methods
It is worth matching the method to your temperament. A cautious desktop user is best served by the graphical Additional Drivers tab, a comfortable terminal user by the ubuntu-drivers command, and only someone who genuinely needs a bleeding-edge release should reach for the PPA and accept the maintenance risk that comes with it.
There are three practical routes: the command-line ubuntu-drivers tool, the graphical Additional Drivers tab in Software and Updates, and the graphics-drivers PPA for newer releases. Each suits a different comfort level.
The graphical method is friendly for beginners, letting you pick a driver from a menu and apply it with a click, all still managed through APT for clean updates later.
The PPA route offers newer drivers than the default repository but is not officially supported and can break after kernel updates, so it is best reserved for users with a specific reason to need the very latest version.
Step-by-Step Installation
With the approach chosen, the actual install takes only a few commands. Follow these in order and you will be running the proper Nvidia driver in minutes.
Update the System and Check Devices
Do not skip the update step, tempting as it is. Installing a driver against an out-of-date system is a common cause of mismatched dependencies and odd failures, whereas a quick refresh first ensures the driver builds against current packages and dramatically reduces the chance of a rocky install.
Start by refreshing your package lists and upgrading existing packages with sudo apt update followed by sudo apt upgrade. This ensures the driver installs against a current system.
Next, run sudo ubuntu-drivers devices to see your GPU and the available driver branches. Note the one marked recommended, since that is the version you will normally install.
Taking a moment to read this output confirms Ubuntu has correctly detected your card, which is reassuring before you commit to installing anything.
Install the Driver
For almost everyone, the autoinstall command is the whole story and there is no need to overthink version numbers. Reserve the explicit-version approach for cases where you have a documented reason to pin a particular branch, such as compatibility with a specific CUDA toolkit or a known-good release for your workload.
For the simplest path, run sudo ubuntu-drivers autoinstall, which installs the recommended branch and resolves dependencies automatically. This single command handles the whole job for most users.
If you prefer a specific version, install it directly with a command like sudo apt install nvidia-driver-570, replacing the number with the branch you want. This gives explicit control while staying inside the package manager.
Either way, the driver installs cleanly through APT, so future updates and kernel rebuilds are handled automatically rather than requiring manual reinstalls.
Secure Boot, Reboot, and Verify
The Secure Boot enrollment step trips up many first-timers, so it helps to know it is expected rather than a sign something broke. You simply set a temporary password during install and confirm it through the blue MOK screen on reboot, after which the signed driver loads normally and you need never repeat it.
If your system has Secure Boot enabled, the installer may prompt you to enroll a key by setting a password, which you confirm on the next reboot through the MOK management screen. This step is normal and important.
After installation, reboot your machine so the new driver loads. Do not worry if the system seems to pause during boot; allow a couple of minutes for it to complete.
Once back at the desktop, verify the install by running nvidia-smi, which should display your GPU, driver version, and usage. If it lists your card, the installation succeeded.
Wayland, Troubleshooting, and Trade-Offs
Modern Ubuntu adds a few considerations worth knowing, especially around Wayland and recovering from a bad install. These round out a confident setup.
Wayland in 2026
For anyone who abandoned Wayland on Nvidia years ago after a frustrating experience, it is genuinely worth another look now. The Explicit Sync work in recent drivers has resolved the flickering and artifacts that plagued earlier attempts, and many users who assumed they were locked to X11 will find Wayland now simply works.
For years, Nvidia on the Wayland display server meant flickering and artifacts, pushing users back to X11. In 2026 that has largely changed thanks to Explicit Sync support in the Nvidia 570 series and newer drivers.
With a current driver, Wayland sessions now run smoothly on Nvidia hardware, and tools like nvidia-settings can manage clocks and fan profiles without an X11 fallback. For most users, Wayland is finally a comfortable default.
If you still hit a Wayland-specific quirk, switching to an X11 session at the login screen remains an easy fallback, but far fewer people need to do that than in previous years.
Fixing a Black Screen
Knowing this recovery path in advance removes most of the fear from installing a driver. Because you can always reach a working desktop through nomodeset and either reinstall cleanly or fall back to Nouveau, a bad install is a minor detour rather than the system-breaking disaster it can feel like in the moment.
If you boot to a black screen after installing a driver, the fix is to boot with the nomodeset option temporarily. At the GRUB menu, edit the boot entry and add nomodeset to reach your desktop.
Once in, you can reinstall the recommended driver cleanly, or if needed, purge the Nvidia packages with sudo apt purge nvidia-* and reboot to the open-source Nouveau driver before trying a different version.
This recovery path means a bad install is never a dead end; you can always get back to a working desktop and try again with the correct branch.
Pros and Cons of Each Method
The clear takeaway is that stability should win for the vast majority of users. Unless you have a concrete reason to chase the newest driver, the ubuntu-drivers tool delivers everything a typical gamer or creator needs while keeping the whole setup managed, predictable, and easy to recover if anything ever goes wrong.
Each installation route has strengths and weaknesses, so the table below lays out the pros and cons to help you pick the one that matches your needs and comfort level.
| Method | Pros and cons |
|---|---|
| ubuntu-drivers (recommended) | Stable, APT-managed, auto DKMS rebuilds; not always the newest version |
| Graphical Additional Drivers | Beginner-friendly, still APT-managed; fewer options than the CLI |
| graphics-drivers PPA | Access to newer drivers; unofficial and can break on kernel updates |
For the vast majority of users, the ubuntu-drivers tool is the right choice, with the PPA reserved for those who specifically need the newest release and accept the extra risk.
See More:
- TechPowerUp GPU
- Nvidia H200 GPU price
- RTX 5050 Mobile
- Nvidia competitors
- Nvidia Reflex low latency on or off
The Bottom Line on Ubuntu 24.04 Install Nvidia Drivers
To install nvidia drivers on Ubuntu 24.04 reliably, use the ubuntu-drivers tool to install the recommended branch, handle any Secure Boot prompt, reboot, and confirm with nvidia-smi, and enjoy the much-improved Wayland experience that current drivers deliver. If you are building a new Linux gaming or workstation rig and want hardware that takes full advantage of these modern drivers, tap the link on our site to check today’s best GPU deals before you buy.
Frequently Asked Questions
What is the simplest way to install NVIDIA drivers on Ubuntu 24.04?
Run sudo ubuntu-drivers devices to list what the system detects and which branch is recommended, then sudo ubuntu-drivers install to apply it, and reboot. This pulls the packaged driver from the Ubuntu archive, sets up DKMS so the kernel module rebuilds after kernel upgrades, and avoids the fragility of the manual run file installer from NVIDIA’s website.
Should I use the open kernel modules or the proprietary ones?
Use the open modules on Turing and newer, where package names end in -open; NVIDIA now treats them as the default and they are required for the newest architectures. The fully proprietary modules remain necessary for older Maxwell and Pascal cards. Mixing the two on one system causes module load failures, so remove one completely before installing the other.
Why does the driver fail to load after installation?
Secure Boot is the usual cause. When Secure Boot is enabled, the newly built kernel module must be signed and its key enrolled through the MOK manager, which prompts for a password during installation and again on the next reboot at a blue enrolment screen. If you missed that prompt, run sudo mokutil –import on the generated key or disable Secure Boot in firmware.
How do I confirm the driver is actually working?
Run nvidia-smi, which should print the driver version, CUDA version and a table of detected GPUs with temperature and memory usage. If it reports that no devices were found or that it cannot communicate with the driver, the module is not loaded. Check lsmod for nvidia entries and dmesg for module signature or version mismatch errors.
Does the driver work properly under Wayland on 24.04?
Largely yes on recent driver branches, with explicit sync support having resolved most of the historic flickering in Electron and XWayland applications. Some professional applications, screen capture tools and older games still behave better under X11. Ubuntu lets you pick the X11 session from the gear icon on the login screen if you hit compatibility problems.
Ready to decide? Our #1 pick for 2026 is the ubuntu-drivers (recommended).
Live price & availability on Amazon.

Write Your Review
No reviews yet. Be the first to share your experience!