
- Top Pick: Ubuntu 26.04 LTS USER GUIDE For Beginners 2026: Navigating the Desktop, Managing Software, Staying Secure, Solving Everyday Problems, and Building Confidence with Linux for Home, School, and Work Use
- Best Value: Beamo Ubuntu Desktop 24.04.3 LTS 64-bit Bootable USB Flash Drive – Live USB for Installing and Repairing Ubuntu Desktop
- Premium Choice: 32GB 9-in-1 Linux Bootable USB Drive for Beginners | Multiboot installer for Ubuntu Mint MX Zorin Fedora Elementary live try install and boot repair
Ubuntu uninstall Nvidia drivers is a task most Linux users hit for a very practical reason: a proprietary driver is causing a black screen, a login loop, a broken external display, or a conflict after a kernel update, and the cleanest path forward is to remove it properly. Unlike a single-click uninstall, doing this on Ubuntu means understanding what you are removing, running the right commands in the right order, and having a safe fallback so you do not end up staring at a blank screen. This review walks through exactly that: why removal takes care on Linux, the commands that do it cleanly, how to recover if something goes wrong, and when the smarter move is different hardware entirely.
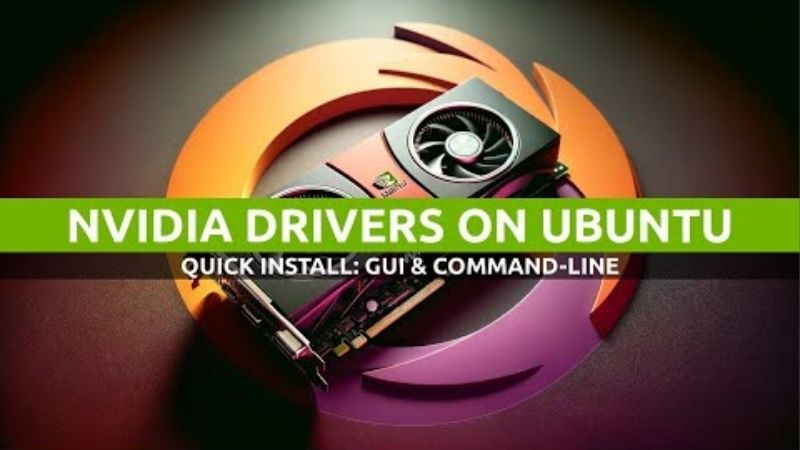
Why removing Nvidia drivers on Ubuntu takes more than a click
On Ubuntu, the graphics stack has moving parts that Windows hides from you: a proprietary Nvidia driver, an open-source alternative called nouveau, the display manager, and the kernel modules that tie them together. Removing the proprietary driver cleanly means accounting for all of them, which is why a rushed removal so often ends in a system that will not reach the desktop. Understanding the pieces first is what keeps the process safe.
Proprietary driver vs the open-source nouveau
Ubuntu can run your GPU with either Nvidia’s proprietary driver or the community nouveau driver. The proprietary one delivers far better performance and feature support, while nouveau is the safe, built-in fallback that keeps a display working even with no extra drivers installed. Knowing this distinction is essential, because when you purge the proprietary driver, the system should fall back to nouveau rather than to nothing.
Analytically, that fallback is your safety net. As long as nouveau is available, removing the proprietary driver leaves you with a usable, if slower, desktop instead of a dead screen. Problems arise mainly when the fallback has been blacklisted or when the removal is incomplete.
It helps to know why the proprietary driver gets blacklisted in the first place. When you install Nvidia’s driver, the setup typically disables nouveau so the two do not fight over the same GPU. That is sensible while the proprietary driver is working, but it becomes a trap during removal: if you delete the proprietary packages without lifting that blacklist, you have disabled both drivers at once. This single detail explains most of the horror stories about removing Nvidia drivers on Ubuntu, and it is entirely avoidable once you know to check for it.
What a clean removal actually has to clear
A proper removal is not just deleting one package. It has to clear the driver packages themselves, the kernel modules built for them, and any configuration files that blacklist nouveau or pin the proprietary driver in place. Leftover configuration is the usual reason a system still misbehaves after you thought you removed everything.
This is the core reason a simple remove command sometimes is not enough. If a blacklist file keeps nouveau disabled after the Nvidia driver is gone, you are left with no working driver at all. A clean removal explicitly undoes those settings so the fallback can take over.
When you actually need to uninstall
You reach for a full removal in a handful of situations: a driver update broke your display, a kernel upgrade left the module unbuilt, an external monitor or suspend function stopped working, or you simply want to switch to a different driver version. In each case, removing cleanly and reinstalling from a known state is more reliable than layering changes on top of a broken install.
The practical guidance is to be deliberate. Identify why you are removing the driver, because that reason often tells you whether you should reinstall a different version afterward or fall back to nouveau and stop there. A removal aimed at fixing a broken update ends differently from one aimed at switching versions, and naming your goal up front keeps the process focused.
The commands to uninstall Nvidia drivers on Ubuntu
This is the part you came for: the actual terminal commands, in a safe order, that you can copy and run. Do these from a terminal you can reach even if the graphical session breaks, and read the fallback section afterward so you are ready if the screen goes dark on reboot.
Purging the proprietary driver
The most thorough way to remove every Nvidia proprietary package is to purge anything matching the Nvidia name, then clean up unused dependencies:
sudo apt-get remove --purge '^nvidia-.*'
sudo apt autoremove
sudo apt update
The purge removes the packages and their configuration, while autoremove clears the dependencies that were only there to support the driver. Running these together gets you far closer to a clean state than removing a single package by name.
Falling back to nouveau safely
After purging, you want the open-source driver back in control. If a blacklist file is keeping nouveau disabled, removing it and rebuilding the initial ramdisk restores the fallback:
sudo rm /etc/modprobe.d/blacklist-nouveau.conf (only if it exists)
sudo update-initramfs -u
sudo reboot
On reboot, the system should load nouveau and bring you to a working desktop. This is the safety step people skip, and skipping it is the single most common cause of the dreaded black screen after removal. Take the extra minute to confirm the fallback is in place.
Reinstalling or switching to a different version
If your goal was to switch versions rather than abandon the proprietary driver, Ubuntu makes reinstalling straightforward. You can see the recommended options and install them with the built-in tooling:
ubuntu-drivers devices
sudo ubuntu-drivers autoinstall
The first command lists the drivers Ubuntu recommends for your specific card; the second installs the recommended one. Reinstalling from this clean base, rather than on top of a broken install, is what makes the new driver behave. Reboot once more and verify your display and any external monitors before calling it done.
There is a small experimental payoff to doing it this way. Because Ubuntu’s tooling knows which driver branch is validated for your card and kernel, letting it pick often gives you a more stable result than manually chasing the newest release from elsewhere. If you specifically want a different version than the recommended one, the same devices listing shows the alternatives, so you can make an informed choice instead of guessing. Either way, starting from a genuinely clean removal is what turns driver-switching on Linux from a gamble into a predictable, repeatable step.
Troubleshooting, trade-offs, and when to look at hardware
Even a careful removal can hit snags, and it is worth knowing both how to recover and where the limits are. Some problems are configuration you can fix in minutes; others are signs that the hardware itself, or its Linux support, is the real obstacle. Sorting one from the other keeps you from wasting an evening.
Pros and cons of removing the proprietary driver
Because this is a review, here is the honest trade-off of uninstalling the Nvidia proprietary driver on Ubuntu.
| Pros | Cons |
|---|---|
| Resolves driver-caused black screens and login loops | nouveau fallback gives much weaker performance |
| Clears broken state after a kernel update | Incomplete removal can leave no working driver |
| Clean base for switching driver versions | Requires terminal access if the GUI breaks |
| Free, built-in tooling does the whole job | Does not fix hardware or firmware-level faults |
The takeaway is that removal is a reliable fix for software and configuration problems, and the built-in tools handle it well. What it cannot do is compensate for a card whose Linux support is poor or whose hardware is failing.
Fixing a black screen after removal
If you reboot into a black screen or a text prompt, do not panic — you almost always still have a way in. Switching to a text console with a keyboard shortcut such as Ctrl+Alt+F3 gives you a terminal where you can re-run the fallback steps or reinstall a driver. From there you rebuild the initramfs or reinstall through the Ubuntu tooling and reboot.
The reassuring reality is that nouveau exists precisely for this moment. As long as you can reach a console, a black screen is a recoverable configuration issue, not a dead machine. Keeping that in mind turns a scary outcome into a routine fix.
When the real fix is better-supported hardware
Sometimes the deeper issue is not the driver but the fit between your card and Linux. Very old GPUs can drop out of proprietary driver support and run only on nouveau, and certain configurations fight the desktop no matter how cleanly you install. If you are removing and reinstalling drivers repeatedly just to keep a display stable, that pattern is telling you something.
For a Linux user who wants reliable graphics without the recurring fight, choosing hardware with strong, current driver support is the durable answer. If your card is aging out of support or simply underpowered for your work, comparing well-supported, current GPUs on Amazon is worth doing — a card that Ubuntu handles smoothly ends the cycle of purge-and-reinstall for good.
See More:
- Nvidia CEO LinkedIn
- Nvidia driver rollback
- Nvidia roll back driver
- RX 9070 XT vs 5060 Ti
- Nvidia driver uninstaller
Conclusion
To Ubuntu uninstall Nvidia drivers cleanly, treat it as more than one command: purge the proprietary packages, clear any leftover blacklist so nouveau can take over, rebuild the initramfs, and reboot into a safe fallback before deciding whether to reinstall a fresh version. Keep console access in your back pocket so a black screen stays a quick fix rather than a crisis. And if you find yourself running this removal again and again just to keep graphics stable, weigh whether your hardware is the real bottleneck. When it is, compare well-supported, current GPUs on Amazon and pair your clean Ubuntu setup with a card that behaves the way Linux users expect.
Frequently Asked Questions
What is the safest command sequence to uninstall?
Use sudo apt-get remove –purge with the nvidia package pattern, then sudo apt autoremove to clear orphaned dependencies, then sudo update-initramfs -u, then reboot. Doing this from a text console rather than inside a running graphical session avoids the X server holding the module open and leaving a half removed state.
Will uninstalling break my desktop?
Temporarily, yes, unless nouveau is available. The proprietary package blacklists nouveau, so after removal you may boot into a very low resolution framebuffer or a black screen. Delete the blacklist file under /etc/modprobe.d and rebuild the initramfs in the same session so the open source driver takes over on reboot.
Do I need to remove CUDA as well?
Not necessarily. The CUDA toolkit and the display driver are separate packages, and you can keep the toolkit if you plan to reinstall a driver shortly. If you are removing everything, purge the cuda and libcudnn packages too, and check for any manually installed toolkit under /usr/local that apt does not track.
How do I reinstall a driver afterwards?
The simplest path is sudo ubuntu-drivers autoinstall, which selects the recommended tested version for your card, or sudo apt install nvidia-driver followed by the specific branch number if you need a particular release. Reboot afterwards and confirm with nvidia-smi that the driver and CUDA runtime versions are reported correctly.
What if apt reports broken packages during removal?
Run sudo dpkg –configure -a followed by sudo apt –fix-broken install to settle any half configured packages, then retry the purge. If a .run installer was previously used alongside apt packages, run the .run uninstaller first, because that mix is the most common source of unresolvable dependency errors.
As an Amazon Associate we earn from qualifying purchases at no extra cost to you.



Write Your Review
No reviews yet. Be the first to share your experience!