
- Top Pick: Lian Li 8.8" Universal Screen-Black-SM088X | Adjustable Mounting for Any Computer Setup – Customizable ARGB Frame – PC Temperature Display Panel – LCD Screen Display
- Best Value: msi MAG 272QP QD-OLED X50, 27-Inch, WQHD, 2560×1440, Gaming Monitor, Quantum Dot OLED Panel, 500Hz, 0.03ms, DisplayHDR True Black 500, HDMI 2.1, DP 1.4a, USB C (15WPD), Tilt/Height Adjustable, Black
- Premium Choice: Asixxsix 5 Inch Secondary Screen, FHD 854×480 Computer Temp Monitor LCD Display for Computer GPU CPU Temperature Memory Hard Drive Data Frame Rate Monitoring (White)
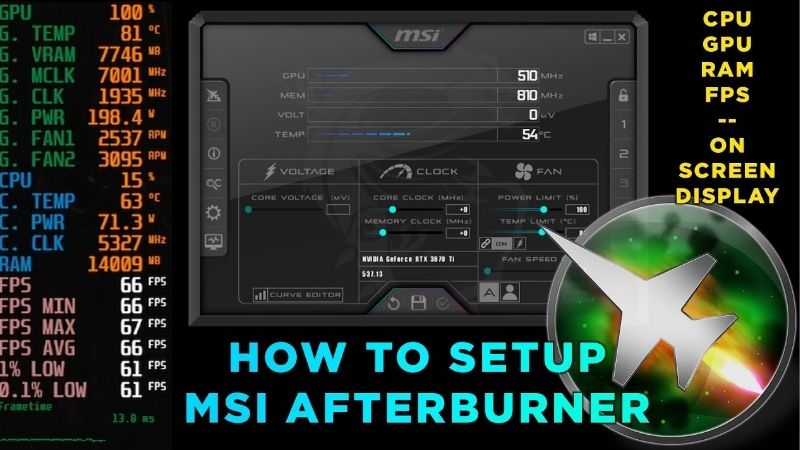
MSI Afterburner how to show FPS is one of the most useful things you can set up as a PC gamer, letting you see your frame rate, temperatures, and hardware usage right on top of your game. If you have installed Afterburner but cannot figure out how to get that on-screen display working, this guide walks you through it step by step. We will cover what you need, the exact steps to show your FPS, how to customize the overlay, and how to fix it when it refuses to appear.
What You Need to Show FPS With MSI Afterburner
Before jumping into the steps, it helps to understand the two pieces of software involved and what each one does. Knowing how they work together makes the setup far less confusing and explains why the overlay sometimes needs a little coaxing to appear.
The whole system is really just two cooperating programs, so once you grasp that, the rest is straightforward. Most setup problems trace back to misunderstanding this pairing rather than to anything genuinely complicated.
MSI Afterburner and RivaTuner
MSI Afterburner is a free tool that monitors and tunes your graphics card, and it is the program most people think of for showing FPS. It works on virtually any GPU, not just MSI cards, which is part of why it is so popular.
Bundled with Afterburner is a second program called RivaTuner Statistics Server, usually shortened to RTSS. This companion tool is what actually draws the overlay on top of your games.
When you install Afterburner, RivaTuner installs alongside it by default. You need both for the on-screen display to work, so make sure you did not deselect RivaTuner during installation.
If you already installed Afterburner and the overlay is missing, it is worth simply running the installer again and confirming RivaTuner is included. Reinstalling the pair together is often quicker than diagnosing why one of them went missing.
Why RivaTuner Matters
Many people get stuck because they expect Afterburner alone to show the overlay, when in fact RivaTuner does the rendering. Afterburner collects the data, and RivaTuner puts it on screen.
This division of labor is the single most common source of confusion. If your overlay is not appearing, RivaTuner not running or misconfigured is very often the reason.
Keeping this in mind saves a lot of frustration. Whenever the overlay disappears, your first instinct should be to check RivaTuner rather than Afterburner, since the display problem almost always lives with the tool that does the drawing.
What the Overlay Can Display
The on-screen display can show far more than just FPS. You can add GPU and CPU temperatures, usage percentages, VRAM and RAM use, clock speeds, and frame times, all at once.
For most gamers, FPS, temperatures, and usage are the essentials worth showing. Starting with those keeps the overlay readable, and you can always add more once you are comfortable.
There is a balance to strike between information and clarity. Cramming every possible stat on screen quickly becomes distracting, so most people settle on a handful of numbers that actually inform their gaming rather than clutter it.
How to Show FPS Step by Step
With both programs in place, enabling the FPS counter is a short, repeatable process. Follow these steps in order and your frame rate will appear the next time you launch a game, ready for you to fine-tune afterward.
None of the steps require any technical knowledge; they are just a matter of ticking the right boxes in the right place. Do them once and the overlay stays enabled across every game until you decide to change it.
Steps 1 to 3: Install and Open
Step 1 — Install MSI Afterburner with RivaTuner. Download Afterburner from the official source and run the installer, keeping RivaTuner Statistics Server selected. Both must be installed for the overlay to work.
Step 2 — Open MSI Afterburner. Launch the program and click the settings icon, which looks like a gear, to open the properties window where the overlay is configured.
Step 3 — Go to the Monitoring tab. In the settings window, find the Monitoring tab, which lists every hardware value Afterburner can track, including your frame rate.
Do not be intimidated by the long list in this tab; you only need to touch the few values you want on screen. Everything else can be left exactly as it is, so the process is far simpler than the crowded interface first suggests.
Steps 4 to 6: Enable the On-Screen Display
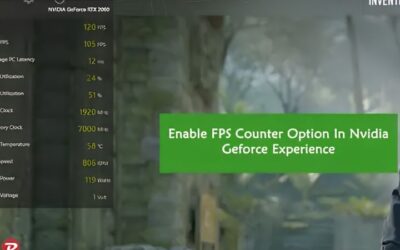
Step 4 — Select Framerate. Scroll the monitoring list, click on Framerate to highlight it, and tick the box labeled Show in On-Screen Display. This tells Afterburner to send FPS to the overlay.
Step 5 — Repeat for other values. Do the same for GPU temperature and usage if you want them shown, ticking Show in On-Screen Display for each one you care about.
Step 6 — Apply and launch a game. Click Apply and OK, then start a game. Your FPS and any other selected stats should now appear in a corner of the screen.
If everything is set up correctly, the numbers update live as you play, reflecting your real-time performance. Seeing that data appear for the first time is the confirmation that both programs are talking to each other as intended.
Pros and Cons of the Afterburner Overlay
The pros are clear: it is free, works on almost any GPU, shows detailed real-time stats, and is highly customizable. For monitoring performance and temperatures while gaming, it is one of the most powerful free tools available.
The cons are minor but real. The initial setup confuses newcomers because of the Afterburner and RivaTuner split, the overlay can occasionally conflict with certain games or other overlays, and the sheer number of options can feel overwhelming at first. None of these outweigh its usefulness once it is configured.
For a free tool, the value is remarkable. Paid alternatives exist, but few match the depth of monitoring Afterburner provides, which is why it has remained the default choice for PC gamers for so many years.
Customizing and Troubleshooting
Once your FPS is showing, a little customization makes the overlay genuinely useful rather than cluttered, and knowing the common fixes saves frustration when it misbehaves. This final section turns a working overlay into one tailored exactly to how you like to monitor your system.
A well-configured overlay quickly becomes something you barely notice until you need it, quietly reporting your performance in the corner. Getting it right once means you rarely have to think about it again.
Adding Temps, Usage, and More
To add more information, return to the Monitoring tab and enable Show in On-Screen Display for each value you want, such as CPU temperature or VRAM usage. Build up the overlay gradually so it stays readable.
Within RivaTuner, you can adjust the overlay’s position, size, and color to suit your screen and preference. A quick pass through these settings makes the display clear without covering important parts of your game.
It is worth positioning the overlay somewhere unobtrusive, such as a top corner, so it informs without distracting. Small tweaks to size and transparency go a long way toward an overlay that feels like part of your setup rather than an intrusion.
Fixing the Overlay Not Showing
If your FPS is not appearing, first confirm RivaTuner Statistics Server is running; it should be open in the background alongside Afterburner. If it is closed, the overlay will not draw.
If RivaTuner is running but nothing shows, check that the game is not blocking overlays and that no other overlay software is conflicting. Toggling the game’s own performance overlay off, or adjusting RivaTuner’s detection level for that game, usually resolves it.
As a last resort, restarting both Afterburner and RivaTuner, or the game itself, clears up many temporary glitches. Overlay conflicts are common but almost always fixable with a little methodical checking rather than a reinstall.
When Low FPS Means More Than Settings
Once your overlay is working, it may reveal an uncomfortable truth: your frame rates are simply low. If your GPU sits at full usage while FPS stays disappointing even after lowering settings, the hardware is the bottleneck rather than any software issue.
Seeing your VRAM max out in demanding games is another clear signal. When the numbers on your new overlay point consistently to the GPU, an upgrade is the real fix, and the recommended GeForce cards linked in this review are a smart starting point for smoother, higher frame rates.
In that sense, the overlay pays for itself in insight. It turns a vague feeling that a game runs poorly into concrete numbers, which is exactly what you need to decide whether a settings tweak or a real upgrade is the answer.
Either way, you are now making that call with real data instead of guesswork, which is the whole point of setting the overlay up in the first place.
See More:
Final Verdict: Mastering MSI Afterburner to Show FPS
Learning MSI Afterburner how to show FPS comes down to understanding that Afterburner gathers the data while RivaTuner displays it, then ticking Show in On-Screen Display for the stats you want. Follow the steps in order, keep RivaTuner running, and you will have a clean, informative overlay showing your frame rate and temperatures in every game.
The overlay is also a genuine diagnostic tool, since it reveals whether your hardware is keeping up or holding you back. If it consistently shows your GPU maxed out and your FPS low, an upgrade is the real answer. When you reach that point, compare the recommended GeForce cards linked throughout this guide for the higher, smoother frame rates your overlay will happily confirm.
Frequently Asked Questions
Do I need anything besides Afterburner itself?
Yes, the on-screen display comes from RivaTuner Statistics Server, which is bundled with the MSI Afterburner installer. If you unticked it during setup the overlay will never appear no matter how you configure Afterburner, so reinstall and make sure RTSS is included and running in the system tray.
How do I turn the frame rate counter on?
Open Afterburner settings, go to the Monitoring tab, click Framerate in the graph list, then tick Show in On-Screen Display. Repeat for GPU temperature, GPU usage, VRAM and CPU temperature if you want them. Apply, launch a game, and the readout appears in the corner.
Why does the overlay not show in some games?
Games using Vulkan, certain DirectX 12 titles and anything with strict anti-cheat can block injection. Check the RTSS application profile, enable the correct API support, and add the game executable manually. Some competitive titles deliberately block overlays, in which case use the built-in performance counter instead.
Is there a performance cost to running it?
The impact is very small, typically under one or two percent, because RTSS draws a simple text layer. Monitoring dozens of sensors at a very short polling interval adds a little CPU overhead, so keep the polling around 1000 milliseconds and only display the values you actually watch.
What numbers should I actually monitor?
Frame rate plus frame time tells you about smoothness, GPU usage reveals whether you are CPU limited, GPU and hotspot temperature flag cooling problems, and VRAM usage shows when you are exceeding your card’s memory. Those five give you almost everything needed to diagnose a stuttering game.
As an Amazon Associate we earn from qualifying purchases at no extra cost to you.



Write Your Review
No reviews yet. Be the first to share your experience!