
How to update my Nvidia drivers is a question every PC gamer eventually asks, usually right when a new game stutters or a favorite title suddenly crashes. The good news is that updating is quick and easy once you know the steps, and getting it right can instantly boost performance and fix bugs. This guide walks you through the whole process in plain language, from the effortless one-click method to a proper clean install for stubborn problems. Follow along and you’ll have a fresh, correctly installed driver in minutes, plus the know-how to avoid the mistakes that trip people up.


What You Need Before You Update Nvidia Drivers
A little preparation makes updating painless, so before you dive in, take two minutes to gather the essentials. You need to know which Nvidia GPU you own, pick the update method that suits you, and note your current driver version so you can roll back if anything goes wrong. These three small steps prevent almost every common headache.
As an Amazon Associate we earn from qualifying purchases at no extra cost to you.




Check Which Nvidia GPU You Have
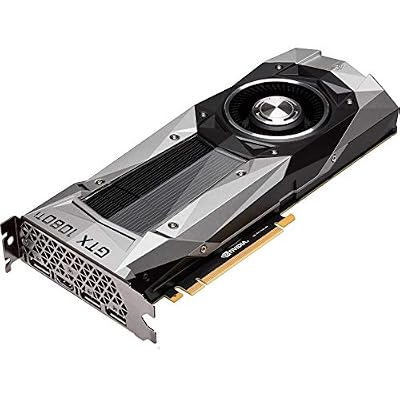
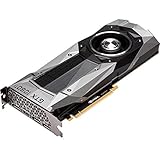
Knowing your exact graphics card ensures you install the right driver. On Windows, open Device Manager, expand “Display adapters,” and read the GPU name, or use the DirectX Diagnostic Tool for the same information.
This quick check matters because Nvidia’s driver package covers many cards, and confirming yours removes any doubt. If you use the Nvidia App, it detects your card automatically, but it’s still worth knowing what you have.
Once you know your GPU, you’re ready to choose how you want to update it. Everything from here is straightforward. This step is especially worth doing if you built or bought your PC a while ago and can’t remember the exact model, since knowing whether you have, say, an RTX 3060 or a GTX 1660 helps you recognise the right driver if you ever download manually.
Choose Your Update Method
There are two main ways to update: the automatic route using Nvidia’s software, and the manual route by downloading directly from Nvidia’s website. The Nvidia App is the easiest and best choice for most people.
The manual method gives you full control and is useful if you want a specific driver version or prefer not to install the companion app. Both are reliable, so the choice comes down to how hands-on you like to be.
For most users, we recommend starting with the Nvidia App for its simplicity. You can always switch to the manual method later if you need it. The app also handles finding the exactly correct driver for your card automatically, which removes the single most common source of update mistakes: accidentally installing a driver meant for a different GPU.
Note Your Current Driver Version
Before updating, jot down your current driver version, found in the Nvidia Control Panel under System Information. It’s a five-second step that pays off if a new driver ever misbehaves.
Having that number means you can quickly roll back to a known-good driver instead of guessing. It’s the simplest insurance policy in the whole process.
With your GPU identified, a method chosen, and your version recorded, you’re fully prepared. Now for the easy part: the actual update. Taking these two minutes of prep up front is the difference between a smooth, five-minute job and an afternoon of frustration if something unexpected happens, so it’s genuinely worth the small effort.
How to Update My Nvidia Drivers Step by Step
Here’s the core of the guide: the exact steps to update your Nvidia drivers, from the one-click method to a manual install and a clean install for tough cases. Follow the numbered steps and you’ll be done in minutes.
Step 1 and 2: Update With the Nvidia App (Easiest)
The Nvidia App is the fastest way to update, and it handles everything for you. Just follow these steps:
1. Open the Nvidia App (or download it from Nvidia’s official site if you don’t have it) and go to the Drivers tab.
2. Click “Check for updates,” then select Download and Install when a new driver appears.
The app detects your card, grabs the correct driver, and installs it automatically. Once it finishes, restart if prompted, and you’re done — this method covers the vast majority of users perfectly. The Nvidia App has largely replaced the older GeForce Experience, and it also lets you pick between Game Ready and Studio drivers and optimise individual games, so it’s worth keeping installed even after your update is complete.
Step 3: Update Manually From Nvidia’s Website
If you prefer full control, updating manually is simple too. Follow these steps:
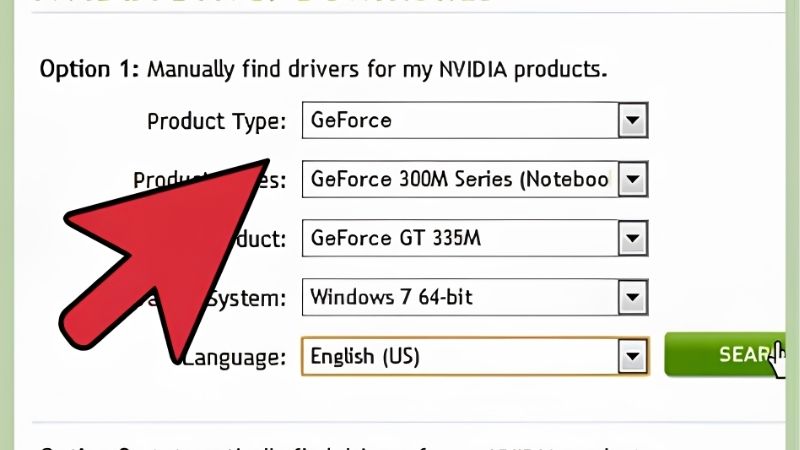
1. Go to Nvidia’s official drivers page and enter your GPU model to find the latest driver.
2. Download the installer, run it, and choose Express installation to update in place.
This method is ideal when you want a specific version or don’t want the companion app running. Always download only from Nvidia’s official site to avoid bundled junk from unofficial sources. The manual installer also offers a Custom option, which is where you’ll find the clean-install checkbox covered in the next step, so it’s the route to use whenever you’re troubleshooting rather than just updating routinely.
Step 4: Do a Clean Install When Needed
If you’re having crashes, stutter, or switching from a very old driver, a clean install is the fix. During the manual installer, choose Custom (Advanced) and tick “Perform a clean installation” to reset everything.
For the most thorough removal, use Display Driver Uninstaller (DDU) in Safe Mode first, then install the fresh driver. This wipes every trace of the old driver and eliminates the leftover conflicts behind most stubborn problems.
Reserve the clean install for when you actually need it, since routine updates don’t require it. But when problems persist, it’s the single most effective step you can take. It’s also the right first move after installing a brand-new graphics card, because leftover software from your previous GPU is one of the most common causes of otherwise baffling crashes and stutter on a fresh setup.
Pro Tips, Mistakes to Avoid, and Staying Updated
A few expert habits keep every future update smooth and stress-free. These pro tips and common mistakes will help you avoid the pitfalls that catch out newcomers when they update their Nvidia drivers.
Pro Tips for a Smooth Update
Always download from Nvidia’s official sources, whether the app or the website, to guarantee a clean, signed driver. Third-party driver sites are a common source of trouble and are best avoided entirely.
Close your games and heavy apps before updating, and restart afterward even if not prompted, to make sure the new driver loads cleanly. These tiny habits prevent a surprising number of glitches.
Finally, choose the Game Ready driver if you game and the Studio driver if you do creative work. Matching the branch to your use gets you the best experience for what you actually do. Game Ready drivers arrive more frequently with day-one support for new releases, while Studio drivers update less often and prioritise stability in creative apps, so the right pick simply depends on how you spend most of your time on the PC.
Common Mistakes to Avoid
The biggest mistake is chasing every single release the moment it drops. Waiting a few days on major updates lets early adopters surface any bugs first, sparing you the trouble.
Another common error is installing over a messy, outdated driver, which causes many of the crashes people blame on new releases. Here’s a balanced look at how often to update:
| Pros of Updating Often | Cons of Updating Often |
|---|---|
| Day-one optimization for new games | Higher chance of catching an early bug |
| Fast access to fixes and features | A stable setup can be disrupted for no gain |
| Better security and compatibility | More installs means more chances for a messy one |
| Free performance at no hardware cost | Occasional need to roll back and troubleshoot |
The lesson is to update with purpose, not on autopilot. Update when there’s a reason, and you’ll get all the benefits with almost none of the risk. If a driver is working perfectly and none of your games have a problem, there’s rarely any harm in waiting for the next release, so let your actual needs, not the calendar, decide when you click install.
See More:
- AMD graphics driver download
- Is Nvidia American
- Nvidia 1080 Ti drivers
- Radeon graphics driver update
- Nvidia RTX 3060 drivers
Keeping Your Nvidia Drivers Updated Long-Term
The easiest long-term approach is to let the Nvidia App notify you of new drivers, then install them when a game you play benefits or a fix addresses a bug you have. You stay current without obsessing over every release.
Keep noting your version before each update so rollback stays painless, and do a clean install whenever you jump between very different versions. These small habits turn updating into a two-minute routine. There’s no need to obsess over being on the absolute newest driver at all times; for most people, updating around big game launches and whenever a fix addresses a real problem is the perfect balance of current and stable.
If your GPU eventually can’t keep up no matter how current the driver, it may be time for an upgrade. You can compare current Nvidia graphics cards through the links on this page whenever that day arrives.
Now you know exactly how to update my Nvidia drivers the easy way: identify your card, use the Nvidia App or a manual download, do a clean install when needed, and update with purpose rather than on impulse. Done right, a driver update is one of the simplest free ways to keep your PC fast, stable, and ready for the latest games. And when your card finally can’t keep up, explore the recommended Nvidia GPUs linked here to upgrade with total confidence.
Frequently Asked Questions
What is the fastest way to update Nvidia drivers?
Open the Nvidia App, go to the Drivers tab, and choose Download then Express install. It fetches the correct package for your card automatically. If you prefer no background software, download the driver manually from the Nvidia site by selecting your product series, model, operating system and download type.
Should I choose Express or Custom installation?
Express keeps existing settings and is fine for routine updates. Custom lets you tick Perform a clean installation, which wipes profiles and shader caches and resolves most upgrade-related crashes. Use Custom with the clean option when you are troubleshooting or jumping across several driver versions at once.
Do I need to uninstall the old driver first?
Normally no, because the installer replaces it. Uninstall properly with Display Driver Uninstaller in Safe Mode when you are switching from AMD or Intel, when installs keep failing, or when you have persistent artefacts and crashes that survive a standard reinstall.
How do I roll back if the new driver causes problems?
Open Device Manager, right-click the GPU under Display adapters, choose Properties then the Driver tab and select Roll Back Driver. If that button is greyed out, download the previous version from the Nvidia driver archive and install it with the clean installation option ticked.
Should I update before or after installing a new graphics card?
Install the card first with the system powered down, boot with the basic Microsoft display driver, then install the Nvidia package. If you are replacing an AMD card, run Display Driver Uninstaller before shutting down so no conflicting components remain when the new hardware first initialises.
Ready to decide? Our #1 pick for 2026 is the Pros of Updating Often.
Live price & availability on Amazon.




Write Your Review
No reviews yet. Be the first to share your experience!