
- Top Pick: NVIDIA Jetson AGX Orin 64GB Developer Kit with Ethernet, USB, Display Port
- Best Value: NVIDIA Jetson Xavier NX Developer Kit (812674024318)
- Premium Choice: PNY NVIDIA T1000
Install Nvidia Toolkit is an ambiguous search and that ambiguity is why half the guides you have found do not match your situation. There are two different products with almost the same name — the CUDA Toolkit and the NVIDIA Container Toolkit — and they solve different problems. Worse, a large share of people searching this do not need either one. Below: how to tell which you want in thirty seconds, copy-paste commands for Ubuntu, Windows and WSL2, and the install failures that account for nearly every support thread.
Which Nvidia Toolkit Do You Actually Mean?
Start here before running anything. Installing the wrong one wastes an evening; installing one you did not need creates conflicts you will be debugging in three months.
CUDA Toolkit vs Container Toolkit
Two completely different things that people conflate constantly.
| CUDA Toolkit | NVIDIA Container Toolkit | |
|---|---|---|
| What it is | Compiler (nvcc), libraries, headers | Runtime hook exposing GPUs to Docker |
| Size | ~3-6GB | ~50MB |
| You need it if | You compile CUDA code | You run GPU containers |
| Provides nvcc | Yes | No |
| Package name | cuda-toolkit-12-8 |
nvidia-container-toolkit |
Neither is the driver. The driver ships separately and is a prerequisite for both — a machine with a healthy driver and no toolkit will run nvidia-smi perfectly and fail to compile a single kernel.
Do You Even Need the CUDA Toolkit?
Probably not, and this is the most useful paragraph on this page.
Since roughly PyTorch 1.13 and TensorFlow 2.14, framework wheels bundle their own CUDA runtime and cuDNN. If your work is pip install torch and running a script, nvcc is never called and the system toolkit is 6GB of dead weight that creates version conflicts with the wheel’s bundled runtime.
# This needs NO system CUDA toolkit. Only a driver.
pip install torch --index-url https://download.pytorch.org/whl/cu128
python -c "import torch; print(torch.cuda.is_available())"
If that prints True, you are done. Close this page. You need the CUDA Toolkit only if you write .cu files, build custom C++ extensions, or use a library that invokes nvcc at install time — for example some flash-attention or bitsandbytes builds from source.
The Decision Tree in 30 Seconds
- Running Python frameworks only? → Install nothing. Use pip wheels in a venv.
- Running GPU workloads in Docker? → Container Toolkit on the host, nothing else.
- Compiling .cu files or building extensions from source? → CUDA Toolkit.
- Not sure? → Try option 1 first. It takes two minutes and resolves most cases.
The number of machines carrying a full CUDA Toolkit installed for no reason is enormous, and it is the root cause of a large share of the version-mismatch errors people spend evenings on.
Installing the CUDA Toolkit
If the decision tree sent you here, these are the commands. Pick your platform and paste.
Ubuntu and Debian
Use the keyring repository. Do not mix this with the .run installer or with your distribution’s own nvidia packages — that combination is how machines end up unrecoverable.
# Ubuntu 22.04 - adjust the ubuntu2204 segment for other releases
wget https://developer.download.nvidia.com/compute/cuda/repos/ubuntu2204/x86_64/cuda-keyring_1.1-1_all.deb
sudo dpkg -i cuda-keyring_1.1-1_all.deb
sudo apt-get update

# Toolkit only - does NOT touch your driver
sudo apt-get install -y cuda-toolkit-12-8
Note cuda-toolkit-12-8 rather than cuda. The bare cuda metapackage drags in a driver as a dependency and will happily replace the working one you already have. This distinction is the single most common cause of a machine that boots to a black screen after a CUDA install.
Then add it to your path, which the installer does not do:
echo 'export PATH=/usr/local/cuda-12.8/bin:$PATH' >> ~/.bashrc
echo 'export LD_LIBRARY_PATH=/usr/local/cuda-12.8/lib64:$LD_LIBRARY_PATH' >> ~/.bashrc
source ~/.bashrc
nvcc --version
Windows
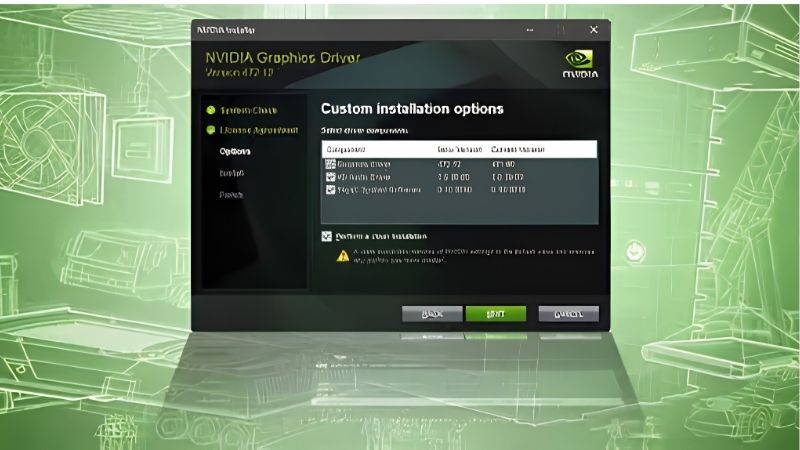
Simpler and harder to break. Download the CUDA Toolkit installer from Nvidia’s developer site, run it, and choose Custom rather than Express.
In the custom screen, uncheck the driver component unless you specifically want the bundled one — it is frequently older than what you already have, and letting Express install it downgrades a perfectly good driver for no reason.
For C++ compilation you also need Visual Studio 2019 or 2022 with the Desktop development with C++ workload installed before the CUDA Toolkit. Install them in that order or nvcc will not find a host compiler and the error will not tell you why. Verify with nvcc --version in a new terminal.
WSL2: The One Everyone Gets Wrong
This deserves its own section because the mistake is universal and the symptom is confusing.
Do not install a Linux Nvidia driver inside WSL. WSL2 uses the Windows driver, projected through to the Linux side. Installing a Linux driver inside the distribution breaks that projection and produces “no CUDA-capable device is detected” on a machine with a perfectly working GPU.
# Inside WSL2 - toolkit ONLY, never a driver
wget https://developer.download.nvidia.com/compute/cuda/repos/wsl-ubuntu/x86_64/cuda-keyring_1.1-1_all.deb
sudo dpkg -i cuda-keyring_1.1-1_all.deb
sudo apt-get update
sudo apt-get install -y cuda-toolkit-12-8
Note the wsl-ubuntu segment in that URL rather than ubuntu2204. That repository exists specifically to exclude driver packages, so it cannot break your setup even by accident. Use it.
Installing the Container Toolkit
If Docker is your route, this is a much smaller job and it is the one most people should be doing.
The Install Commands
curl -fsSL https://nvidia.github.io/libnvidia-container/gpgkey \
  | sudo gpg --dearmor -o /usr/share/keyrings/nvidia-container-toolkit-keyring.gpg

curl -s -L https://nvidia.github.io/libnvidia-container/stable/deb/nvidia-container-toolkit.list \
  | sed 's#deb https://#deb [signed-by=/usr/share/keyrings/nvidia-container-toolkit-keyring.gpg] https://#g' \
  | sudo tee /etc/apt/sources.list.d/nvidia-container-toolkit.list

sudo apt-get update
sudo apt-get install -y nvidia-container-toolkit
sudo nvidia-ctk runtime configure --runtime=docker
sudo systemctl restart docker
The last two lines are the ones people skip. Installing the package without reconfiguring and restarting the Docker daemon leaves it unaware the runtime exists, and the resulting error message never mentions it.
Verifying It Works
docker run --rm --gpus all nvidia/cuda:12.8.0-base-ubuntu22.04 nvidia-smiIf that prints your GPU, the entire chain is functional — driver, container toolkit, runtime, image. The container carries its own CUDA, so the host needs no toolkit at all.
This is the property that makes the container route so much better than most people realise: two projects needing CUDA 11.8 and 12.8 coexist with zero conflict, because neither touches the host.
Pros and Cons of Each Route
| Route | Pros | Cons |
|---|---|---|
| pip wheels only | Two minutes; no system CUDA; isolated per venv | No nvcc; duplicated libs across environments |
| CUDA Toolkit | Full nvcc; required for custom kernels | 3-6GB; highest conflict risk; the cuda metapackage can replace your driver |
| Container Toolkit | 50MB on the host; multiple CUDAs coexist; matches production | Linux-first; Docker learning curve |
The summary most readers need: pip in a venv if you consume frameworks, Container Toolkit if you juggle projects, CUDA Toolkit only if you genuinely compile.
When Installs Go Wrong
Three failures cover nearly every support thread on this topic, and all three have specific causes.
apt Conflicts and Mixed Sources
The most destructive failure, and it is self-inflicted. Mixing Nvidia’s keyring repository with your distribution’s nvidia-driver-* packages, or with a manually run .run installer, produces conflicting file ownership that apt cannot resolve.
The fix is to pick one channel and purge the others:
sudo apt purge 'nvidia-*' 'libnvidia-*' 'cuda-*'
sudo apt autoremove
sudo reboot
# then reinstall from the keyring repo only
Prevention is simpler than cure here. Choose the keyring repository, and never run a .run installer on a machine that uses it.
nvcc Not Found After a Successful Install
The install worked. The path did not get set. This is not a failure, it is a missing line in your shell profile — the Ubuntu packages deliberately do not modify your PATH.
# Confirm it exists
ls /usr/local/cuda-12.8/bin/nvcc

# If it does, the install was fine - just add it
export PATH=/usr/local/cuda-12.8/bin:$PATH
Add both the PATH and LD_LIBRARY_PATH lines to ~/.bashrc so they survive a new terminal. And be aware that /usr/local/cuda is a symlink to whichever version installed last — if you have two, pin the versioned path explicitly rather than trusting the symlink.
The Hardware Underneath
One requirement no install guide states clearly: your driver version gates which CUDA you can use, and drivers are backward compatible. A newer driver runs older CUDA without complaint, so “update the driver” is rarely wrong. Older driver with newer CUDA fails.
The one hard line: Blackwell cards require CUDA 12.8 or newer. If you have an RTX 50-series GPU and your CUDA 11.8 environment throws “no kernel image is available for execution on the device”, that is what it means. The fix is a newer toolkit, not a newer driver — people update drivers repeatedly against this error and get nowhere.
And once everything installs cleanly, VRAM becomes your permanent constraint. 8GB handles small models, 12GB is the practical floor, 16GB opens up 7B language models. If out-of-memory errors during model load rather than version conflicts are what actually block you, compare what 12GB and 16GB cards cost before spending another evening on install guides.
See More:
- GTX 1650 vs RTX 3050
- Nvidia DIGITS
- Nvidia cuDNN
- Radeon RX 9070 XT vs RTX 5090
- PNY GeForce RTX 5080 review
Conclusion: Install the Nvidia Toolkit You Actually Need
The most valuable thing on this page is the decision tree, not the commands. Most people searching “install nvidia toolkit” need nothing — pip-installed framework wheels carry their own CUDA runtime, and a system toolkit only creates conflicts. If you run Docker, you want the 50MB Container Toolkit and not the 6GB CUDA one. The full toolkit is for people compiling .cu files, and that is a smaller group than the search volume suggests.
If you do install it: use cuda-toolkit-12-8 rather than the bare cuda metapackage, because the latter will replace your driver. On WSL2, use the wsl-ubuntu repository and never install a Linux driver inside the distribution. And add the PATH lines yourself, because the package will not. Bookmark the decision tree — it is the question you will have again on the next machine.
Frequently Asked Questions
Which Nvidia toolkit do I actually need?
There are three commonly confused products. The CUDA Toolkit is for compiling and running GPU compute code. The NVIDIA Container Toolkit exposes GPUs to Docker and Podman. The Nvidia app is the consumer driver and overlay utility. Gamers need none of them beyond the driver, developers usually need CUDA, and container users need the Container Toolkit.
Do I need the CUDA Toolkit to run PyTorch or TensorFlow?
No. Pip and conda builds of PyTorch and TensorFlow ship their own bundled CUDA runtime and cuDNN libraries, so a current display driver is enough. You only need the full toolkit if you compile custom CUDA kernels, build extensions from source, or use nvcc, Nsight and the profiling tools directly.
Will installing the CUDA Toolkit overwrite my display driver?
It can. The bundled network installer offers to install the driver packaged with that CUDA release, which is often older than your Game Ready driver. Choose Custom and untick the Display Driver component to keep your current one. On Linux, use the runfile with the no-driver flag or install cuda-toolkit rather than the full cuda meta package.
How do I verify the installation worked?
Run nvidia-smi to confirm the driver and the maximum CUDA version it supports, then run nvcc –version to confirm the toolkit compiler. These two numbers are allowed to differ, since nvidia-smi reports driver capability while nvcc reports the installed toolkit. Compiling and running deviceQuery from the samples is the definitive check.
Can I have multiple CUDA versions installed at once?
Yes, and it is common practice. Installers place each release in its own versioned directory such as /usr/local/cuda-12.4 on Linux, with a symlink for the active one. Switch by repointing that symlink and updating PATH and LD_LIBRARY_PATH, or isolate the whole thing per project with conda environments or containers.
As an Amazon Associate we earn from qualifying purchases at no extra cost to you.






Write Your Review
No reviews yet. Be the first to share your experience!