
- Top Pick: Getting Started with NVIDIA GPUs : A Beginner’s Guide to AI Acceleration with python, C++ and Cuda
- Best Value: NVIDIA GPU Performance Engineering: A Comprehensive Guide to PTX, SASS, CUDA Optimization, Kernel Analysis, Memory Hierarchies, Warp Execution, and High-Throughput Parallel Computing
- Premium Choice: The NVIDIA Full Stack: From CUDA Kernels to Cloud-Native AI Deployment
Nvidia cuDNN is the library that most people only learn about at the exact moment it breaks their environment. You installed PyTorch, ran your script, and got a wall of red text mentioning a .so file you have never heard of. You do not want a lecture on convolution algorithms. You want a compatibility table you can scan, a command you can paste, and a way to verify the fix in under a minute. That is what this page is — a working reference for the version stack, the install paths, and the specific errors that send people here.
What Nvidia cuDNN Does and Why Versions Break
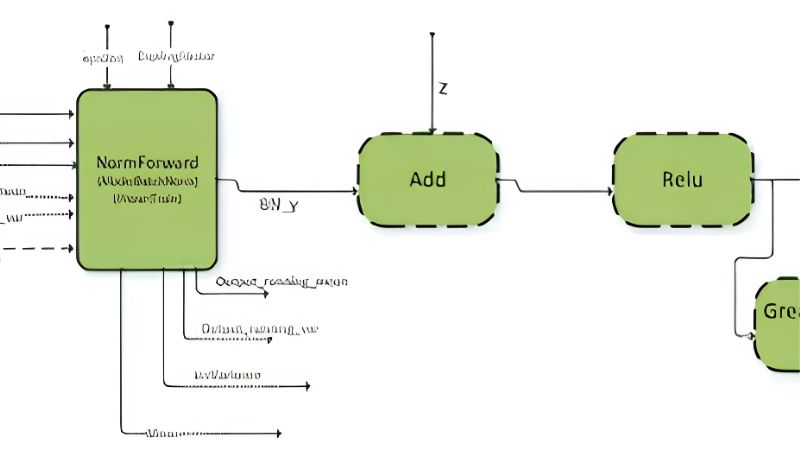
cuDNN — the CUDA Deep Neural Network library — is a set of GPU-accelerated primitives for the operations that dominate deep learning: convolutions, pooling, normalisation, attention and activation functions. Frameworks do not implement these themselves. PyTorch and TensorFlow call into cuDNN, cuDNN calls into CUDA, and CUDA calls into the driver. Nearly every cuDNN error you will ever encounter comes from one of those four layers disagreeing with another about which version it is talking to.
cuDNN Is a Library, Not a Driver
This distinction resolves a surprising amount of confusion. Your Nvidia driver ships with the GPU and handles hardware communication. The CUDA Toolkit is a compiler and runtime. cuDNN is a separate set of shared object files that sits on top of CUDA. Installing a new driver does not install cuDNN. Installing CUDA does not necessarily install cuDNN either.
Practically, this means a system can have a perfectly healthy driver, a working nvidia-smi output, and still fail to run a single convolution — because the layer that actually performs the convolution is missing or mismatched. If nvidia-smi works but your training script does not, cuDNN is the first place to look.
The Three-Layer Version Stack That Causes Most Errors
Four things must agree, and they are frequently installed by four different mechanisms at four different times:
- Driver version — sets the maximum CUDA version supported
- CUDA Toolkit — 11.8, 12.1, 12.4, 12.6, 12.8 and so on
- cuDNN — 8.x for CUDA 11/12, 9.x for CUDA 12 and required for Blackwell
- Framework build — a PyTorch wheel is compiled against one specific CUDA version
The failure mode people hit most often: they pip-install PyTorch built for CUDA 12.4, while a system-wide CUDA 11.8 with cuDNN 8.6 already exists in the library path. Both are individually fine. Together they produce a symbol lookup error that reads like a hardware fault but is purely a path problem.
The cuDNN Compatibility Table You Actually Need
Find your row, note the versions, move on.
| Framework | CUDA | cuDNN | Min driver (Linux) |
|---|---|---|---|
| PyTorch 2.0-2.1 | 11.8 | 8.7 | 450.80.02+ |
| PyTorch 2.2-2.4 | 12.1 | 8.9 | 525.60.13+ |
| PyTorch 2.5-2.6 | 12.4 | 9.1 | 550.54.14+ |
| PyTorch 2.7+ | 12.8 | 9.7+ | 570.x+ |
| TensorFlow 2.13-2.14 | 11.8 | 8.6 | 450.80.02+ |
| TensorFlow 2.15-2.16 | 12.2-12.3 | 8.9 | 525.60.13+ |
| TensorFlow 2.17+ | 12.3+ | 8.9-9.x | 525.60.13+ |
| Blackwell GPUs (sm_120) | 12.8+ | 9.7+ required | 570.x+ |
Two things to notice. First, drivers are backward compatible — a 570 driver runs CUDA 11.8 workloads without complaint, so “upgrade the driver” is rarely the wrong move. Second, the Blackwell row is not optional. If you have an RTX 50-series card, cuDNN 8.x will not work, and no amount of path fiddling changes that.
Installing cuDNN Without Breaking Your Environment
There are three install paths and they are not equally good. The order below is the order you should try them in, and most readers should stop after the first one.
Method 1: pip, the Path Most People Should Take
Since roughly PyTorch 1.13 and TensorFlow 2.14, the framework wheels bundle their own CUDA and cuDNN libraries. You do not need a system CUDA install at all. For most people this is the entire solution:
# PyTorch with CUDA 12.8 - cuDNN comes bundled
pip install torch torchvision torchaudio --index-url https://download.pytorch.org/whl/cu128

# TensorFlow with GPU support - pulls cuDNN automatically
pip install tensorflow[and-cuda]
If you need cuDNN standalone — for TensorRT, ONNX Runtime or a custom C++ build — install it directly:
pip install nvidia-cudnn-cu12

# Pin a specific version
pip install nvidia-cudnn-cu12==9.7.1.26
The critical rule with this method: do it inside a virtual environment. Installing into a system Python is how you end up with two cuDNN versions fighting over the same library path six months from now.
Method 2: Conda for Reproducible Environments
If your team needs the same stack on every machine, conda handles the dependency graph more predictably:
conda create -n ml python=3.11 -y
conda activate ml
conda install -c conda-forge cudnn=9.7 cuda-version=12.8

# Or let PyTorch resolve it
conda install pytorch torchvision pytorch-cuda=12.8 -c pytorch -c nvidia
Conda is slower to solve and heavier on disk. In exchange, you get an environment you can export and recreate exactly. For a team, that trade is usually worth it. For a solo project, it usually is not.
Method 3: Manual Tarball or apt on Linux
Use this only when you need cuDNN system-wide for a non-Python consumer. On Ubuntu:
wget https://developer.download.nvidia.com/compute/cuda/repos/ubuntu2204/x86_64/cuda-keyring_1.1-1_all.deb
sudo dpkg -i cuda-keyring_1.1-1_all.deb
sudo apt-get update
sudo apt-get -y install cudnn9-cuda-12
For the tarball route, extract and copy into your CUDA directory, then make sure the linker can find it:
tar -xvf cudnn-linux-x86_64-9.x.x.x_cuda12-archive.tar.xz
sudo cp include/cudnn*.h /usr/local/cuda/include/
sudo cp -P lib/libcudnn* /usr/local/cuda/lib64/
sudo chmod a+r /usr/local/cuda/include/cudnn*.h /usr/local/cuda/lib64/libcudnn*

# Add to ~/.bashrc
export LD_LIBRARY_PATH=/usr/local/cuda/lib64:$LD_LIBRARY_PATH
That last line is the one everyone forgets, and its absence produces exactly the error in the next section.
Diagnosing the Errors That Brought You Here
Three errors account for the overwhelming majority of cuDNN support threads. Match your message to the heading and apply the fix.
“Could not load library libcudnn_cnn_infer.so.8”
This is a path problem, not a missing install. The file usually exists; the dynamic linker cannot see it. Confirm first:
find / -name "libcudnn*" 2>/dev/null
ldconfig -p | grep cudnn
If find returns results but ldconfig does not, point LD_LIBRARY_PATH at the directory containing them and re-run. If you installed via pip, the files live inside your site-packages under nvidia/cudnn/lib, and a stale system-wide cuDNN earlier in the path is shadowing them.
Version Mismatch and CUDNN_STATUS_NOT_INITIALIZED
A message reading “loaded runtime cuDNN library: 8.5.0 but source was compiled with: 8.9.2” means two copies exist and the wrong one loaded first. Remove the older one rather than adding paths — layering more paths on top of a conflict has never once resolved it.
CUDNN_STATUS_NOT_INITIALIZED is more deceptive. It is frequently not a cuDNN problem at all: it is an out-of-memory condition wearing a misleading label. Before touching your install, run nvidia-smi and check whether another process is holding VRAM. If memory is tight, cap the allocation and retry — many people reinstall the entire toolchain to fix what was a stray Jupyter kernel.
Verifying Your Install in 30 Seconds
Paste this and read the output. If all three lines are correct, your stack is healthy:
python -c "import torch; print('CUDA:', torch.version.cuda); print('cuDNN:', torch.backends.cudnn.version()); print('GPU OK:', torch.cuda.is_available())"A cuDNN version like 90701 reads as 9.7.1. If GPU OK prints False, the problem is upstream of cuDNN — check your driver first. For a real convolution test rather than a version string, run a single conv2d on a CUDA tensor; if that completes, cuDNN is genuinely functional.
Pros, Cons and the Hardware Underneath
Choosing an install method is a trade-off, and so is choosing the card you run it on. Both decisions have a clear right answer for most readers, and both are frequently made backwards.
Pros and Cons of Each Install Method
| Method | Pros | Cons |
|---|---|---|
| pip (bundled) | One command; no system CUDA; isolated per venv | Duplicates libraries across envs; disk-heavy |
| pip (standalone) | Exact version pinning; works with TensorRT/ONNX | You manage compatibility yourself |
| Conda | Reproducible; solves the full graph; exportable | Slow solves; large footprint |
| apt / tarball | System-wide; needed for C++ builds | Highest conflict risk; the usual source of .so errors |
The summary most readers need: use pip inside a venv unless you have a specific reason not to. The manual methods exist for C++ and TensorRT users, and for everyone else they are a source of problems rather than a solution to one.
Which GPU Do You Actually Need for cuDNN?
cuDNN requires a compute capability of 5.0 or higher, which covers everything from Maxwell onward. But capability and usefulness are different questions. Tensor cores — present from Turing onward — are what let cuDNN dispatch mixed-precision kernels, and that is where the real acceleration lives.
A GTX 1650 will run cuDNN and will not use tensor cores, because it has none. An RTX 3060 will, and its 12GB frame buffer makes it the long-standing sensible entry point for learning. If you are on an RTX 50-series card, remember the hard requirement from the table above: cuDNN 9.7+ and CUDA 12.8+, no exceptions.
VRAM Is the Ceiling, Not cuDNN
Once cuDNN is installed correctly, it stops being your constraint. VRAM becomes the constraint, permanently. Roughly: 8GB handles small vision models and fine-tuning at low batch sizes; 12GB is the practical floor for comfortable work; 16GB opens up 7B language models; 24GB is where you stop fighting the machine.
If you are repeatedly hitting CUDNN_STATUS_NOT_INITIALIZED from genuine out-of-memory conditions rather than version conflicts, no amount of reinstalling will help — that is the hardware telling you it has run out. If a VRAM ceiling is what is actually blocking your work, compare current pricing on 12GB and 16GB cards before you spend another evening on dependency archaeology.
See More:
Conclusion: Getting Nvidia cuDNN Right the First Time
Nvidia cuDNN is not complicated once you see the shape of it: four layers that must agree, one library that most frameworks now bundle for you, and three errors that account for nearly every support thread on the subject. Install via pip inside a virtual environment, verify with the one-line check above, and resist the urge to add a system-wide install unless a C++ or TensorRT build genuinely requires it.
When something breaks, work from the bottom up — driver, then CUDA, then cuDNN, then framework — instead of reinstalling everything at once. And when the errors turn out to be memory rather than versions, recognise it early. Bookmark the compatibility table above; it will save you the next hour you were about to lose.
Frequently Asked Questions
What does cuDNN actually do?
cuDNN is a library of hand-tuned GPU primitives for deep learning operations such as convolutions, pooling, normalisation and attention. Frameworks like PyTorch and TensorFlow call into it rather than writing their own kernels, which is why it is a dependency rather than something you interact with directly.
Do I need to install it separately?
Usually not. Pip and conda builds of PyTorch and TensorFlow bundle the cuDNN libraries they were built against, so a current display driver is sufficient. You install cuDNN manually only when compiling a framework from source, building custom C++ extensions, or working with a container that expects a system-wide installation.
Which cuDNN version goes with which CUDA version?
cuDNN releases are published per CUDA major line, so a build labelled for CUDA 12 works across CUDA 12.x thanks to minor version compatibility. Mixing a cuDNN built for CUDA 11 with a CUDA 12 toolkit is the classic cause of undefined symbol errors at import time.
How do I fix could not load dynamic library libcudnn errors?
Confirm the file exists, then ensure its directory is on LD_LIBRARY_PATH on Linux or on PATH on Windows. If you installed via the tarball rather than a package manager, the libraries often end up somewhere the loader does not search. Running ldconfig after copying files into /usr/local/cuda/lib64 resolves most cases.
Why do I get a cuDNN failed to initialize error?
Despite the wording this is very often an out of memory condition rather than a library problem, especially when another process already holds VRAM. Check nvidia-smi for competing processes, reduce batch size, and on TensorFlow enable memory growth so it does not preallocate the entire card at startup.
As an Amazon Associate we earn from qualifying purchases at no extra cost to you.


Ready to decide? Our #1 pick for 2026 is the PyTorch 2.0-2.1.
Live price & availability on Amazon.





Write Your Review
No reviews yet. Be the first to share your experience!