


How to enable NVIDIA overlay is one of those small tasks that feels confusing until someone shows you the exact clicks. If your Alt+Z does nothing, or you just installed the NVIDIA app and cannot find the in-game overlay anywhere, this guide fixes it fast. In a handful of short steps you will turn the overlay on, bind the right hotkey, and start recording, replaying, and monitoring your games with zero guesswork.
What You Need Before You Enable the NVIDIA Overlay
A smooth setup starts with the basics in place. Before you touch any settings, make sure your GPU, driver, and software are ready to go, because the large majority of overlay problems come from a missing or outdated piece here rather than from the overlay feature itself. Sort these three things first and the rest takes only minutes.
As an Amazon Associate we earn from qualifying purchases at no extra cost to you.



Check Your GPU and Driver Are Ready
First, confirm you are actually running a GeForce GPU, since the NVIDIA overlay only works on NVIDIA hardware. If your display is being driven by integrated graphics or an AMD card, the overlay will never appear no matter how many settings you toggle.
Next, update to the latest driver through the NVIDIA app, which has now replaced the older GeForce Experience software. An outdated or partially installed driver is the single most common reason the overlay refuses to open when you press the hotkey.
Handle these two checks first and you will avoid the overwhelming majority of the frustration people run into when they are learning how to enable NVIDIA overlay for the first time.
Tools and Gear That Make Recording Smoother
The overlay itself is completely free, but a few pieces of hardware make the whole capture experience noticeably better. A fast SSD with plenty of free space keeps your recorded clips from stuttering or dropping frames, so a spacious, speedy drive is the first upgrade to consider if you plan to record often.
A dedicated microphone, or a headset with a genuinely clean mic, dramatically improves the voice track on your highlight clips and streams, and a comfortable gaming mouse with programmable buttons makes triggering hotkeys mid-match far less fiddly than reaching across the keyboard.
None of these are required just to enable the overlay, but if you intend to record regularly, the button below points to reliable, well-reviewed options that pair perfectly with NVIDIA’s capture features and keep your footage clean. Even a modest upgrade here, such as moving your recordings onto a dedicated drive or swapping a scratchy built-in laptop mic for a proper USB one, tends to make a bigger difference to your final clip quality than almost any single overlay setting you can toggle.
Enable the Right Windows and App Settings
Open the NVIDIA app and sign in if you are prompted, then make sure the in-game overlay toggle is actually present in the settings menu. If it appears greyed out, your driver install may be incomplete, so reinstall cleanly through the app to restore it.
On the Windows side, confirm the app has permission to run at startup and that no aggressive third-party optimizer is silently blocking it. Overlays from other programs, such as chat or streaming apps, can also conflict, so disable duplicates if the NVIDIA panel stubbornly refuses to appear.
With your hardware, driver, and permissions all sorted, you are finally ready for the actual step-by-step process.
How to Enable the NVIDIA Overlay Step by Step
This is the core of the guide. Follow the numbered steps in order and the overlay will be live in under two minutes, with the hotkey and the key capture features configured the way most players actually want them. Each step includes a quick note on why it matters, so you understand the setup rather than just clicking blindly.
Step 1 and 2: Open the App and Turn On the Overlay
Step 1: Open the NVIDIA app. Launch it from the Start menu or the system tray. This app is the hub for both your driver and the overlay, so everything in this guide begins here, and keeping it accessible saves time later.
Step 2: Enable the in-game overlay. Head to the Settings or Features area and switch the in-game overlay toggle on. This is the master switch for the entire feature, and without it the Alt+Z shortcut will do absolutely nothing, which is the mistake that trips up most first-timers.
Once that toggle turns green, the overlay engine is active and quietly listening for your hotkey in the background.
Step 3 and 4: Bind Your Hotkey and Set Up Features
Step 3: Confirm or change the hotkey. The default is Alt+Z. Press it on the desktop or inside a game to open the overlay panel. If it clashes with another program you already use, rebind it to a free combination so it always responds instantly when you need it.
Step 4: Configure your recording and capture options. Inside the overlay, set your recording quality, resolution, and frame rate, and choose a save folder on the fast drive you prepared earlier. Doing this once means every future clip records exactly how you want.
Taking a minute here to dial in these settings saves you from fumbling through menus in the middle of an exciting moment later on.
Step 5: Record, Highlight, and Monitor Performance
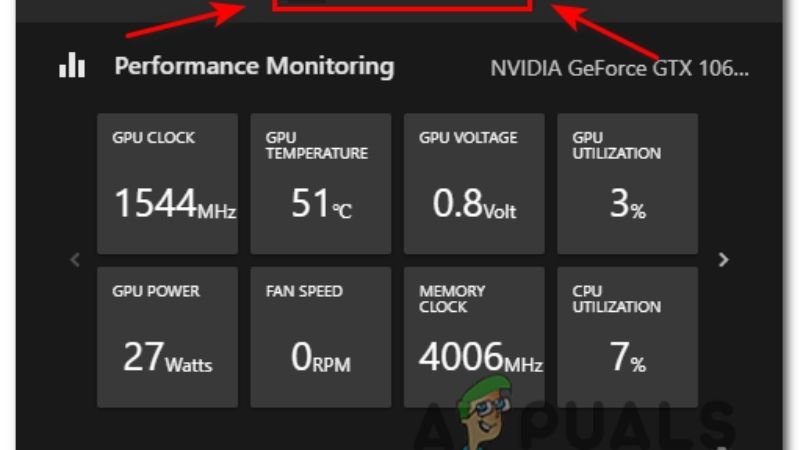
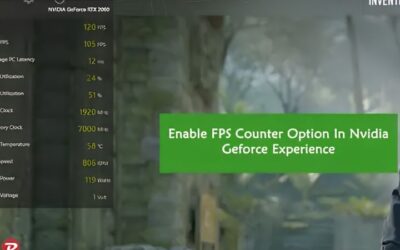
Step 5: Use the capture and monitoring tools. With the overlay open, you can start a manual recording, enable instant replay to save the last several minutes on demand, and turn on the performance monitor to watch FPS, temperatures, and hardware usage live while you play.
That performance overlay is especially useful for spotting thermal throttling or a CPU bottleneck in real time, which quietly turns the feature into a legitimate diagnostic tool rather than just a clip recorder. Many players leave it running permanently for exactly that reason.
And that is the entire process; the overlay is now enabled, configured, and fully functional across your games. Spend a minute exploring the panel and you will find extra conveniences such as instant screenshots and quick sharing that make it far more than a simple record button once you grow comfortable with it.
Pro Tips, Mistakes to Avoid, and Overlay Pros and Cons
Getting the overlay running is step one; using it without headaches is step two. This section shares a few expert tips, the mistakes new users make most often, and an honest pros and cons breakdown, so you know exactly what to expect and how to get the best results once the NVIDIA overlay is enabled on your system.
Pro Tips for a Smoother Overlay
Keep instant replay switched on at all times so you never miss a great moment; you simply tap the save hotkey right after it happens. It costs almost no performance and spares you from remembering to start a manual recording at the beginning of every round.
Record to a separate drive from your game install whenever possible, which meaningfully reduces stutter during capture. Also keep your driver current, since NVIDIA regularly ships updates that improve capture stability and occasionally add useful new features to the overlay.
Finally, always test a short clip before any important session, so you confirm both audio and video are being captured correctly and avoid a heartbreaking silent recording.
Common Mistakes to Avoid
The biggest mistake is leaving the master overlay toggle off and then blaming the hotkey when nothing happens, so always verify that in-game overlay switch first. The second most common error is running two overlays at once, such as a chat app overlay fighting the NVIDIA one, which causes flicker or an unresponsive panel.
Another frequent slip is recording at maximum quality onto a nearly full drive, which produces dropped frames and choppy footage. Leave healthy free space available and match your recording quality to the storage you actually have.
Steer clear of those three pitfalls and the overlay stays reliable and smooth through even the longest gaming sessions.
Pros and Cons of Using the NVIDIA Overlay
To keep this guide honest, here is the balanced view of the feature. Pros: it is free, built directly into the driver you already have, offers low-overhead recording and instant replay, and includes a genuinely useful live performance monitor, all without any extra software cluttering your system.
Cons: it only works on NVIDIA GPUs, it can occasionally conflict with other overlays, high-quality recording demands fast storage, and the interface sometimes needs a clean driver reinstall to behave properly after a major update.
For the vast majority of GeForce owners the pros clearly outweigh the cons, which is exactly why learning how to enable NVIDIA overlay is well worth the two minutes it takes.
See More:
- RX 9060 XT vs RTX 4060
- NVIDIA Jetson price
- NVIDIA GeForce GTX 1650 driver
- Intel Iris Xe graphics driver
- 9060 XT 16GB vs 5060 8GB
Conclusion: Enjoy Your Newly Enabled NVIDIA Overlay
That is how to enable NVIDIA overlay from start to finish: check your GPU and driver, flip the master toggle in the NVIDIA app, bind Alt+Z, and configure recording along with the performance monitor. From here you can capture highlights, save instant replays on demand, and watch your FPS and temperatures live while you play, all from one lightweight panel. If you record or stream regularly, the right storage, microphone, and mouse make the whole experience dramatically smoother, so use the button below to check out dependable, highly rated gear that pairs perfectly with your newly enabled overlay and keeps every capture clean and stutter-free. Once the overlay becomes second nature, saving a clutch play or checking your temperatures mid-game takes a single keypress, and that small habit quickly turns into one of the most useful parts of owning a GeForce card day to day.
Frequently Asked Questions
How do I turn on the NVIDIA overlay?
Install the NVIDIA app, open Settings, and enable the in-game overlay toggle. Once enabled, press Alt and Z inside a game to bring it up. The NVIDIA app has replaced GeForce Experience, so if you are still running the old software the overlay lives under the Share settings instead.
Why is Alt and Z not working?
The most common causes are the overlay toggle being off, another application claiming the same hotkey, or the game running with elevated privileges while the NVIDIA app does not. Try running the NVIDIA app as administrator, rebind the shortcut, and confirm you are running a current Game Ready driver.
What can the overlay actually do?
It provides an on screen performance monitor with frame rate, latency, temperature, and utilisation, plus instant replay and manual recording, screenshot capture, filters, and a photo mode in supported titles. It also exposes the latency metrics that pair with Reflex, which is useful for tuning frame generation settings.
Does the overlay reduce performance?
The overlay itself has a negligible cost, typically a fraction of a percent. Instant replay is different because it continuously buffers video, which uses the encoder and some memory. If you are chasing maximum frame rates in a competitive title, disable instant replay but keep the statistics display on.
Can I use it on a GTX card?
Yes, the overlay and its performance monitor work on GTX cards including Turing based models such as the GTX 1650. What you cannot access are RTX specific features like ray tracing filters, DLSS controls, and Smooth Motion, since those depend on tensor and RT hardware that GTX cards do not have.

Write Your Review
No reviews yet. Be the first to share your experience!