
- Top Pick: Gpu Backplate Radiator, Alloy Fast Heat Sink 4 Pin Backplane Gpu Backplate Aluminum Cooler Memory Cooler for Rtx3090 3080 3070
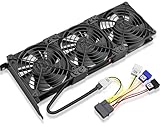
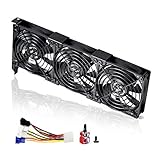
- Best Value: GDSTIME Graphic Card Fans, PCI Slot 3X 90mm 92mm Fans, Graphics Card Cooler
- Premium Choice: GOWENIC GPU Backplate Memory Radiator, Aluminum Alloy Heatsink Cooler with 4Pin Cooling Fan and Thermal Pad for Graphics Card RTX3090 3080 3070
Choosing a GPU cooler is less about finding the biggest fan and more about matching the cooler to your graphics card, case, and noise tolerance. A common mistake is buying a universal-looking accessory without checking the card’s mounting pattern, thickness, power connector, or clearance around nearby PCIe slots. Another is confusing a backplate heatsink with a full GPU cooler: a backplate can help remove heat from the rear of the card, but it usually cannot replace the GPU’s factory heatsink and fans.
Buyers also often focus on advertised fan size while ignoring airflow direction, static pressure, fan speed, and whether the product fits the case. The right choice in 2026 may be a replacement fan, an auxiliary PCI-slot cooler, a backplate radiator, or a complete aftermarket heatsink. The best option depends on the problem you are trying to solve.
As an Amazon Associate we earn from qualifying purchases at no extra cost to you. Product prices and availability are accurate as of the date shown and are subject to change.


Decide These 3 Things First
- Identify the cooling problem. Is the GPU overheating, running loudly, suffering from a failed fan, or simply warming the case? A replacement fan addresses a failed fan, while a case-airflow problem may require intake or exhaust fans instead.
- Measure compatibility. Record the graphics card’s length, height, thickness, fan diameter, screw spacing, and available space in the case. Check the number of free PCIe slots and the location of the 4-pin or 2-pin fan header.
- Set a realistic performance target. Decide whether you need quieter everyday gaming, lower temperatures under sustained loads, or basic memory and backplate cooling. A small accessory cooler cannot deliver the same results as a properly fitted heatsink with a heat pipe or vapor chamber.
Size and Compatibility
Size is the first decisive factor because even a technically capable cooler is useless if it blocks your other hardware. Measure the GPU itself, not just the published length of the card. A graphics card may be listed at 300 mm long, but its power cable can require another 20 to 35 mm of bending space.
For a replacement fan, compare the original fan’s diameter and mounting holes. Common sizes include 75 mm, 80 mm, 87 mm, 90 mm, and 92 mm. A 92 mm fan is not automatically interchangeable with an 87 mm fan, even when the blades appear similar. Confirm the screw-hole spacing, connector type, voltage, and rotation direction.
PCI-slot coolers with two or three fans commonly occupy one expansion slot and measure roughly 90 to 120 mm wide, 20 to 30 mm deep, and 270 to 300 mm long. Check whether the cooler sits directly beneath the GPU and whether its fan blades align with the card’s intake area. A two-slot graphics card can leave little room for an auxiliary cooler.
Backplate radiators are usually designed for specific card families rather than universal use. Some aluminum models measure approximately 290 by 95 mm and include thermal pads for memory or rear components. Verify the exact GPU model, backplate shape, screw locations, and component height before installation. Never allow a metal heatsink to contact exposed electrical components.
Material and Heat Transfer
Most practical GPU coolers use aluminum, copper, or a combination of both. Aluminum is light, affordable, and adequate for spreading moderate heat across fins. Copper transfers heat more efficiently and is often used in the base plate or heat pipes, but it costs more and adds weight.
For a small backplate cooler or memory radiator, look for an aluminum fin stack with a reasonably broad contact area. A thin flat plate with minimal fins may provide limited benefit because surface area is what allows heat to move into the air. A useful budget heatsink may weigh around 150 to 350 grams; larger copper-based assemblies can weigh 500 grams or more and may require a support bracket.
Thermal pads matter as much as the metal. Typical pad thicknesses range from 0.5 mm to 2 mm. The pad must be thick enough to bridge the gap but not so thick that it prevents the cooler from sitting flat. Use a pad with suitable thermal conductivity, commonly rated around 6 to 12 W/mK for consumer accessories, and cut it to cover the intended memory or backplate area without overlapping connectors.
Do not assume a higher thermal-conductivity rating guarantees better results. Contact pressure, flatness, fin area, and airflow determine how much heat reaches the air. A well-fitted aluminum cooler can outperform a poorly mounted copper accessory.
Construction, Mounting, and Safety
Construction quality determines whether the cooler remains secure and electrically safe. Look for straight fins, a flat base, protected fan wiring, and mounting hardware that does not require excessive force. Metal edges should be smooth rather than sharp, especially on a cooler installed close to the motherboard.
Mounting is particularly important for backplate products. Some use existing card screws; others rely on adhesive thermal pads. Screw-mounted designs are generally easier to remove, but the screw length must match the original hardware. Using a screw that is even 2 to 3 mm too long can damage the circuit board or prevent the card from seating correctly.
Check the connector before purchase. A 4-pin fan plug may support motherboard-controlled speed, while a 2-pin design commonly runs at a fixed voltage or speed. Some small GPU coolers draw power from a motherboard header, SATA connector, or graphics-card header. Keep total fan-header load below the motherboard manufacturer’s rating; many headers are designed for about 1 amp, but the specification varies.
Avoid coolers that rely on permanent adhesive over hot components unless the manufacturer specifically designs the product for that use. Also confirm that the cooler does not cover the GPU’s serial label, interfere with the backplate screws, or prevent the card from fitting into its normal slot.
Noise, Airflow, and Cooling Performance
Cooling performance should be considered alongside noise. A small fan running at 3,000 to 5,000 rpm may move useful air but produce a noticeable high-pitched sound. Larger 90 or 92 mm fans can often deliver similar airflow at lower speeds, although the final result depends on blade design and the restriction around the card.
For a quiet system, target a cooler with a controllable speed range of roughly 800 to 2,000 rpm and a stated noise rating near or below 30 dBA. Treat manufacturer noise figures as comparisons rather than guarantees because testing methods differ. A cooler mounted directly under a graphics card may sound louder than the same fan in open air.
Airflow direction is equally important. A PCI-slot fan placed beneath an open-air GPU should generally feed cooler air toward the card or remove hot air from the slot area, depending on the case layout. Do not install several fans that fight one another. Maintain at least one clear front-to-back airflow path, with approximately 10 to 20 mm of breathing room around the fan intake when possible.
For replacement fans, confirm the fan’s voltage, rated current, connector, and control method. A fan with a higher maximum rpm is not necessarily better if the GPU cannot control it. Monitor temperatures and fan speed after installation with software that supports your graphics card, and compare results under the same workload rather than relying on a single temperature reading.
Price Tiers and Overall Value
GPU cooling accessories generally fall into three price groups:
- Budget: $15 to $30. This range includes basic PCI-slot fan assemblies, replacement fans, and simple aluminum backplate radiators. Products such as three-fan 90 or 92 mm slot coolers commonly appear near $23 to $29. They can improve airflow but may have limited controls, lighter construction, or noisier motors.
- Midrange: $30 to $70. Expect better bearings, speed control, stronger mounting hardware, improved thermal pads, and more reliable compatibility information. This is often the best value for replacing a noisy or failed fan.
- Premium: $70 to $150 or more. Large aftermarket heatsinks, copper heat-pipe assemblies, and some liquid-cooling solutions occupy this tier. They may offer more capacity, but installation complexity and compatibility risks also increase.
Do not pay premium pricing for a basic aluminum backplate and a small fixed-speed fan. Conversely, a very cheap universal cooler may require extra thermal pads, brackets, or a separate fan controller, raising the final cost. Include those accessories in your comparison.
Warranty and Replacement Support
A cooler with moving parts should have clear support for fan failure. Look for at least a 12-month warranty, a stated return window of 30 days or longer, and a seller that identifies the exact replacement fan model. Bearings, fan cables, and adhesive pads are common failure points.
Read the warranty exclusions before installing the product. Some manufacturers exclude damage caused by modifying a graphics card, removing the factory cooler, or using incorrect thermal pads. Keep the original screws and cooler until the new assembly has been tested and you are certain it works.
Useful support information includes a compatibility list, installation diagrams, connector specifications, pad thickness, and replacement-part availability. Vague listings that say “fits most GPUs” without naming dimensions or card families deserve caution.
Delivery and Assembly
Before ordering, confirm that the package includes every part needed: thermal pads, screws, washers, fan cable, mounting bracket, and instructions. A delivery box measuring only a few inches may contain a compact accessory, while a large heatsink can arrive in packaging roughly 12 by 6 by 3 inches and weigh 1 to 2 pounds.
Allow 30 to 90 minutes for a simple fan or slot cooler installation. A backplate or heatsink replacement may take 1 to 3 hours, especially if the factory cooler must be removed and old thermal material cleaned. Work on a non-carpeted surface, disconnect power, ground yourself, and avoid touching exposed contacts.
After assembly, check that every fan spins, the GPU is firmly seated, cables are clear of blades, and the card is supported. Test at idle first, then under a repeatable load for 15 to 30 minutes while watching temperatures, fan speed, and system stability.
Spec Checklist
| Spec | Budget | Mid | Premium |
|---|---|---|---|
| Typical price | $15–$30 | $30–$70 | $70–$150+ |
| Fan size | 80–92 mm | 90–120 mm | 92–140 mm or liquid pump |
| Fan control | Fixed or basic 2-pin | 4-pin PWM preferred | PWM, controller, or software control |
| Speed range | 1,500–4,000 rpm | 800–3,000 rpm | 500–2,500 rpm |
| Materials | Aluminum or plastic frame | Aluminum with copper contact parts | Copper base, heat pipes, or vapor chamber |
| Typical weight | 100–350 g | 300–700 g | 600 g–1.5 kg |
| Warranty target | At least 12 months | 12–24 months | 24 months or more |
Red Flags
- No exact dimensions, mounting-hole spacing, connector type, or compatibility list.
- Cooling claims without fan speed, airflow, noise, or power information.
- Thermal pads included but no stated thickness or installation guidance.
- A metal backplate cooler that may touch exposed components or short the card.
- Fans powered from an unspecified connector or drawing more current than a motherboard header supports.
- Reviews mentioning warped plates, rattling bearings, missing screws, or blades that contact the shroud.
- A large heatsink with no warning about GPU sag, case clearance, or adjacent PCIe slots.
- Promises of dramatic temperature reductions without controlled test conditions.
FAQ
Is a backplate radiator a complete GPU cooler?
No. It primarily removes heat from the rear of the graphics card and may help with memory or backplate temperatures. It does not replace the GPU die heatsink, front-side memory cooling, or the card’s main fans unless it is part of a specifically engineered replacement system.
Are three 90 or 92 mm fans better than the original GPU fans?
Not automatically. They may improve airflow beneath the card, but performance depends on placement, case ventilation, noise, and whether the fans align with the GPU heatsink. They are most useful when the original fans are failing or when the card has a compatible mounting solution.
How do I know whether a replacement fan will fit?
Match the fan diameter, screw-hole spacing, thickness, connector, voltage, and rotation direction. Compare the replacement with the original fan rather than relying only on the GPU model name. Some cards sold under the same GPU chip use different shrouds and fan assemblies.
When should I replace the cooler instead of adding another fan?
Replace the cooler when the heatsink is damaged, the fan mount is proprietary, the card has a failed heat pipe, or temperatures remain excessive after cleaning and improving case airflow. Add an auxiliary fan when the existing cooler works but the area beneath the card lacks fresh air.






Write Your Review
No reviews yet. Be the first to share your experience!