
- Top Pick: MC1648DLS-JST ZE0824 406077 Treadmill Control Board 10 pins Treadmill Motor Controller 50W Compatible with Proform/Nordic Track Treadmill
- Best Value: Metal Bracket Kit 3D Printer with Strong Stability Accurate Dimension High Heat Aluminum Alloy CNC Parts for 2.4 Compatible with Stealthburner
- Premium Choice: EZDIY-FAB PCIe 5.0 Riser Cable, Gen5 GPU Extender, Right Angle, 20cm, Black | Vertical GPU Mount, 128GB/s Bandwidth, RTX 5090/4090 & RX 9000 Ready, PCIe 4.0/3.0 Backward Compatible, Ultra-Flexible Cable
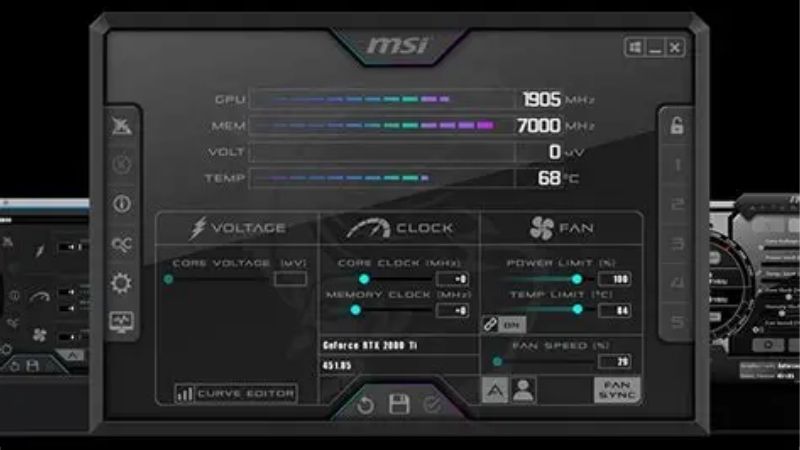
How to undervolt GPU MSI Afterburner is a search that usually starts with a noise problem or a heat problem. Your card sounds like a hairdryer. Your room gets warm. Your frame rate dips after twenty minutes of play. Undervolting fixes all three, it is free, it takes about thirty minutes, and it is the lowest-risk thing you can do in Afterburner — lower risk than overclocking, because you are asking the card for less rather than more. This guide walks you through it step by step, with the exact settings and the mistakes that waste people’s evenings.
What Undervolting Does and Why It Works
Your GPU ships with a voltage curve set conservatively. Nvidia and AMD have to guarantee every card in a production run is stable, including the worst silicon that passed testing. Yours is probably better than that worst case, which means it is being fed more voltage than it needs.
The Trade That Is Not Really a Trade
Less voltage means less heat. Less heat means the card holds its boost clock longer instead of throttling. On many cards, a good undervolt produces the same or slightly better sustained performance while running 10–20°C cooler and drawing tens of watts less.
That is not a free lunch exactly — you are trading peak boost headroom for consistency. But peak boost is a number you see in a benchmark. Sustained clocks are what you actually play on.
The bigger the card’s power budget, the bigger the win. An RTX 5090 at 575W TGP is the ideal candidate: it is common to remove 80–100W from one without losing measurable performance.
Why This Matters More in 2026
Two reasons beyond the noise. First, RTX 50 and RX 9000 cards run hot — the 5090’s 575W and the RX 9070 XT’s measured ~351W draw put real heat into a case, and undervolting is the cheapest way to manage it.
Second, and less obvious: sustained heat shortens component life over years. In a market where component prices have continued climbing and replacement has become genuinely expensive, keeping the card you own healthy has more value than it did.
Undervolting has quietly overtaken overclocking as the enthusiast default for exactly this reason.
Is It Safe?
Yes, more so than overclocking. You cannot damage a card by giving it less voltage. The worst outcome is instability — a driver crash or a black screen — and the fix is to raise the voltage slightly or reset.
The one genuine hazard is procedural: setting an unstable profile to apply at Windows startup, then having it crash during boot. This guide handles that explicitly in the last step.
One warranty note: overclocking can technically void warranty in some jurisdictions. Undervolting is harder to characterise that way, but be aware the tuning utility is not vendor-blessed.
What You Will Need
Three things, two of them free. The list is short because undervolting is a software job — but the hardware you check it against matters, and one item on this list is where most people’s results actually come from.
MSI Afterburner 4.6.6 (Free)
Download it only from Guru3D or MSI’s own site. Searching for it surfaces a sea of mirror sites, some bundling adware or outright malware. This matters more than usual because the tool needs low-level hardware access.
Version 4.6.6 is the one you want. It is the first stable build in over two years, and it added official GeForce RTX 50 support, unofficial Radeon RX 9000 support, control of up to four independent fans, and new voltage controller handling. Earlier stable builds predate Blackwell entirely.
Despite the branding, it works on any card — GeForce, Radeon, or Intel Arc, from any board partner.
RivaTuner Statistics Server (Bundled, Free)
RTSS 7.3.7 ships with Afterburner 4.6.6. It provides the on-screen overlay you will use to read temperature, clock, and voltage while testing. Install it when the Afterburner installer offers.
Without an overlay you are guessing. With one, you can see the exact moment the card throttles.
A Repeatable Load and a Way to Watch Temperatures
You need something that loads the GPU the same way every time. A benchmark with a fixed run works; so does a three-minute route in a demanding game you own. Consistency matters more than which one.
The hardware item worth considering: if your case airflow is poor, undervolting will help and better case fans will help more. A card starved of intake air throttles regardless of its voltage curve, and no amount of curve editing fixes a case with one exhaust fan. If your temperatures are extreme before you start, look at your airflow first — a decent set of case fans costs less than most people expect and does more for sustained clocks than any software tuning.
Step-by-Step: Undervolting in MSI Afterburner
Work through these in order. Each step takes a few minutes and the whole process is about thirty. Do not skip the baseline — without it you cannot tell whether anything you did helped.
Steps 1 to 4: Baseline and Setup
- Install Afterburner 4.6.6 and RTSS. Reboot. Open Afterburner and confirm it detects your card and shows a voltage reading. If voltage is greyed out, open Settings → General and tick Unlock voltage control and Unlock voltage monitoring, then restart the application.
- Record your baseline. Run your chosen load for ten minutes. Note peak temperature, sustained core clock after the card has heated up, and power draw. Write these down. This is the number you are trying to beat.
- Run the baseline twice. This establishes your run-to-run variance. If two identical runs differ by 3%, then a 2% “gain” later means nothing. Most people skip this and then argue about noise.
- Raise the power limit to maximum. Counterintuitive, but correct: it stops the power limit from interfering while you find the voltage the card actually needs. You will not use the extra power once undervolted.
Steps 5 to 8: Editing the Curve
- Open the curve editor with Ctrl+F. You will see a graph with voltage on the horizontal axis and core clock on the vertical. The line rising left to right is your card’s stock curve. Every point is a promise: at this voltage, run at this clock.
- Pick your target point. Find your sustained boost clock from Step 2 on the vertical axis. Now move left along the curve to a lower voltage — a sensible first attempt is 50–75mV below where your card currently sits at that clock. On most modern cards that lands somewhere around 900–950mV.
- Drag that point up to your target clock. Click the point at your chosen voltage and drag it vertically until it reaches the clock you want. You are telling the card to hit that clock at a lower voltage than it normally would.
- Flatten everything to the right. Select all points to the right of your target and drag them down to the same level, so the curve becomes flat after your point. This stops the card boosting past your target and undoing the work. Then press Apply (the tick icon).
Steps 9 to 12: Testing and Saving
- Run your load for ten minutes. Watch the overlay. You are looking for the clock to sit flat at your target and the voltage to sit at your chosen point. If it crashes, black-screens, or artifacts, your voltage is too low — go back and raise the target point by 10–15mV.
- Compare against your baseline. Temperature should be down 10–20°C, power down noticeably, and performance within your measured variance. If performance dropped meaningfully, your clock target was too ambitious for that voltage — lower the clock slightly rather than raising voltage.
- Test in real games, not just benchmarks. A profile stable in a synthetic load can fail in a game that hits a different part of the curve. Play for an hour across two or three titles before trusting it.
- Save the profile — but do not set it to apply at startup yet. Click a profile slot number and the save icon. Live with it for a week first. Only tick Apply overclocking at system startup once you are confident, because an unstable profile applying at boot is the one failure mode that costs you an evening rather than a minute.
Pro Tips and Mistakes to Avoid
Most undervolting frustration comes from four things, and none of them are the curve editor being difficult. Here is what actually goes wrong.
The Mistakes That Waste Evenings
Skipping the baseline. Without a before number, you will spend an hour arguing with yourself about whether it feels smoother. It does not feel like anything. Measure it.
Not flattening the curve after your point. This is the single most common error. If the curve keeps rising past your target, the card boosts higher, pulls more voltage, and your undervolt does nothing. Everything to the right must be flat.
Testing only in a benchmark. Synthetic loads hit a narrow part of the voltage curve. Games hit all of it. A profile that passes Superposition and crashes in a shader-heavy title is not stable, it is untested.
Chasing the lowest possible voltage. The last 25mV buys you a couple of degrees and costs you stability margin. Stop when it works and leave headroom for a hot day.
Getting More From the Same Profile
Build a custom fan curve alongside the undervolt. In Settings → Fan, tick Enable user defined software automatic fan control. Aim for silence below 50°C and a gradual ramp to 100% around 83–85°C. On RTX 5080 and 5090 cards, Afterburner 4.6.6 can drive up to four fans independently.
Consider a light memory overclock separately. RTX 50 cards have GDDR7 with real headroom — Afterburner 4.6.6 extended the memory offset range considerably, and RTX 5080 memory chips are 32 Gbps parts factory-limited to 30 Gbps. Memory clocks and core voltage are independent, so you can undervolt the core and lift memory in the same profile.
Note that some newer AMD cards have driver-level limits that cap what any utility can change, so RDNA 4 results vary more than Blackwell ones.
When Undervolting Is Not the Answer
If your card throttles at 83°C in a case with one intake fan, the problem is airflow, not voltage. Undervolting will help and will not fix it.
If the card is more than four or five years old, thermal paste degradation is the likelier culprit. A repaste often does more than any curve edit.
And if you are chasing frames rather than temperatures, undervolting is the wrong tool. It buys consistency, not peak performance. If your 1% lows sit below 40 FPS at your settings, no amount of tuning closes that gap — that is a hardware conversation, and in a market where prices have flattened rather than fallen and Nvidia’s 16GB cards were reported end of life at CES 2026, it is one worth having sooner rather than later.
See More:
- Nvidia beta
- Nvidia CUDA 11.8
- Check CUDA version
- Nvidia GPU for gaming
- PNY GeForce RTX 5080 16GB OC review
Conclusion: Undervolt Your GPU With MSI Afterburner
Learning how to undervolt GPU MSI Afterburner takes one evening and pays back every session afterwards. A card running 10–20°C cooler is quieter, holds its boost clock longer instead of throttling, draws less power, and lasts longer. On a high-TGP card the numbers are substantial — 80–100W is common on an RTX 5090 with no measurable performance loss.
The process reduces to four things: measure your baseline twice, drag a point on the curve to a lower voltage, flatten everything to the right of it, and test in real games before trusting it at startup. Download Afterburner 4.6.6 from Guru3D or MSI directly — never a mirror.
One last thing worth checking. Undervolting works with your cooling, not instead of it. If your card sits in a case with poor airflow, or if its thermal paste is years old, the software can only do so much — and a set of decent case fans or a fresh tube of quality thermal compound will multiply everything you just did. Sort the airflow first, then let the curve do the rest.
Frequently Asked Questions
What are the exact steps to undervolt?
Open MSI Afterburner, press Ctrl and F to open the voltage frequency curve editor, pick a target voltage such as 900mV, drag that point up to your intended frequency, then hold Shift and select all points to the right and drag them down so they flatten at that frequency. Apply, then stress test for stability.
What voltage and frequency should I target?
Start conservatively. A common starting point is the frequency your card normally reaches under load, set at fifty to a hundred millivolts less than its stock voltage. If that is stable, step the voltage down further in twenty five millivolt increments. Every chip differs, so treat published settings from other owners as a starting hint rather than a target.
What do I actually gain from undervolting?
Usually a large drop in power draw and temperature for little or no performance loss, sometimes even a small gain because the card stops hitting its power limit and holds a higher sustained clock. Typical outcomes are twenty to fifty watts saved, several degrees cooler, and noticeably lower fan speed and noise.
How do I test whether the undervolt is stable?
Run a demanding game for at least thirty minutes plus a mixed stress test, and include a ray traced title if you play them, since ray tracing stresses different parts of the die. Symptoms of an unstable undervolt are driver timeouts, black screens that recover, and crashes to desktop rather than gradual slowdown.
Will my settings survive a reboot or a driver update?
Save the curve to an Afterburner profile and enable apply at Windows startup so it reloads automatically. Profiles live in Afterburner rather than the driver, so a driver update does not erase them, though a clean driver install can reset the driver side settings and it is worth confirming the curve is still applied afterwards.
As an Amazon Associate we earn from qualifying purchases at no extra cost to you.








Write Your Review
No reviews yet. Be the first to share your experience!