
- Top Pick: Getting Started with NVIDIA GPUs : A Beginner’s Guide to AI Acceleration with python, C++ and Cuda
- Best Value: CUDA by Example: An Introduction to General-Purpose GPU Programming
- Premium Choice: GPU-Accelerated Computing with Python 3 and CUDA: From low-level kernels to real-world applications in scientific computing and machine learning
What is NVIDIA CUDA Toolkit, and do you actually need it? In short, it is the software layer that turns your graphics card into a general-purpose computing machine, and if you have ever tried to run an AI model, a video encoder, or a 3D renderer, you have already felt what happens when it goes missing. This guide explains in plain language what the toolkit actually is, what it installs on your system, which GPU you need to use it, and how to set it up correctly the very first time. You will also see the mistakes that break most beginner installs, and why the current wave of AI hardware news makes a CUDA-capable GPU a smarter purchase today than it was six months ago. No prior experience is required. By the end, you will know exactly what to download and what to buy.
What the NVIDIA CUDA Toolkit Actually Does
At its core, the toolkit is a development kit that lets software send heavy math to your GPU instead of your CPU. A modern GPU has thousands of small cores that run in parallel, which is perfect for the matrix math behind AI, simulation, and rendering. The toolkit is the bridge that makes those cores usable by ordinary programs.
CUDA in Plain English
CUDA stands for Compute Unified Device Architecture. Think of your CPU as a few very fast workers and your GPU as an army of slower workers. For tasks that can be split into thousands of tiny identical jobs, the army wins by a wide margin.
The toolkit gives developers the tools to write and compile programs that hand those tiny jobs to the GPU. When an app says it needs CUDA, it means it was built to use this system and will refuse to run without it.
What the Toolkit Installs on Your PC
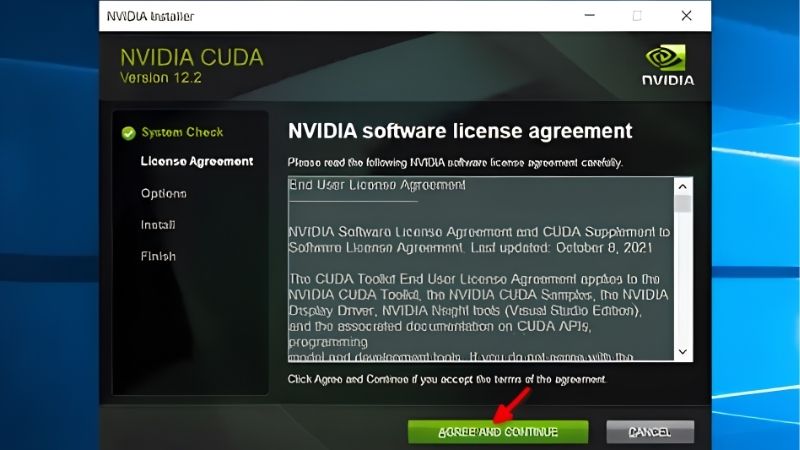
Installing the CUDA Toolkit is not a single file. It sets up several pieces: the nvcc compiler that builds GPU code, the CUDA runtime that programs call while running, and math libraries such as cuBLAS and cuFFT.
For AI specifically, you often add cuDNN, a separate library that accelerates deep neural networks. Many frameworks like PyTorch and TensorFlow already bundle the CUDA runtime, so a beginner may only need the toolkit when compiling code or using tools that require nvcc directly.
Who Actually Needs the CUDA Toolkit
You need it if you develop or build AI models, run local large language models, generate images, do scientific computing, or use professional video and 3D software that lists CUDA as a requirement.
Content creators sit in the middle. Video editors using GPU-accelerated exports in DaVinci Resolve or Premiere, and 3D artists in Blender’s CUDA or OptiX render modes, benefit directly even if they never write a line of code. If your creative app lists CUDA acceleration as a feature, keeping the toolkit and drivers current keeps those exports fast.
You usually do not need it just to play games. Games use the graphics driver, not the developer toolkit. That single distinction saves a lot of confusion, and we cover it in detail below.
Checking Whether Your Hardware Can Run CUDA
Before you download anything, confirm your machine is ready. The toolkit only works with NVIDIA GPUs, and the amount of memory on that GPU quietly decides how far you can go with AI. Getting this right first prevents the most common wasted hours.
GPU Compatibility and Compute Capability
CUDA runs only on NVIDIA cards. AMD and Intel GPUs use different systems entirely, so the toolkit will not help them. Every NVIDIA GPU has a “compute capability” number that tells software which features it supports.
As a rule, any GeForce RTX card from the 20, 30, 40, or 50 series is comfortably supported by current toolkit versions. Older cards may work but can be locked out of newer libraries, which matters for cutting-edge AI models.
To check what you actually have, open a terminal and run nvidia-smi, or look under the NVIDIA Control Panel system information. Note both the exact model and the driver branch, because the toolkit installer will compare against your current driver. If you are unsure whether your card is recent enough, matching its series to the list above is the fastest sanity check before you download several gigabytes.
How Much VRAM You Need for AI Work
Video memory, or VRAM, is the single most important spec for AI. It sets the ceiling on model size. Here is a practical guide:
| VRAM | What You Can Realistically Do |
|---|---|
| 8 GB | Entry AI: small image generation, light local models, learning |
| 12-16 GB | Comfortable: Stable Diffusion, mid-size LLMs, most hobby AI |
| 24 GB+ | Serious: larger models, fine-tuning, longer training runs |
If your card has only 8 GB, you will hit “out of memory” errors quickly once you move past the basics. For anyone planning real AI work, a 16 GB card is the sweet spot for price and headroom. If you are shopping now, check current prices on a 16 GB RTX card on Amazon before you commit to a smaller one you will outgrow.
Drivers vs the Toolkit: They Are Not the Same
This trips up almost every beginner. The graphics driver is what Windows uses to run your display and games. The CUDA Toolkit is a separate developer package for building and running compute code.
You need an up-to-date NVIDIA driver first, and the toolkit second. The good news is that recent toolkit installers can bundle a compatible driver, but keeping your Game Ready or Studio driver current is still the safest foundation.
How to Download and Install the CUDA Toolkit Step by Step
With your hardware confirmed, the install itself is straightforward if you follow the order. Rushing or mixing versions is what causes broken setups, so treat this like a short checklist rather than a race.
Before You Install: A Quick Checklist
Run through these first to avoid the usual pitfalls:
- Confirm you have an NVIDIA GPU and note its series.
- Update your NVIDIA graphics driver to the latest stable version.
- Decide the toolkit version your framework needs (PyTorch and TensorFlow each list a supported CUDA version).
- Free up several gigabytes of disk space for the install.
Installing the CUDA Toolkit on Windows and Linux
Follow these numbered steps, which mirror the official flow on both systems:
- Download the installer from NVIDIA’s developer site, choosing your operating system and version.
- Pick the right installer type – a local installer is safest for beginners because it does not depend on your internet during setup.
- Run the installer and choose the express option unless you have a reason to customize.
- Allow the bundled driver only if your current driver is older than the one offered.
- Reboot when the installer finishes, which finalizes the environment paths.
- Confirm the path so your terminal can find nvcc after restart.
Verifying the Installation Works
Do not assume it worked. Open a terminal and run nvcc –version. If it prints a version number, the compiler is installed and on your path.
Next, run nvidia-smi to see your GPU, driver, and memory. If both commands respond, your system is ready. Frameworks like PyTorch also expose a simple check that reports whether the GPU is available, which is the final confirmation before real work. If that check comes back false, the usual culprit is a version mismatch rather than broken hardware, so recheck your toolkit and framework versions before troubleshooting anything deeper.
Pros, Cons, Common Mistakes, and Today’s GPU Market
The toolkit is powerful, but it is not free of trade-offs, and the market you are buying into right now is unusual. Understanding both keeps you from over-installing software and from overpaying for hardware. This section also weighs the honest advantages and drawbacks tied directly to the CUDA toolkit.
Pros and Cons of Installing the Full CUDA Toolkit
Here is the balanced view most guides skip:
| Pros | Cons |
|---|---|
| Unlocks true GPU acceleration for AI and rendering | Large download and disk footprint |
| Mature, best-supported ecosystem for machine learning | Version mismatches with frameworks cause errors |
| Includes optimized math libraries out of the box | Only useful with an NVIDIA GPU |
For most beginners, the pros clearly win, but you should install only the version your framework asks for rather than the newest by default.
Common Mistakes That Break CUDA Installs
The top mistake is installing a toolkit version your framework does not support, then wondering why the GPU is “not found.” Match versions first.
The second is ignoring the driver, since an outdated driver can block a new toolkit. The third is installing multiple versions carelessly, which pollutes the system path. Keep it simple: one driver, one matching toolkit, verified before you build.
Why the Latest AI Chip News Affects Your Buying Decision
Two recent developments matter for anyone about to buy a CUDA-capable card. First, the United States has cleared NVIDIA to sell its H200 – one of its most powerful AI chips – to China. That signals just how central NVIDIA and CUDA remain to global AI, and it keeps demand for CUDA-ready GPUs strong across every tier, including the consumer cards you would buy.
Second, laptop and component prices have trended upward, and the memory shortage that pushed them there has not fully cleared. There is cautious good news: prices have stopped climbing as steeply as they did in late 2025, and some hardware makers have reported a period of relative stability, though they still warn of volatility. New memory supply is coming – from Chinese DDR5 makers and new Micron fabs in Idaho – but those plants are not expected to run until 2027 or 2028.
The practical takeaway is simple. Real relief is likely years away, and prices have only leveled off rather than dropped. If you already know you need a CUDA GPU for AI, waiting is unlikely to save you money in the near term, and it may cost you more.
See More:
Conclusion
So, what is NVIDIA CUDA Toolkit in the end? It is the foundation of almost all serious GPU computing, from local AI to professional rendering, and setting it up is far easier once you separate the driver from the toolkit and match versions to your framework. Confirm your GPU, check your VRAM against your goals, follow the numbered install steps, and verify with nvcc before you build. With AI demand staying high and component prices only stabilizing rather than falling, a capable NVIDIA GPU remains a sound investment for anyone learning CUDA today. If you are ready to start, compare current prices and pick a card with the memory headroom your projects will need.
Frequently Asked Questions
What is the CUDA Toolkit in simple terms?
It is the development kit that lets programmers write code running on NVIDIA GPUs. It includes the nvcc compiler, accelerated maths libraries such as cuBLAS and cuFFT, the CUDA runtime, debugging and profiling tools like Nsight, and documentation. It is for building GPU software, not for running games.
Do I need it if I only play games?
No. Games use the graphics driver, which already contains everything required. The toolkit is purely a developer package. Installing it on a gaming PC adds several gigabytes and offers no benefit unless you are compiling GPU code or using an application that specifically demands the full toolkit.
What is the difference between CUDA cores, the driver and the toolkit?
CUDA cores are the physical processing units on the chip. The driver exposes them to the operating system and includes the low-level CUDA driver API. The toolkit is the software development layer on top, giving you compilers and libraries to write programs that use those cores.
Why do AI frameworks mention CUDA versions if I never installed it?
Because prebuilt PyTorch and TensorFlow packages bundle the CUDA runtime libraries they were compiled against. The version label tells you which runtime is embedded, and your display driver simply needs to be recent enough to support it. That is why installation usually works without a separate toolkit.
Is CUDA compatible with AMD or Intel graphics cards?
No, it is proprietary to NVIDIA hardware. AMD offers ROCm with a HIP translation layer that can port many CUDA programs, and Intel provides oneAPI, while OpenCL and Vulkan compute offer vendor-neutral alternatives. None of them run CUDA binaries natively on non-NVIDIA silicon.
As an Amazon Associate we earn from qualifying purchases at no extra cost to you.



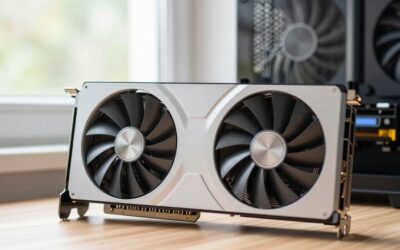
Ready to decide? Our #1 pick for 2026 is the VRAM.
Live price & availability on Amazon.



Write Your Review
No reviews yet. Be the first to share your experience!