
A graphics driver can make the difference between a smooth desktop and a computer that crashes whenever you open a game. If an old driver is only partially removed, Windows may show a black screen, flickering, error codes, poor performance, or conflicts between multiple NVIDIA installations. The safest approach is to remove the existing software, restart cleanly, and install only the components you need.
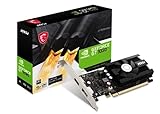
This guide explains how to install Nvidia GPU drivers cleanly on a Windows desktop, whether you are setting up an entry-level card such as the MSI Gaming GeForce GT 1030 4GB DDR4 or a newer model such as the ASUS Dual GeForce RTX 4060 Ti EVO OC Edition 8GB. The process also works when changing from one NVIDIA card to another. In 2026, NVIDIA’s app makes routine updates easier, but a full clean installation is still useful after persistent crashes, a major hardware swap, or a failed update.
As an Amazon Associate we earn from qualifying purchases at no extra cost to you. Product prices and availability are accurate as of the date shown and are subject to change.

What You Need
| Item | Why | Optional? |
|---|---|---|
| Windows PC with the NVIDIA card installed | The driver must match your operating system and graphics hardware. | No |
| Stable internet connection | Needed to download the correct driver package and, if selected, the NVIDIA app. | No |
| USB flash drive, 8GB or larger | Useful for saving the driver installer before removing the old driver. | Optional |
| Display cable connected to the graphics card | Ensures the monitor uses the installed GPU rather than the motherboard’s video output. | No for a desktop GPU |
| Display Driver Uninstaller, commonly called DDU | Removes leftover driver files and settings more thoroughly than a normal uninstall. | Optional, but recommended for troubleshooting |
| Phillips screwdriver and case manual | Needed only if you are installing or reseating the physical card. | Optional |
Before downloading, check your card and power supply. A GT 1030 typically draws little power and often needs no separate power cable, while an RTX 4060 Ti commonly uses a single 8-pin PCIe connection or an adapter, depending on the exact card. Confirm your power supply has the required connector and enough capacity; approximately 300 watts can be adequate for some GT 1030 systems, while a 500-watt or higher quality supply is a more typical target for an RTX 4060 Ti system. Always follow the card maker’s specification first.
Step-by-Step
-
Confirm the GPU and Windows version (5 minutes)
Right-click the Start button, choose Device Manager, and expand Display adapters. Write down the exact NVIDIA model. Then open Settings > System > About and confirm whether you are running 64-bit Windows.
Also check the physical installation. Shut down the PC, switch off the power supply, unplug it, and press the power button once. Make sure the card is fully seated in the PCIe slot, its rear bracket is secured, and any required power plug is firmly connected. If you are replacing a card, measure the case clearance before buying: compare the card’s length, height, thickness, and radiator or front-fan space with your case specifications.
-
Download the correct driver before removing anything (5–10 minutes)
Use NVIDIA’s official driver selection page or the NVIDIA app. Select the product family, series, exact model, and Windows version carefully. Choose Game Ready Driver for frequent gaming releases or Studio Driver for supported creative applications that prioritize production stability.
Save the installer somewhere easy to find, such as the Downloads folder or an 8GB-or-larger USB drive. Do not rely on Windows Update to supply the complete driver package. If your current display is unstable, download the installer on another computer and copy it to the USB drive.
-
Disconnect from the internet (1 minute)
Turn off Wi-Fi or unplug the Ethernet cable. This prevents Windows from automatically installing a generic or older graphics driver while you are removing the current one. You can reconnect after the new driver is working.
-
Start Windows in Safe Mode (5 minutes)
Open Settings > System > Recovery, find Advanced startup, and choose Restart now. Select Troubleshoot > Advanced options > Startup Settings > Restart, then press the number for Safe Mode.
Safe Mode loads a basic display driver and limits background software, making it easier to remove NVIDIA files. If you are not using DDU, you can uninstall NVIDIA components from Settings > Apps > Installed apps, but this is less thorough.
-
Remove the old driver with DDU (5–10 minutes)
Run DDU in Safe Mode. Choose GPU and NVIDIA, then select Clean and restart. This removes the display driver, associated services, profiles, and cached files. Do not remove chipset, audio, or motherboard drivers.
DDU is particularly useful when changing cards, moving from another graphics brand, dealing with repeated driver crashes, or installing over years of accumulated updates. If the computer restarts to a low-resolution desktop, that is expected; Windows is temporarily using its basic display driver.
-
Install the NVIDIA driver (10–15 minutes)
Open the downloaded NVIDIA installer. Allow it to check system compatibility, then choose Custom (Advanced) rather than Express. Select only the components you need. The graphics driver and PhysX are generally useful; the NVIDIA app is optional, and HD Audio is needed only if you send sound through the GPU’s HDMI or DisplayPort connection.
Check Perform a clean installation when that option appears. This resets NVIDIA control-panel profiles and replaces existing driver settings. The screen may blink or go dark briefly. Do not shut down the computer during the installation.
-
Restart and reconnect (3–5 minutes)
Restart Windows when prompted. After reaching the desktop, reconnect Ethernet or turn Wi-Fi back on. Open Device Manager and verify that the exact NVIDIA card appears without a yellow warning symbol.
Right-click the desktop and open NVIDIA Control Panel or the NVIDIA app. Confirm the installed driver version, monitor resolution, refresh rate, and connection type. If you use multiple displays, reconnect them one at a time if Windows does not detect them immediately.
-
Test the system carefully (10–20 minutes)
First test ordinary tasks: move windows, play a video, and change display settings. Then launch a familiar game or graphics program for 10 to 15 minutes. Watch for black screens, colored artifacts, driver-reset messages, unusual fan noise, or immediate crashes.
Do not overclock immediately after a clean installation. Leave default settings in place until the system proves stable. Create a restore point after the successful test so you have a known-good configuration to return to later.
Mistakes to Avoid
- Installing the wrong model’s driver: Confirm the full card name, not just “RTX” or “GTX.”
- Using the motherboard video output: Plug the monitor into the ports on the graphics card.
- Removing drivers while online: Windows can interfere by installing a driver mid-process.
- Choosing every optional component: Extra overlays and recording tools can add background processes. Install them only if you use them.
- Ignoring power and clearance: Check the card’s physical dimensions, slot thickness, connector requirements, and recommended PSU wattage before installation.
- Updating BIOS as a first resort: A BIOS update is not normally required for a routine NVIDIA driver installation.
- Diagnosing software when the hardware is failing: Persistent artifacts, burning smells, or a fan that will not spin can indicate a physical problem.
How Often
Install a clean driver only when needed: after replacing the GPU, recovering from repeated crashes, switching graphics brands, or fixing a failed update. For a stable computer, use normal NVIDIA app updates or manually install a new driver when a game or application requires it. Many users can go several months between updates. There is no benefit to using DDU before every routine release.
When to Call a Pro or Replace
Seek professional help if the PC will not display an image after reseating the card, the system repeatedly shuts down, or you smell melted plastic or see scorch marks. A technician can test the power supply, motherboard slot, memory, and card in another system.
Consider replacement when the card cannot meet your monitor’s resolution or refresh rate, lacks required ports, or needs more power than your case and PSU can safely provide. A basic GT 1030 may be suitable for display output and light tasks at around $100–$150, while an RTX 4060 Ti-class card may cost roughly $450–$550 and requires more room, airflow, and power planning. Compare the total system upgrade cost, not just the GPU price.
FAQ
Do I need DDU for every NVIDIA driver update?
No. The NVIDIA installer’s clean-install option is usually sufficient for routine updates. Use DDU when changing graphics brands, replacing a card, or troubleshooting persistent problems.
Will a clean installation delete my games?
No. It removes NVIDIA driver software and related settings, not game files, documents, or Windows applications. Custom NVIDIA Control Panel profiles may be reset.
What if the screen goes black during installation?
Wait several minutes because the display driver may be restarting. If the computer remains unresponsive, restart it and boot into Safe Mode. Confirm that the monitor cable is connected to the GPU and repeat the installation.
Should I install Game Ready or Studio Driver?
Choose Game Ready for current gaming compatibility and Studio for supported video, 3D, photography, or design applications. Both are made for NVIDIA GPUs, but the release priorities differ.



Write Your Review
No reviews yet. Be the first to share your experience!