
- Top Pick: BIG Dutch Wooden Cheese Press – Cheese Making Kit (Wooden Cheese Press with Lever and 2 Cheese Molds 1,3 Qt, 2 Qt, 2 Cheeseclothes)-Cheese Press for Home Cheese Making pressure up to 400 lbs
- Best Value: Grand Way Cheese Mold with a Follower and Cheesecloth – Cheese Making Kit – Cheesemaking Supplies – Cheese Set for Press – Reusable Cheesecloth – 100% Cotton Cloth for Straining – Paneer Maker
- Premium Choice: Dutch Wooden Cheese Press – Cheese Making Kit (Wooden Cheese Press with Lever and 2 Cheese Molds 1.2L)-Cheese Press for Home Cheese Making pressure up to 200 lbs
Best Cheese Presses for Home Cheese Making
The best cheese press for home cheese making is a sturdy, adjustable press rated for the loads your recipes require, with a follower and mold that fit together without binding. For occasional soft and semi-hard cheeses, a simple lever press is usually enough; for dense hard cheeses, choose a screw or pneumatic press with a reliable gauge, stable frame, and capacity above your highest planned pressing weight.
Choose by cheese style and pressing load
A press applies force to curds inside a mold. Recipes may specify pressure in pounds per square inch (psi), or give a weight to place on the follower. Those are not interchangeable unless you account for the mold’s diameter: the same weight creates more pressure in a smaller mold.
As an Amazon Associate we earn from qualifying purchases at no extra cost to you.


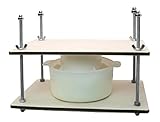
Use this calculation when a recipe gives a target pressure:
Required force (lb) = target pressure (psi) × mold area (in²), where mold area = 3.14 × (inside diameter ÷ 2)².
For example, a 6-inch mold has an area of about 28.3 in². At 2 psi, it needs roughly 57 lb of force; at 10 psi, about 283 lb. A 4-inch mold has an area of 12.6 in², so 2 psi requires only about 25 lb. This is why a recipe’s weight cannot be copied blindly between different mold sizes.
| Cheese style | Typical recipe pressure | Approx. load for a 6-inch mold | Press priority |
|---|---|---|---|
| Soft, lightly pressed | 0.5–2 psi | 14–57 lb | Gentle, controllable pressure and drainage |
| Semi-hard | 2–5 psi | 57–141 lb | Stable frame and easy adjustment between stages |
| Hard, firmly pressed | 5–15 psi | 141–424 lb | High capacity, rigid frame, and dependable load measurement |
These are planning ranges, not universal recipe instructions. Follow the pressure schedule for the specific cheese: many recipes begin lightly, then increase pressure after turning the wheel. Mold dimensions and recipe conventions also vary.
Press types: what matters in practice
Lever presses
A lever press uses a weight or spring to multiply force. It can be compact and simple, and many home-scale designs suit soft and semi-hard cheeses. Its main drawback is that the force at the follower depends on the lever ratio and where the weight sits. A scale reading on the weight alone does not necessarily tell you the pressure on the curds. Prefer a design with a published load range or clear instructions for calculating output, and check that the lever can travel far enough as the cheese settles.
Screw presses
A screw press applies force through a threaded rod, making it straightforward to increase pressure gradually and hold it in place. Look for a broad, stable base, a smooth-running screw, and a load indicator or a documented way to measure force. A screw can generate substantial pressure, but tightening by feel is imprecise; it may also over-compress curds if you turn it too far. Use the recipe’s staged schedule rather than treating maximum capacity as a target.
Pneumatic presses
Air-powered presses can provide repeatable pressure with less manual adjustment, but they add setup complexity: a compatible air source, regulator, and pressure gauge may be needed. Air pressure in the line is not automatically the same as pressure on the cheese; the press’s cylinder area and mechanism matter. Choose one only if its instructions explain the relationship between the regulator setting and pressing force, and if the extra equipment suits your workspace.
Compatibility and construction checklist
- Match the follower to the mold. The follower should move freely without excessive side-to-side wobble. A tight fit can bind as curds swell or the mold flexes; a loose fit can tilt and press unevenly.
- Check height and clearance. The mold, follower, and collected whey need room beneath the press. Confirm the press can accommodate your tallest filled mold and still apply force as the wheel shrinks.
- Verify load capacity, not just frame size. The press should be rated for the calculated force, with a sensible margin. A large-looking frame is not proof that its joints, screw, or lever can safely handle a hard-cheese load.
- Choose food-contact materials carefully. Stainless steel and food-grade plastics are common practical choices for parts that touch whey or the mold. Painted or plated metal may be fine for the frame, but avoid designs where coatings can chip into the work area.
- Consider drainage and cleaning. Smooth, accessible surfaces are easier to wash than deep seams, exposed threads, and hard-to-reach corners. Keep the press itself outside the whey whenever possible; clean and dry it after use, and follow the manufacturer’s care instructions.
- Assess stability and storage. A countertop press needs a footprint that will not rock under load. If space is tight, check whether the lever or frame disassembles without leaving small parts that are easy to lose.
Which setup fits your situation?
| Your situation | Best-fit press class | What to prioritize |
|---|---|---|
| You mainly make fresh or lightly pressed cheeses | Compact lever or low-capacity screw press | Gentle adjustment, easy cleanup, and a mold sized for small batches |
| You make several styles and follow changing pressure schedules | Adjustable screw press with load measurement | Repeatability, broad adjustment range, and mold flexibility |
| You regularly make dense hard cheeses | High-capacity screw press or appropriately specified pneumatic press | Verified force rating, rigid construction, and clear pressure calibration |
| You use multiple mold diameters | Press with interchangeable or separately matched followers | Correct follower fit and recalculation of load for each mold |
| You have limited counter space | Compact, stable lever or vertical screw design | Footprint, clearance, and secure placement under load |
Set up the press for even, repeatable results
- Place it on a level, sturdy surface. A tilted base can produce a lopsided wheel. Keep the press near a sink or tray, but position it so whey drains without pooling around the frame.
- Check the mold and follower before filling. Confirm that the follower travels smoothly and sits level. Correct a poor fit before curds are inside, when adjustments are easier.
- Use a drainage setup suited to the mold. Follow the recipe’s instructions for a draining mat, cloth, or perforated mold. Blocked drainage can leave whey trapped and interfere with knitting.
- Apply the initial load gradually. Start at the recipe’s specified low pressure, then turn the cheese and increase the load on schedule. This gives curds time to knit and reduces the chance of sealing the outside while whey remains inside.
- Record the setup. Note mold diameter, load or pressure, pressing time, and turn schedule. This makes it possible to reproduce a successful batch—and helps explain differences when changing molds.
Common buying mistakes to avoid
Buying by maximum force alone: A very high capacity is useful only if the press can also hold low, controlled loads. For a small mold, even a modest weight may create substantial pressure.
Assuming all molds are interchangeable: Mold diameter changes the pressure produced by a given load, while mold height affects clearance and drainage. Match both dimensions to the press and recipe.
Confusing frame rating with cheese pressure: The press’s capacity is a force limit, not a recipe setting. Convert the target psi to force using the mold’s inside area, and use the manufacturer’s method to determine the actual load at the follower.
Overlooking cleaning access: Whey and curd can collect around joints and threads. A press that is easy to wipe down and dry is more practical than one with a higher rating but inaccessible crevices.
Bottom line
For a first press, prioritize a stable frame, simple adjustment, compatible mold and follower, and a clear way to know the force at the cheese. A lever press can cover gentle, lower-load recipes; a measured screw press is the more flexible choice for varied semi-hard and hard cheeses. Buy for the recipes and mold sizes you will actually use, then calculate the required force rather than relying on the press’s headline capacity.
Ready to decide? Our #1 pick for 2026 is the Soft, lightly pressed.
Live price & availability on Amazon.











Write Your Review
No reviews yet. Be the first to share your experience!