
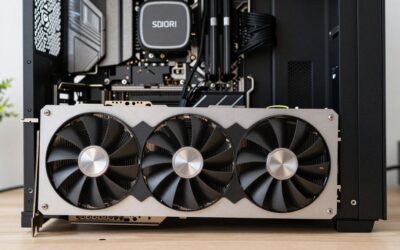
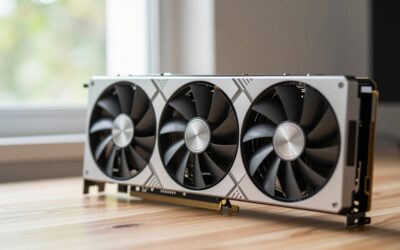
- Top Pick: ASUS ROG Strix GeForce RTX 4090 OC Edition Gaming Graphics Card (PCIe 4.0, 24GB GDDR6X, HDMI 2.1a, DisplayPort 1.4a), 3 Year Warranty
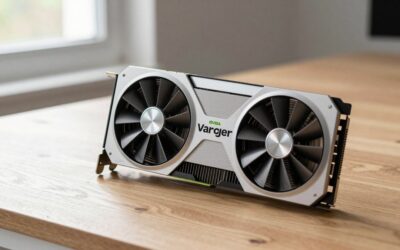
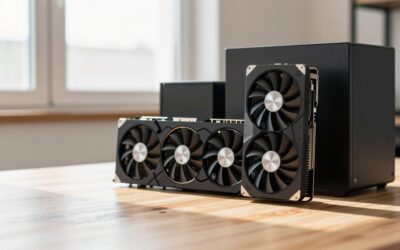
- Best Value: ASUS TUF Gaming GeForce RTX™ 5080 16GB GDDR7 OC Edition Graphics Card | PCIe 5.0, HDMI/DP 2.1, 3.6-slot, Military-grade Components, Protective PCB Coating, Axial-tech Fans
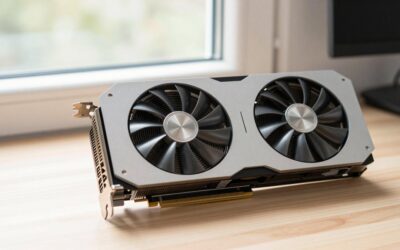
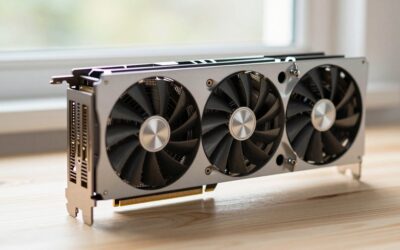
- Premium Choice: MSI GeForce RTX 4090 Gaming X Trio 24G Gaming Graphics Card – 24GB GDDR6X, 2595 MHz, PCI Express Gen 4, 384-bit, 3X DP v 1.4a, HDMI 2.1a (Supports 4K & 8K HDR)
An RTX 4090 build guide starts with three hard requirements: a power supply that meets NVIDIA’s recommendation of 850 W or more with a properly seated 16-pin cable, a case with room for a card about 304 mm long and three slots thick (more for some partner models), and a CPU fast enough that the GPU is not left waiting. Get those three right and the rest of the build looks like any other high-end gaming PC. Get them wrong and you face a cable that will not bend, a side panel that will not close, or a card that spends its time idling behind a weak processor.
- Quick answer
- What the RTX 4090 asks of the rest of your PC
- Step 1: choose the power supply
- Step 2: handle the 16-pin cable correctly
- Step 3: check the case clearance
- Step 4: pick a CPU that does not bottleneck the GPU
- Step 5: plan power, heat and noise
- Step 6: assembly order for a heavy GPU
- A short section for RTX 3080 and RTX 3090 builds
- What changes with the RTX 5090
- Common mistakes and fixes
- Safety and troubleshooting
- How we compared
- Sources
- Frequently Asked Questions
As an Amazon Associate we earn from qualifying purchases at no extra cost to you.


Quick answer
| Area | Requirement | Source or reason |
|---|---|---|
| GPU power | 450 W board power, one 16-pin (12VHPWR) connector | NVIDIA specifications as listed by The FPS Review and Notebookcheck |
| Power supply | 850 W recommended by NVIDIA; 1000 W is a common safer choice for overclocked CPUs | NVIDIA recommendation; Micro Center suggests 1000 W minimum based on its own judgement |
| Cable | Native 16-pin cable from an ATX 3.0 / 3.1 supply, pushed fully home and not bent sharply at the plug | Corsair and other PSU makers |
| Case | At least 304 mm GPU length and 3-slot width for the Founders Edition; check the exact partner model | The FPS Review, Notebookcheck, PCPartPicker listing |
| CPU | Fast gaming CPU on AM5, LGA1851 or LGA1700 | See the pairing table below |
| Memory | 32 GB of DDR5 is the sensible floor for this class | Platform requirement and game memory use |
| Cooling | Plan to exhaust roughly 650 to 750 W of heat under heavy load | Worked power budget below |
What the RTX 4090 asks of the rest of your PC
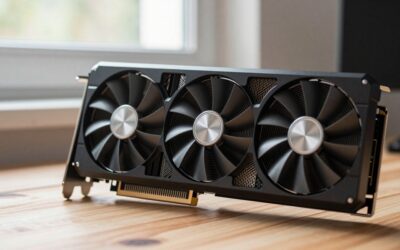
The GeForce RTX 4090 was NVIDIA’s flagship of the Ada Lovelace generation. According to the specifications published by The FPS Review and Notebookcheck, the Founders Edition has 16,384 CUDA cores, 24 GB of GDDR6X memory on a 384-bit bus, a 450 W total graphics power rating, and a single 16-pin power connector. It measures about 304 mm long, 137 mm wide and 61 mm thick, which means it occupies three expansion slots. Those four numbers (450 W, 16-pin, 304 mm, three slots) drive every decision below.
One note on availability: NVIDIA has since launched the RTX 5090, so new RTX 4090 stock is no longer the main way to buy this card in 2026. Many builders now find the 4090 on the used market or in existing systems they are upgrading. If you are buying used, check the condition of the 16-pin socket on the card, ask for proof of the remaining warranty, and inspect the cooler for damage. The build guidance here applies either way.
Step 1: choose the power supply
NVIDIA’s own recommendation for the RTX 4090 is an 850 W power supply, as reported by The FPS Review. Some retailers and writers suggest more: Micro Center, for example, says its own results led it to recommend a minimum of 1000 W. The difference comes from what else is in the system. NVIDIA’s figure assumes a typical gaming CPU. A power-hungry processor, several drives and many fans push the real draw up.
Worked power budget
| Component | Typical heavy-load draw |
|---|---|
| RTX 4090 (board power) | 450 W |
| High-end CPU (gaming load) | 90 to 150 W |
| High-end CPU (all-core load or overclock) | 200 to 250 W |
| Motherboard, RAM, SSDs, fans, USB devices | 60 to 90 W |
| Gaming total | about 600 to 690 W |
| Worst-case total (CPU and GPU both near maximum) | about 710 to 790 W |
Take the worst case of about 790 W. The worst case rarely lasts long in games, so sizing a supply for it at 100 per cent load would be wasteful and loud. The sensible compromise is an 850 W supply for a standard gaming CPU and 1000 W if you plan to overclock or run heavy rendering alongside gaming. High-end graphics cards also produce brief power spikes above their rated draw, so headroom matters beyond the average figure.
Supply features to look for
- ATX 3.0 or ATX 3.1 certification. These supplies are designed for the higher short-term power excursions of modern GPUs and include a native 16-pin cable.
- A native 16-pin cable. The 4090 box includes a 16-pin to 4x 8-pin PCIe adapter, according to The FPS Review’s coverage. A native cable avoids the bulk of the adapter, which is harder to route.
- Quality over headline wattage. Look at independent reviews of the specific model for ripple, transient response and fan noise.
Step 2: handle the 16-pin cable correctly
The 16-pin connector is the part of an RTX 4090 build that deserves the most care. XDA Developers noted reports of adapters overheating and melting in the months after launch, citing bending and poor connection quality among the causes. The revised connector standard, 12V-2×6, was introduced with ATX 3.1. According to Tom’s Hardware and Corsair, it uses sense pins that are 1.5 mm shorter and conductor terminals that are 0.25 mm longer, so a card only powers up if the plug is fully seated. The cable side is unchanged, so existing 12VHPWR cables work in a 12V-2×6 socket, but mixing generations loses some of that safety benefit.
The practical steps are the same either way:
- Push the plug in until it clicks and then check it. Look at the connector from the side and confirm there is no visible gap between the plug and the socket. Gently tug the cable to confirm it is locked.
- Keep a straight run before any bend. The commonly quoted guidance is at least 35 mm of straight cable before a bend; some PSU vendors suggest up to 40 mm. Bending inside that distance puts sideways force on the pins.
- Use a pre-bent or 90-degree cable if the case is narrow. Several cable makers sell angled versions for tight builds.
- Make sure the side panel does not press on the plug. A panel pushing sideways can lever a correctly inserted plug out of position.
- Do not use more than one adapter in a chain. A single native cable is simpler and safer than extension layers.
If you use the 4x 8-pin adapter from the box, connect all four 8-pin ends to separate cables on the supply, not to daisy-chained connectors, so that each cable carries a share of the load. Do this only when the supply has enough separate PCIe cables.
Step 3: check the case clearance
The Founders Edition is 304 mm long and 61 mm thick. The FPS Review lists 304 x 137 x 61 mm, and PCPartPicker lists a slot width of three. Partner models vary: some are longer, some are thicker than three slots, and some have different heights above the slot. Never rely on the Founders Edition numbers when you buy a partner card. Open the card’s manufacturer page and find the length, thickness and height.
Use this checklist for every case you consider:
| Check | What to compare | Margin to keep |
|---|---|---|
| GPU length | Card length versus case maximum GPU length (with front fans or radiators installed) | At least 20 to 30 mm |
| GPU thickness | Slot count versus the case’s slot rating; check the side panel gap | At least one slot of free air if possible |
| Cable bend space | Distance from the 16-pin socket to the side panel | Around 35 to 40 mm of straight cable |
| PSU shroud / front fan | Front radiator or fan thickness reduces GPU length | Measure with them installed |
| Expansion slots | Number of slots below the GPU, for support brackets and other cards | Keep the lowest slot free if the card is thick |
| Weight support | A large card may sag without a bracket | Use the case’s bracket or a support stay |
A 450 W card produces a lot of heat, so airflow matters as much as fit. Choose a case with a mesh or ventilated front panel, at least two intake fans and one exhaust fan, and enough free space in front of the GPU’s fans. If the GPU’s intake is blocked by a solid side panel or a thick radiator, the card will get hot and loud even if it physically fits.
Step 4: pick a CPU that does not bottleneck the GPU
The 4090 is fast enough that the CPU decides performance in many games at 1080p and 1440p, and sometimes at 4K with upscaling. The CPU choice is therefore a bigger part of the build than for mid-range cards.
| Tier | Example platform | Socket and RAM | Who it suits |
|---|---|---|---|
| Best for gaming | AMD Ryzen X3D class (for example the Ryzen 7 9800X3D) | AM5, DDR5 | High-refresh gaming at 1440p and 4K |
| Gaming plus heavy work | Intel Core Ultra 9 285K class | LGA1851, DDR5 | Streaming, editing and rendering on the same machine |
| Upgrade path on an existing board | Intel 13th/14th Gen K-series | LGA1700, DDR4 or DDR5 by board | Reusing an existing platform; check BIOS and cooling |
| Balanced | Mid-range Ryzen 7000/9000 non-X3D | AM5, DDR5 | 4K at maximum settings where the GPU is the limit |
As a rule of thumb, the lower the resolution and the higher the target refresh rate, the more the CPU matters. At 4K with ray tracing the GPU is usually the limit, and a mid-range CPU gives most of the result. If you play at 1080p or 1440p on a 240 Hz monitor, spend more on the processor. Match the motherboard to the socket and make sure its VRM can handle the CPU you have chosen.
Memory: choose 32 GB of DDR5 in a two-module kit. Enable XMP or EXPO in the BIOS, since memory runs at a base speed otherwise. If you edit video or run virtual machines, 64 GB is reasonable.
Step 5: plan power, heat and noise
A system that draws about 650 W under gaming load puts that much heat into the room. One watt equals 3.412 BTU per hour, so 650 W is about 2,218 BTU/hr, similar to a small space heater on low. Three practical consequences follow:
- Airflow. Aim for positive or balanced pressure with filtered intakes. Exhaust fans at the rear and top remove hot air from the GPU and CPU.
- CPU cooler. A 280 or 360 mm AIO or a large dual-tower air cooler suits a high-end CPU. Make sure the cooler’s radiator does not block the GPU length.
- Power limit. If noise bothers you, cap the GPU power limit at 80 to 90 per cent in a tuning utility. Many users report a small performance loss for a clear drop in power and noise, but confirm the effect on your own system.
Storage should be a PCIe 4.0 or 5.0 NVMe SSD for the operating system and games. A GPU of this class benefits from fast asset loading, but storage speed rarely limits frame rate.
Step 6: assembly order for a heavy GPU
- Install the CPU, RAM and M.2 drive on the motherboard outside the case.
- Mount the cooler or AIO and route its power cables.
- Fit the PSU and plan the 16-pin cable path before installing the GPU. Why: the cable needs room to run straight for 35 mm or more.
- Mount the motherboard and connect the 24-pin and 8-pin CPU power cables.
- Install the GPU in the top PCIe x16 slot. Hold the card with both hands and avoid pressing on the fan shroud.
- Connect the 16-pin cable last. Check the seating visually from the side and give it a gentle tug.
- Fit the support bracket if the case has one, then close the side panel and confirm it is not pressing on the plug.
- Connect the display cable to the GPU, not to the motherboard, then update the BIOS and install the graphics driver.
A short section for RTX 3080 and RTX 3090 builds
Readers who search for an rtx 3090 build guide or a 3080 build guide are usually building a high end gaming pc around an older card. The same principles apply, with lower numbers. According to NVIDIA’s published specifications, the RTX 3090 is a 350 W card with 24 GB of GDDR6X, and the RTX 3080 is a 320 W card, both recommended for roughly 750 W supplies. They use the 12-pin connector on Founders Edition cards or two or three 8-pin connectors on most partner cards, so they do not require a 16-pin cable. Check the physical size, though: the RTX 3090 is a very large card in most partner versions and may need a case rated for it. The RTX 3090 Ti, at 450 W, belongs with the 4090 in terms of power planning.
| Card | Board power | Memory | Typical recommended PSU | Connector |
|---|---|---|---|---|
| RTX 3080 | 320 W | 10 GB (original model) | 750 W | 12-pin or 2 to 3 x 8-pin |
| RTX 3090 | 350 W | 24 GB | 750 W | 12-pin or 3 x 8-pin |
| RTX 4090 | 450 W | 24 GB | 850 W | 16-pin (12VHPWR) |
| RTX 5090 | 575 W | 32 GB | 1000 W | 16-pin (12V-2×6) |
What changes with the RTX 5090
If you are deciding between the two cards for a new build, the key differences are about power and size. The RTX 5090 is rated at 575 W for the Founders Edition, uses the revised 12V-2×6 connector, has 32 GB of GDDR7 and carries a recommended supply of 1000 W, according to Tom’s Hardware, Corsair and other coverage. NVIDIA lists the Founders Edition at 304 mm long and 137 mm wide in a two-slot design, but its case guidance says to leave room for a thicker card and extra space for the power cable. Partner models are generally larger. In practice, a case and supply that are comfortable for the 4090 can often be reused, but you should confirm that the supply has a native 12V-2×6 cable and meets the higher wattage.
Common mistakes and fixes
| Mistake | Consequence | Fix |
|---|---|---|
| Using a 650 W supply | Shutdowns under load | Use 850 W or more, ATX 3.0 or newer |
| Bending the 16-pin cable at the plug | Poor contact, heat at the connector | Leave 35 mm or more of straight cable; use an angled cable |
| Not seating the plug fully | Overheating or damage to the connector | Push until it clicks and check from the side |
| Buying a case on looks alone | GPU does not fit, side panel presses on the cable | Check the case’s GPU length and width, plus cable space |
| Pairing with an old CPU | Low frame rate at 1080p and 1440p | Choose a current gaming CPU |
| Ignoring case airflow | High temperatures and fan noise | Choose a ventilated front and sufficient fans |
| Not supporting a heavy card | Sag stress on the slot | Use the case’s support bracket |
Safety and troubleshooting
Switch the supply off and unplug it before touching any component, and ground yourself by touching bare metal on the case. Do not force the 16-pin plug; if it does not seat, check its orientation and look for debris in the socket. If the PC does not start, go through the basic no-POST checklist: reseat the RAM until both clips click, confirm the 8-pin CPU power cable is connected to the board, check the 24-pin connector, and plug the monitor into the GPU, not the motherboard.
If the system shuts down only when gaming, the usual suspects are a supply that is too small, a loose power connector, or overheating. Check the GPU and CPU temperatures with a monitoring utility, reseat the 16-pin connector, and make sure the supply meets the recommended wattage. If the display shows artefacts, update the driver, and then check the power cable.
How we compared
We compared manufacturer manuals, specifications and independent guides named below. We did not build or benchmark these systems ourselves.
Sources
- The FPS Review, NVIDIA GeForce RTX 4090 Founders Edition specifications and review
- Notebookcheck, NVIDIA GeForce RTX 4090 Founders Edition review
- Micro Center, NVIDIA RTX 4090 power requirements and compatibility guide
- XDA Developers, power supply coverage for the RTX 4090
- Corsair, guides on PSU choice for RTX 4090 and RTX 5000 series, and on the 12VHPWR and 12V-2×6 standards
- Tom’s Hardware, 12V-2×6 connector coverage and RTX 5090 power supply guidance
- NVIDIA, GeForce RTX 5090 product page
- PCPartPicker, RTX 4090 Founders Edition listing
Frequently Asked Questions
What power supply do I need for an RTX 4090?
NVIDIA recommends 850 W. Many builders choose 1000 W, especially with a power-hungry CPU or overclocking. Pick an ATX 3.0 or newer supply with a native 16-pin cable.
Can I use the adapter that comes in the box?
Yes, but a native cable is better. If you use the adapter, connect each 8-pin end to its own cable on the supply, seat everything fully, and avoid sharp bends near the connector.
How much space does an RTX 4090 need in the case?
The Founders Edition is about 304 mm long and occupies three slots (61 mm thick). Partner models vary, so check the exact dimensions of the card you buy and leave extra space for the cable.
What CPU should I pair with an RTX 4090?
A current high-end gaming CPU, such as an AM5 X3D chip or a top Intel Core Ultra model. At 4K the GPU is the main limit, so a mid-range CPU can be enough, but for 1080p and 1440p at high refresh rates a faster CPU matters.
Is 12V-2×6 different from 12VHPWR?
It is a revision. The sense pins are shorter and the power terminals longer, so the card only powers on when the plug is fully seated. Cables are interchangeable, but you should still seat the plug fully and avoid sharp bends.
Is the RTX 4090 still worth building around?
It remains a very capable 4K card with 24 GB of memory. With the RTX 5090 now available, check current stock, used condition and warranty, and consider whether the 5090’s higher power needs fit your supply and case.
Can I build around an RTX 3090 or 3080 instead?
Yes. Both need less power (320 W to 350 W, with 750 W supplies recommended) and do not require a 16-pin cable on most partner models, but the same rules on case size, airflow and CPU pairing apply.
Ready to decide? Our #1 pick for 2026 is the GPU power.
Live price & availability on Amazon.


Write Your Review
No reviews yet. Be the first to share your experience!